Enabling Basic Web Protection
This section describes how to enable basic web protection.
Basic web protection defends against common web attacks, such as SQL injection, XSS attacks, remote buffer overflow attacks, file inclusion, Bash vulnerability exploits, remote command execution, directory traversal, sensitive file access, and command and code injections, and detects web shells, robots (search engine, scanner, and script tool), and other crawlers.
Prerequisites
Login credentials have been obtained.
The domain name to be protected has been created.
Procedure
Log in to the management console.
Click
 in the upper left corner of the management console and select a region or project.
Click Service List at the top of the page and choose Security > Web Application Firewall. In the navigation pane, choose Domains. Figure 1 shows an example.

Figure 1 Entrance to the domain configuration page
Note
In the upper part of the domain name list, click Quota details to view the domain name quota.
Locate the row that contains the desired domain name. In the Operation column, click Configure Policy. Figure 2 shows an example.

Figure 2 Protection configuration page
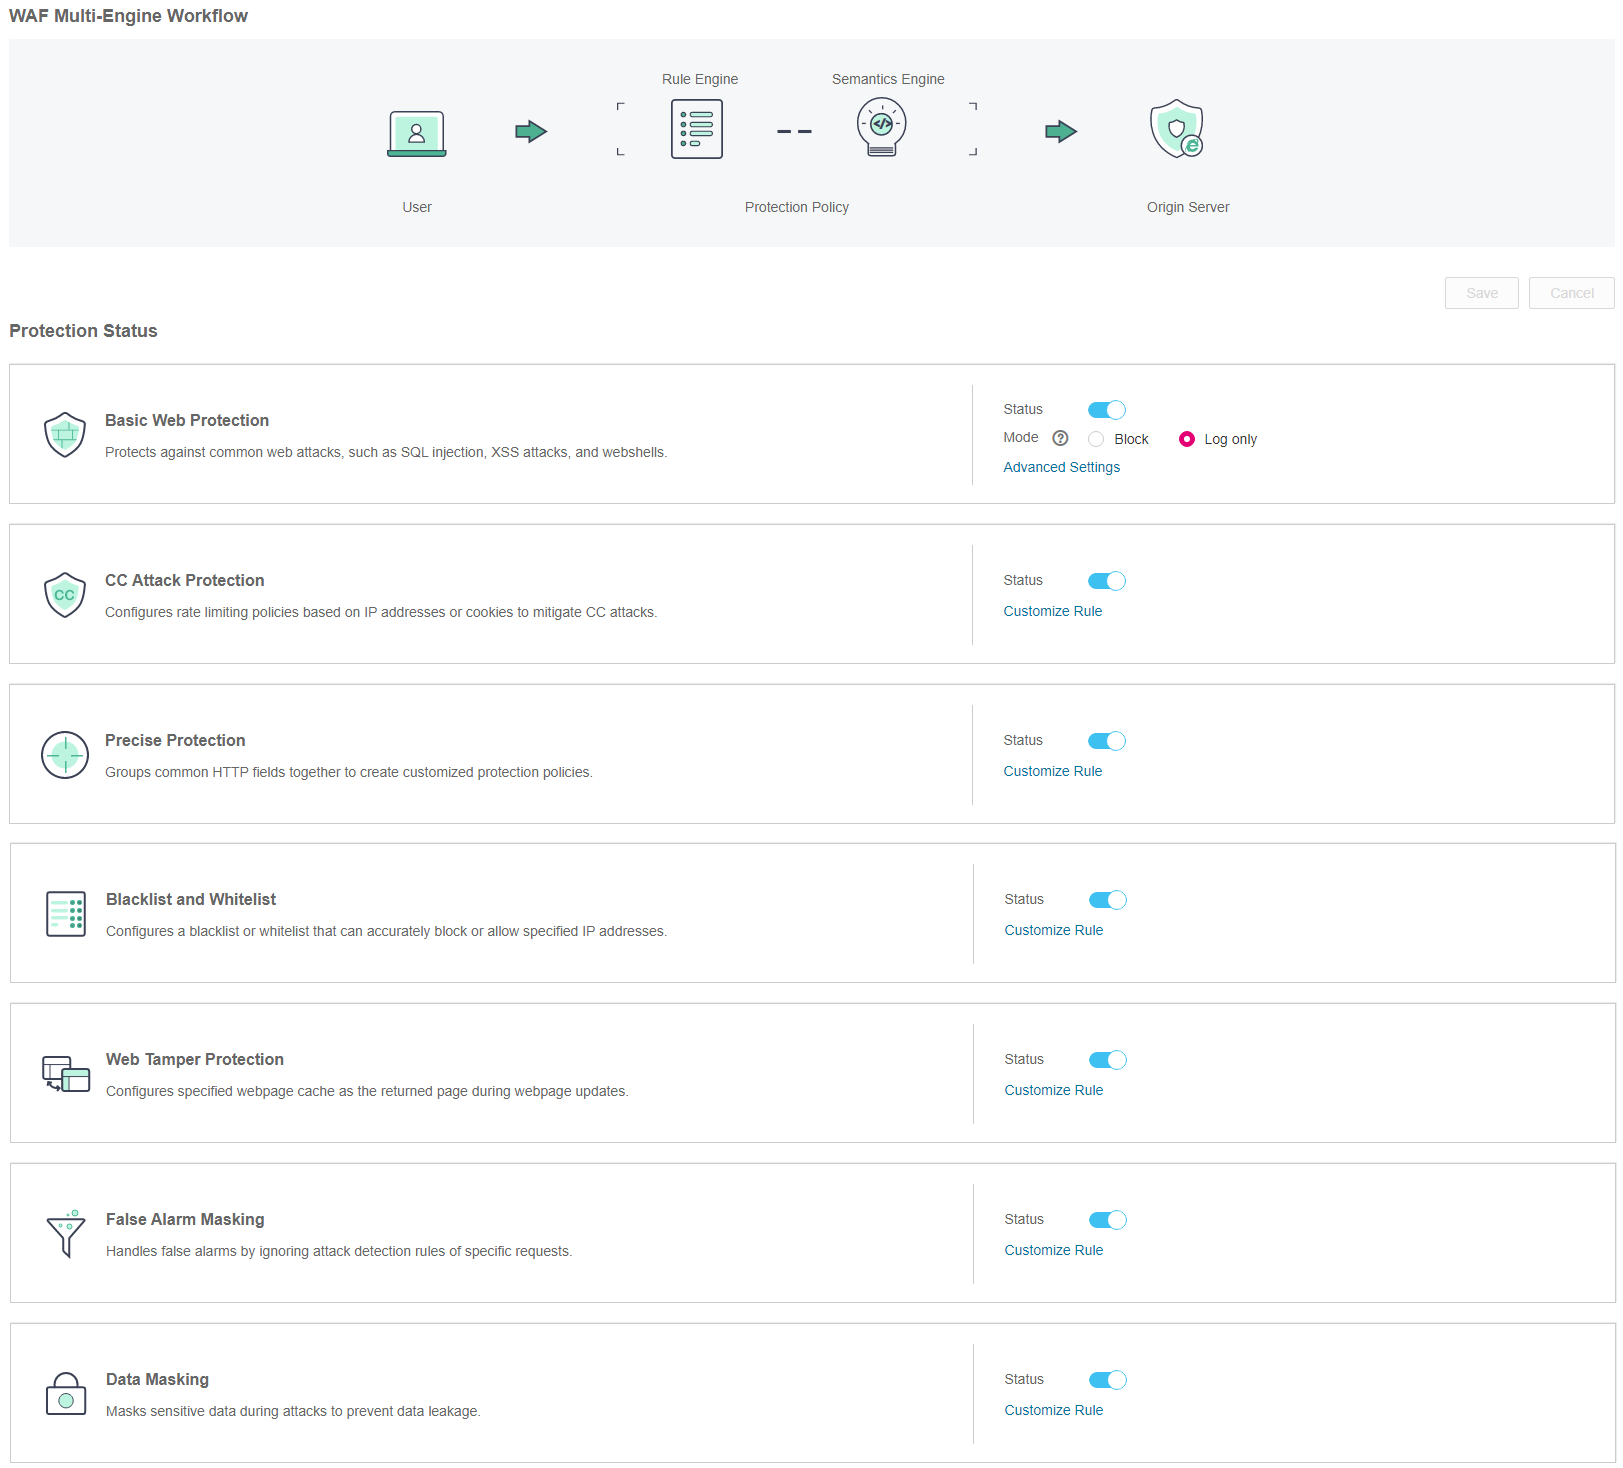
In the Basic Web Protection area, specify Status and Mode by referring to Table 1. After the configuration completes, in the upper right corner of the Protection Status list, click Save. In the displayed dialog box, click Yes to save the settings. If you do not want to save the settings, click Cancel. Figure 3 shows an example.

Figure 3 Basic Web Protection configuration area
Table 1 Parameter description¶ Parameter
Description
Status
Status of Basic Web Protection
 : enabled.
 : disabled.
Mode
Block: WAF blocks and logs detected attacks.
Log only: WAF logs detected attacks only.
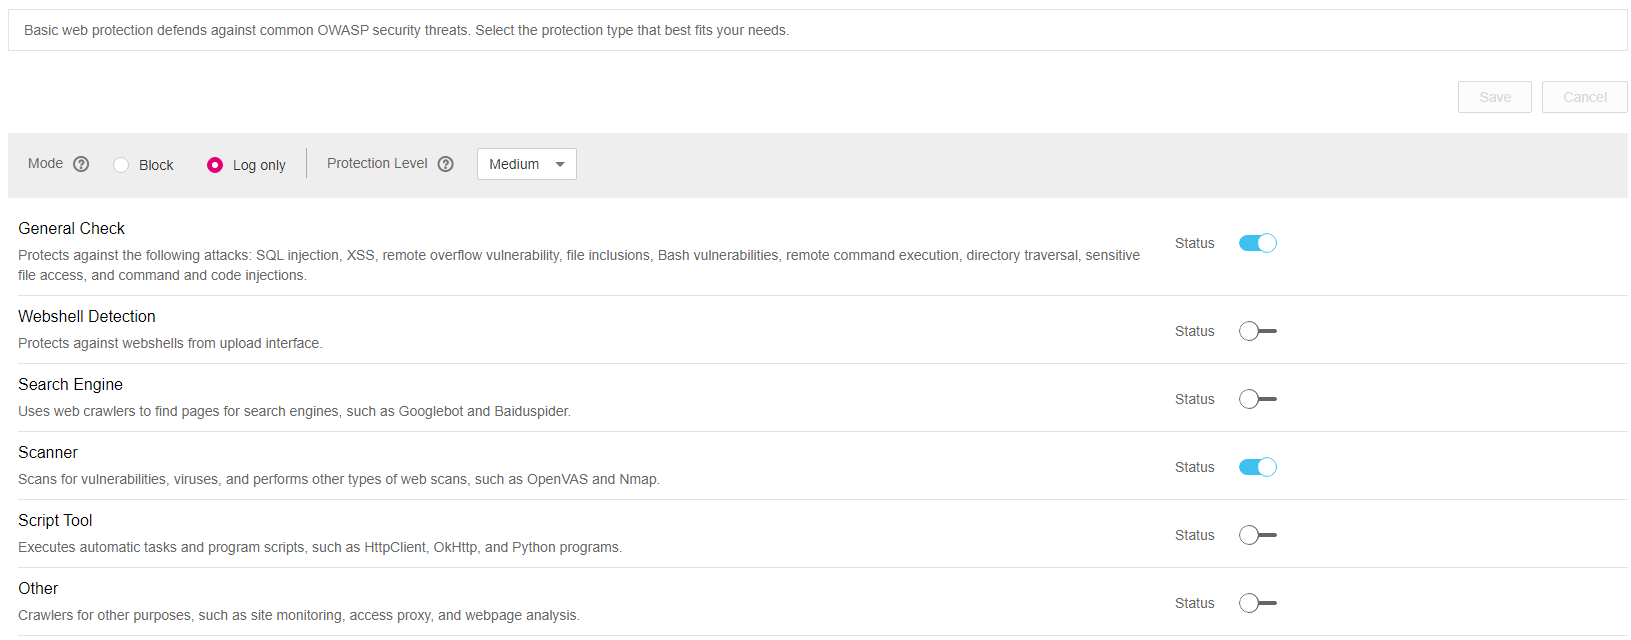
In the Basic Web Protection configuration area, click Advanced Settings. Enable the protection type that best fits your needs. Figure 4 shows an example.
Note
If you do not click Save after changing Status and Mode in Step 5, a Warning dialog box is displayed when you click Advanced Settings.
Click Yes to cancel the previous settings.
Click No and then Save to save the settings.

Figure 4 Basic web protection
Table 2 Protection types¶ Type
Description
General Check
Defends against attacks, such as SQL injection, XSS, remote overflow vulnerability, file inclusion, Bash vulnerabilities, remote command execution, directory traversal, sensitive file access, and command/code injection.
Webshell Detection
Defends against web shells from the upload interface.
Search Engine
Uses web crawlers such as Googlebot and Baiduspider to find pages for search engines.
Scanner
Scans for vulnerabilities, viruses, and performs other types of web scans, such as OpenVAS and Nmap.
Script Tool
Executes automatic tasks and program scripts, such as HttpClient, OkHttp, and Python programs.
Note
If your application uses scripts such as HttpClient, OkHttp, and Python, disable Script Tool. Otherwise, WAF will identify such script tools as crawlers and block the application.
Other
Crawlers for other purposes, such as site monitoring, access proxy, and web page analysis.
Set the protection level.
In the upper part of the page, select a protection level: Low, Medium, or High. The default value is Medium.
Table 3 Protection levels¶ Protection Level
Description
Low
WAF only blocks the requests with obvious attack signatures.
If a large number of false alarms are reported, Low is recommended.
Medium
The default level is Medium, which meets a majority of web protection requirements.
High
WAF blocks the requests with no attack signature but have specific attack patterns.
High is recommended if you want to block SQL injection, XSS, and command injection attacks.
Set the protection type.
By default, General Check and Scanner are enabled. You can click
 to enable other protection types.
Click Save in the upper right of the page to save the settings. Otherwise, click Cancel.