Configuring Data Masking Rules
This section describes how to configure data masking rules. Data Masking prevents such data as usernames and passwords from being displayed in event logs.
Prerequisites
Login credentials have been obtained.
The domain name to be protected has been created.
Procedure
Log in to the management console.
Click
 in the upper left corner of the management console and select a region or project.
Click Service List at the top of the page and choose Security > Web Application Firewall. In the navigation pane, choose Domains. Figure 1 shows an example.

Figure 1 Entrance to the domain configuration page
Note
In the upper part of the domain name list, click Quota details to view the domain name quota.
Locate the row that contains the desired domain name. In the Operation column, click Configure Policy. Figure 2 shows an example.

Figure 2 Protection configuration page
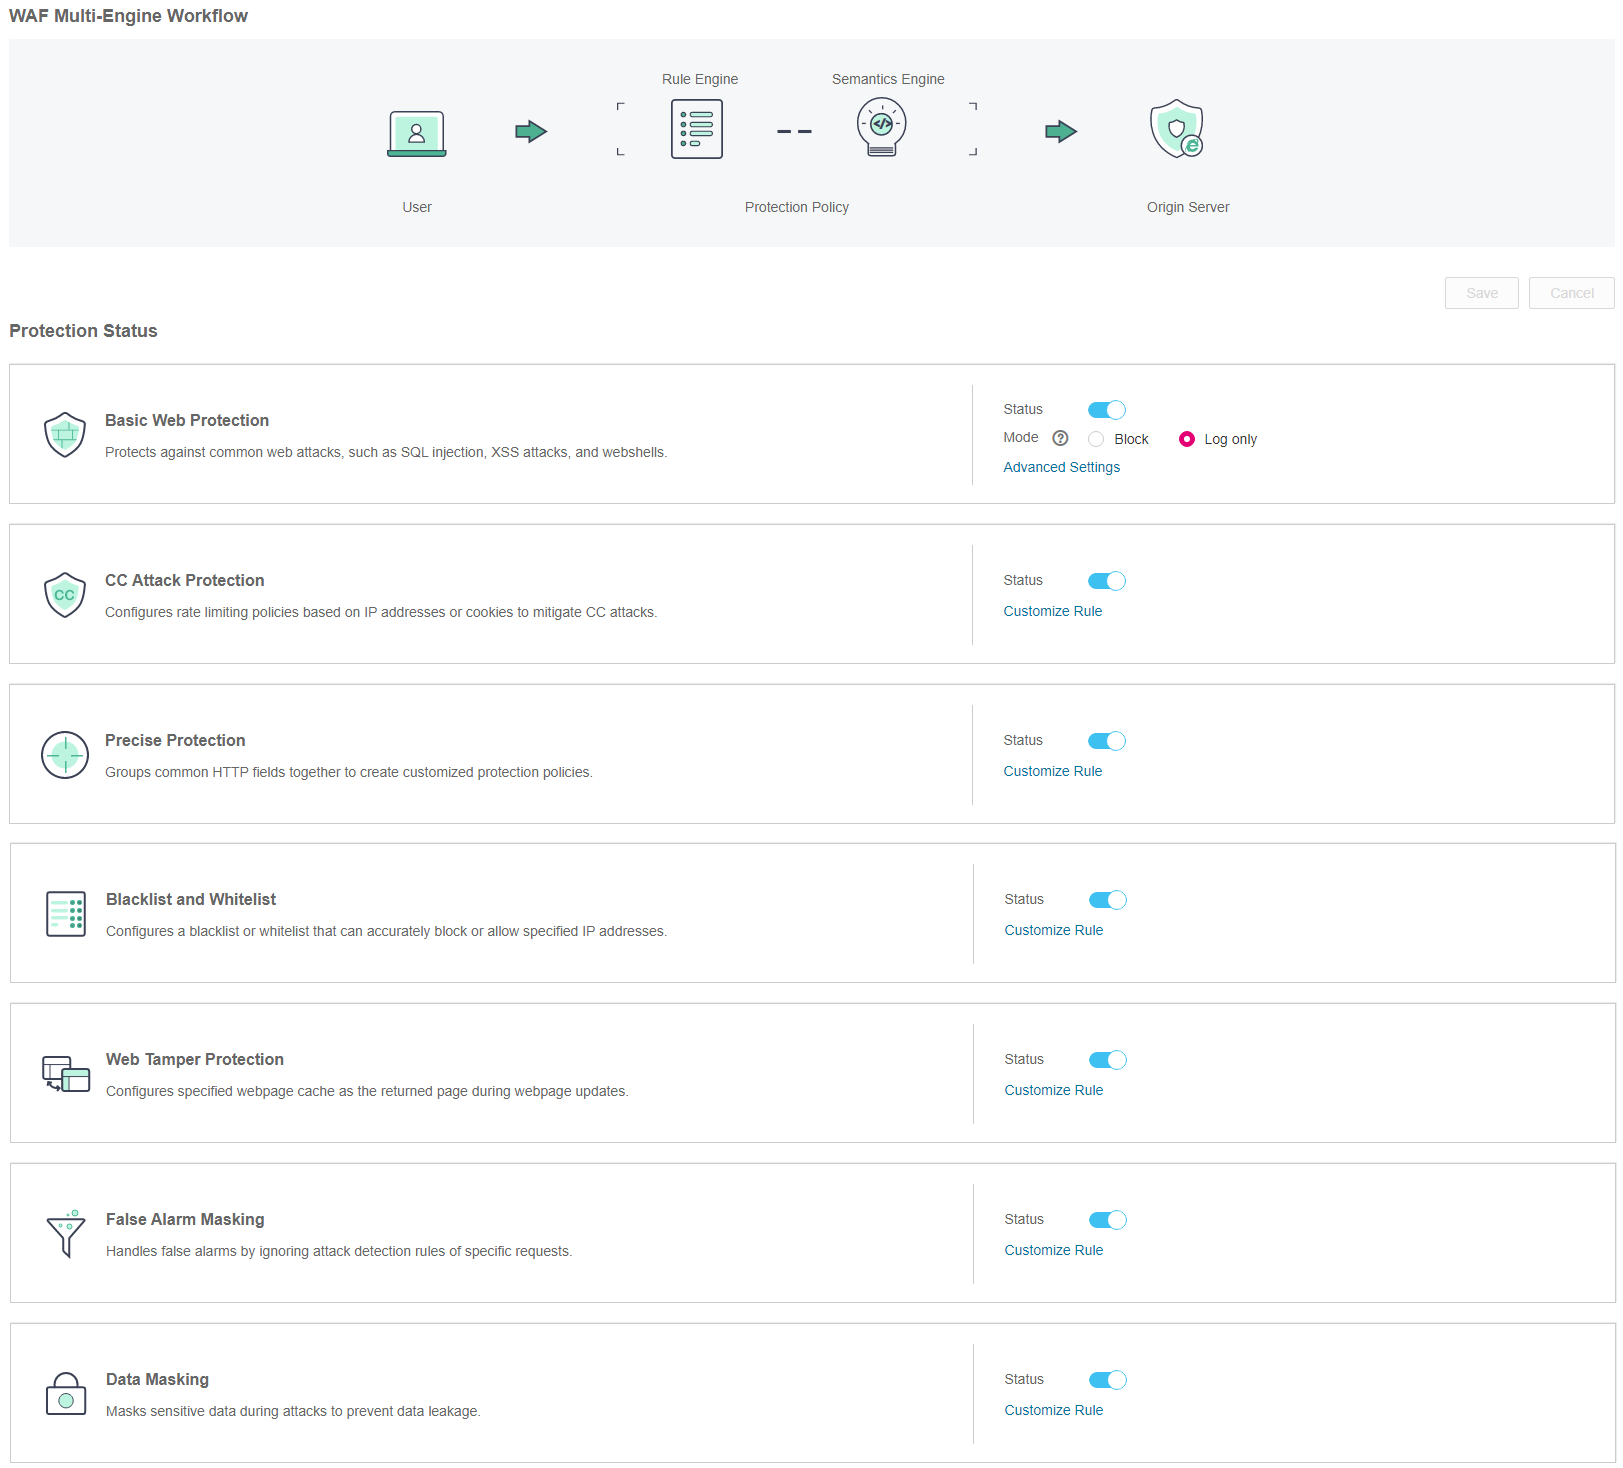
In the Data Masking area, specify Status. After the configuration completes, in the upper right corner of the Protection Status list, click Save. In the displayed dialog box, click Yes to save the settings. If you do not want to save the settings, click Cancel. Figure 3 shows an example.

Figure 3 Data Masking configuration area
Click Customize Rule. On the displayed Data Masking page, click Add Rule in the upper left corner. Figure 4 shows an example.
Note
If you do not click Save after changing Status in Step 5, a Warning dialog box is displayed when you click Customize Rule.
Click Yes to cancel the previous settings.
Click No and then Save to save the settings.

Figure 4 Add Rule (Data Masking)
Note
In the upper part of the protection rule list, click Quota details to view the quota of protection rules.
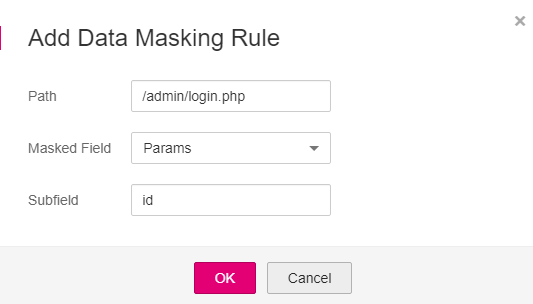
In the displayed dialog box, specify the parameters by referring to Table 1. Figure 5 shows an example

Figure 5 Adding a data masking rule
Table 1 Rule parameters¶ Parameter
Description
Example Value
Path
URL excluding a domain name
Prefix match: The path ending with * indicates that the path is used as a prefix. For example, if the path to be protected is /admin/test.php or /adminabc, set Path to /admin*.
Exact match: The path to be entered must match the path to be protected. If the path to be protected is /admin, set Path to /admin.
Note
The path supports prefix and exact matches only and does not support regular expressions.
The path cannot contain two or more consecutive slashes. For example, ///admin. If you enter ///admin, the WAF engine converts /// to /.
/admin/login.php
For example, if the URL to be protected is http://www.example.com/admin/login.php, set Path to /admin/login.php.
Masked Field
A field set to be masked
Params: A request parameter
Header: A user-defined HTTP header
If Masked Field is set to Params, configure Subfield based on your needs. If it is set to id, the content that matches id will be masked.
If Masked Field is set to Header, configure Subfield based on your needs. If it is set to Accept, the content that matches Accept will be masked.
Subfield
Set the parameter based on Masked Field. The masked field will not be displayed in the log.
Important
NOTICE: The length of a subfield cannot exceed 2048 bytes. Only digits, letters, underscores (_), and hyphens (-) are allowed.
Click OK.
To modify the added rule, click Modify in the row containing the target rule.
To delete the added rule, click Delete in the row containing the target rule.