Configuring CC Attack Protection Rules
This section describes how to configure CC attack protection rules.
With these rules, rate limiting policies are set based on the IP addresses, cookies, or Referer field to accurately identify and mitigate CC attacks.
Prerequisites
Login credentials have been obtained.
The domain name to be protected has been created.
Procedure
Log in to the management console.
Click
 in the upper left corner of the management console and select a region or project.
Click Service List at the top of the page and choose Security > Web Application Firewall. In the navigation pane, choose Domains. Figure 1 shows an example.

Figure 1 Entrance to the domain configuration page
Note
In the upper part of the domain name list, click Quota details to view the domain name quota.
Locate the row that contains the desired domain name. In the Operation column, click Configure Policy. Figure 2 shows an example.

Figure 2 Protection configuration page
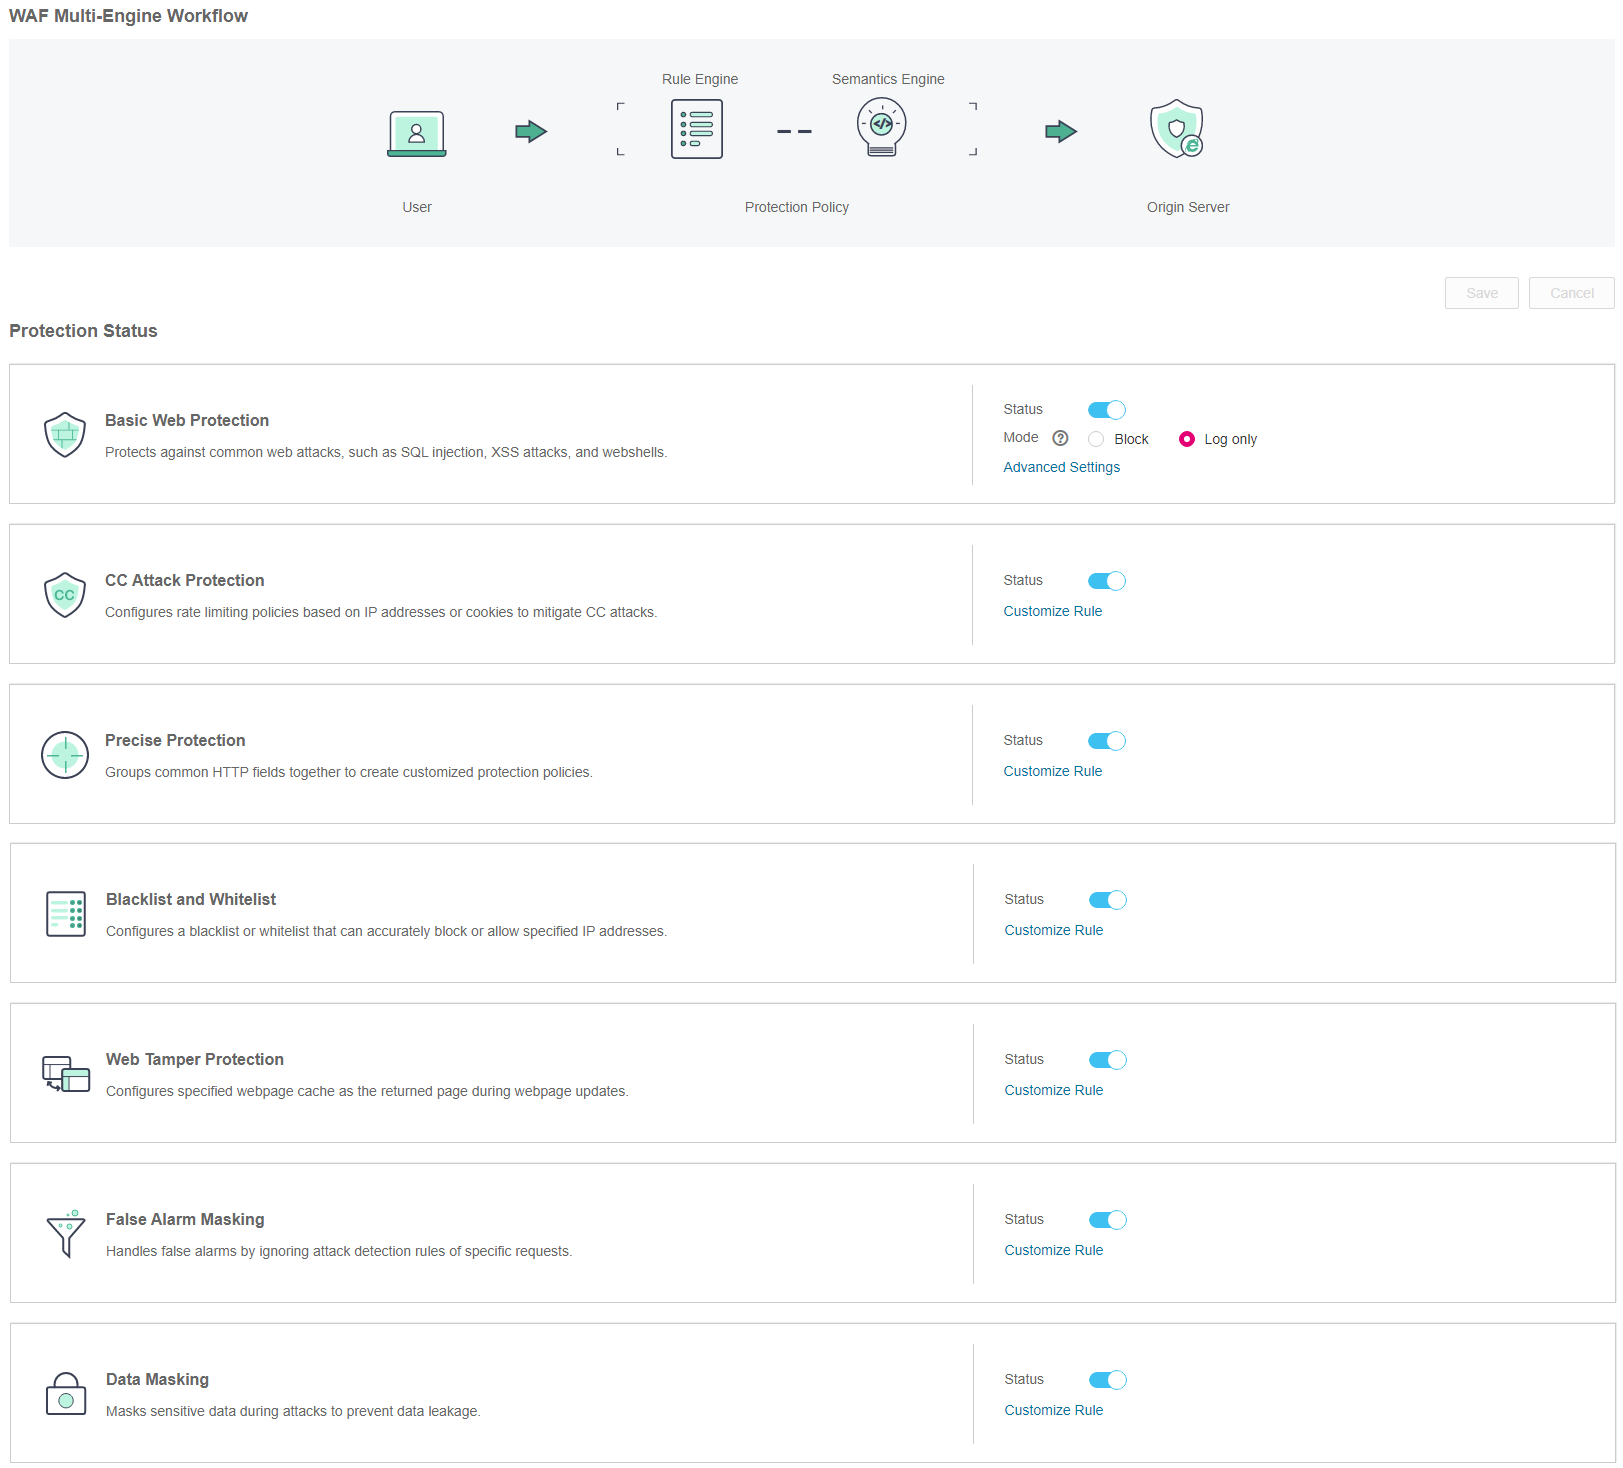
In the CC Attack Protection area, specify Status and Mode. After the configuration completes, in the upper right corner of the Protection Status list, click Save. In the displayed dialog box, click Yes to save the settings. If you do not want to save the settings, click Cancel. Figure 3 shows an example.

Figure 3 CC Attack Protection configuration area
Click Customize Rule. On the displayed CC Attack Protection page, click Add Rule in the upper left corner. Figure 4 shows an example.
Note
If you do not click Save after changing Status in Step 5, a Warning dialog box is displayed when you click Customize Rule.
Click Yes to cancel the previous settings.
Click No and then Save to save the settings.
WAF creates a default CC attack protection rule. The rule can be modified but cannot be deleted. Rate Limit in the rule is 500 requests/5 seconds by default and it can be adjusted up to 10000 requests/5 seconds. If you want a higher rate limit than the maximum value, contact the administrator.

Figure 4 Add Rule (CC Attack Protection)
Note
In the upper part of the protection rule list, click Quota details to view the quota of protection rules.
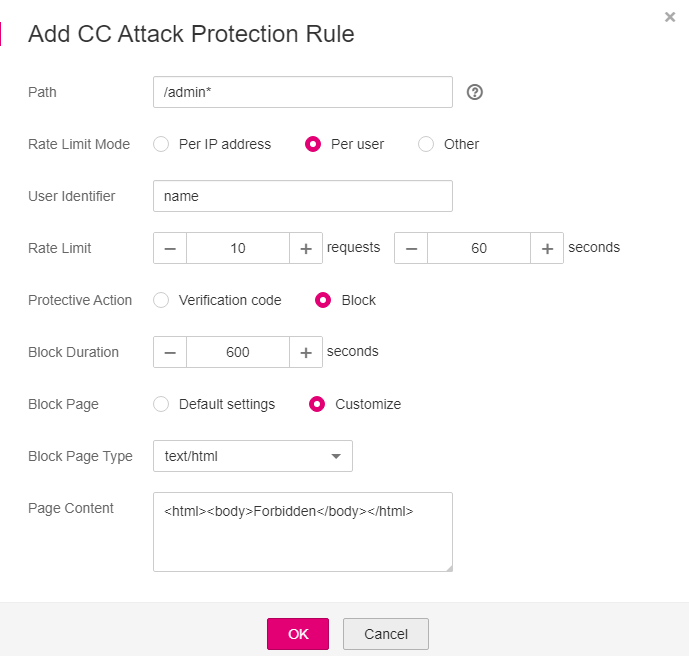
In the displayed dialog box, specify the parameters by referring to Table 1. Figure 5 shows an example.

Figure 5 Adding a CC attack protection rule
Table 1 Rule parameters¶ Parameter
Description
Example Value
Path
Part of the URL without the domain name.
Prefix match: The path ending with * indicates that the path is used as a prefix. For example, if the path to be protected is /admin/test.php or /adminabc, set Path to /admin*.
Exact match: The path to be entered must match the path to be protected. If the path to be protected is /admin, set Path to /admin.
Note
The path supports prefix and exact matches only and does not support regular expressions.
The path cannot contain two or more consecutive slashes. For example, ///admin. If you enter ///admin, the WAF engine converts /// to /.
/admin*
Rate Limit Mode
Per IP address: A web visitor is identified by the IP address.
Per user: A web visitor is identified by the cookie key value.
Other: A web visitor is identified by the Referer field (user-defined request source).
Note
If Rate Limit Mode is Other, Content of Referer is set to a complete URL containing the domain name. The Content field supports prefix match and exact match only, and cannot contain two or more consecutive slashes, for example, ///admin. If you enter ///admin, the WAF engine converts it to /admin.
For example, if Path is /admin and you do not want visitors to access the page from www.test.com, set Content to http://www.test.com.
Per user
User Identifier
A cookie field that you need to set if Rate Limit Mode is Per user. This value supports exact match only and does not support regular expressions.
If a website uses the name field in the cookie to uniquely identify a web visitor, enter name. If you do not set this value, WAF will automatically assign one.
name
Rate Limit
Number of requests allowed from a web visitor in the rate limiting period. The visitor's access request is denied if the limit is reached.
10 requests 60 seconds
Protective Action
Action to perform if the maximum number of requests is reached. Options are Verification code and Block.
Verification code: A verification code is displayed when the number of requests reaches the maximum limit within a specified period. Upon completing the verification, you are no longer restricted by the maximum number of requests allowed.
Block: Requests are blocked if the maximum number of requests is reached.
Note
If Rate Limit Mode is Other, Protective Action can only be Block.
Block
Block Duration
Time required for the page to be restored to normal state after being blocked
600 seconds
Block Page
Error page displayed when the maximum number of requests has been reached. This parameter is set only when Protective Action is Block.
If you select Default settings, the default block page is displayed.
If you select Customize, set a custom message.
Customize
Block Page Type
If you select Customize for Block Page, select a type of the block page among options application/json, text/html, and text/xml.
text/html
Page Content
If you select Customize for Block Page, set the content to be returned.
<html><body>Forbidden</body></html>
Click OK.
To modify the added rule, click Modify in the row containing the target rule.
The default CC attack protection rule created by WAF can be modified but cannot be deleted.
To delete the added rule, click Delete in the row containing the target rule.