Configuring the SID
Important
This is the last step for VM configuration. Due to the Cloudbase-Init mechanism, after the VM used to create an image is restarted, a random password is generated, and the VM cannot be logged in. Therefore, confirm the VM configuration before performing operations in this section.
A Security Identifier (SID) is a unique value that identifies a user, group, or computer account.
Only Windows Server 2016 requires SID configuration during image creation. For how to configure a SID for Windows Server 2012 R2, see Bare Metal Server User Guide.
Log in to the Windows VM.
Click
 in the lower left corner, choose Windows PowerShell, and run the whoami /user command to check the SID.
Figure 1 Querying the original SID
Modify the Cloudbase-Init configuration files.
Open the cloudbase-init.conf and cloudbase-init-unattend.con files.
File directory: C:\Program Files\Cloudbase Solutions\Cloudbase-Init\conf
Add first_logon_behaviour=no to both files.
[DEFAULT]
username=Administrator
groups=Administrators
first_logon_behaviour=no
netbios_host_name_compatibility=false
metadata_services=cloudbaseinit.metadata.services.httpser
inject_user_password=true
...
Delete cloudbaseinit.plugins.common.sethostname.SetHostNamePlugin from the cloudbase-init-unattend.conf configuration file.
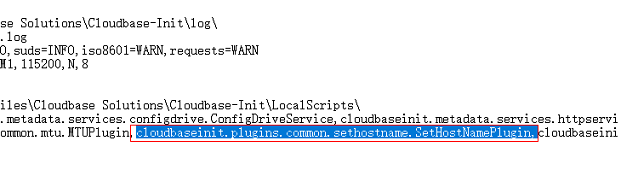
Figure 2 Modifying the configuration file
Open the CLI and run the following command to open the Sysprep window:
C:\Program Files\Cloudbase Solutions\Cloudbase-Init\conf>
C:\Windows\System32\Sysprep\sysprep.exe /unattend:Unattend.xml
Configure the parameters shown in the following figure.
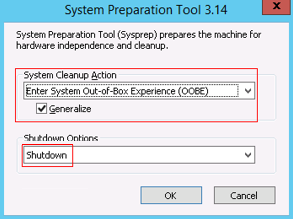
Figure 3 System Preparation Tool settings
After the configuration is complete, the BMS automatically restarts. You need to encapsulate and decompress the system again. Log in to the VM and query the SID as instructed in 2.

Figure 4 Viewing the new SID
As shown in the preceding figure, the SID has been changed successfully.