How to upload a file to a compute
Step 1. Upload a local file
You can use the Bash component to upload any files to a compute.
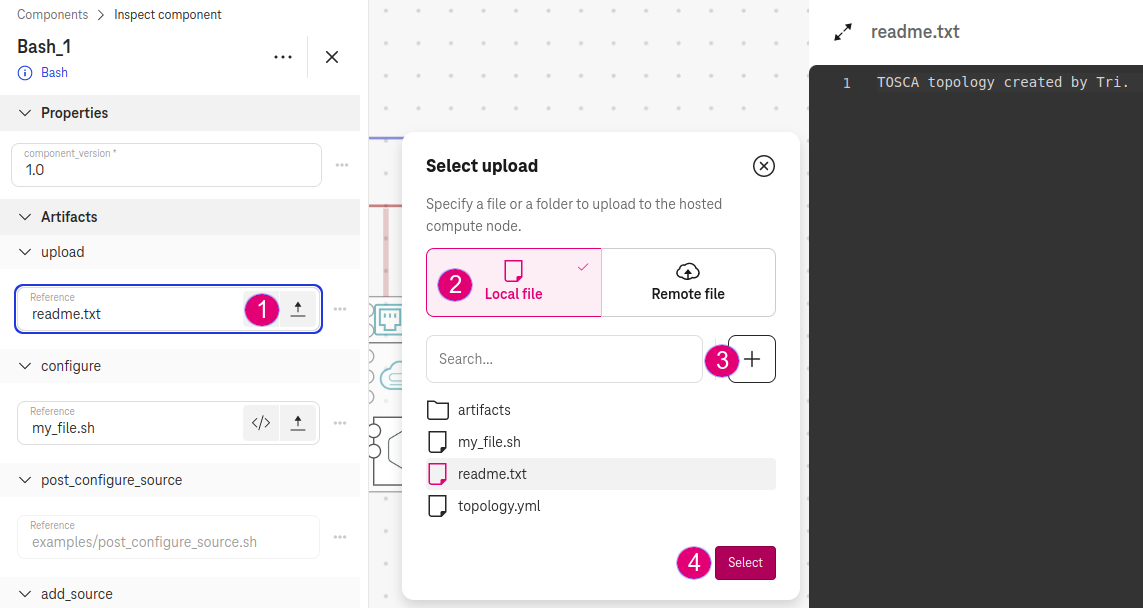
Go to Artifacts / Upload artifact.
Select Local file.
Upload a file and select it (e.g.,
readme.txt).

Figure 1. Upload a local file
(Alternative) Download a remote file
Alternatively, you can specify a remote URL to download a file from github or gitlab to the compute.
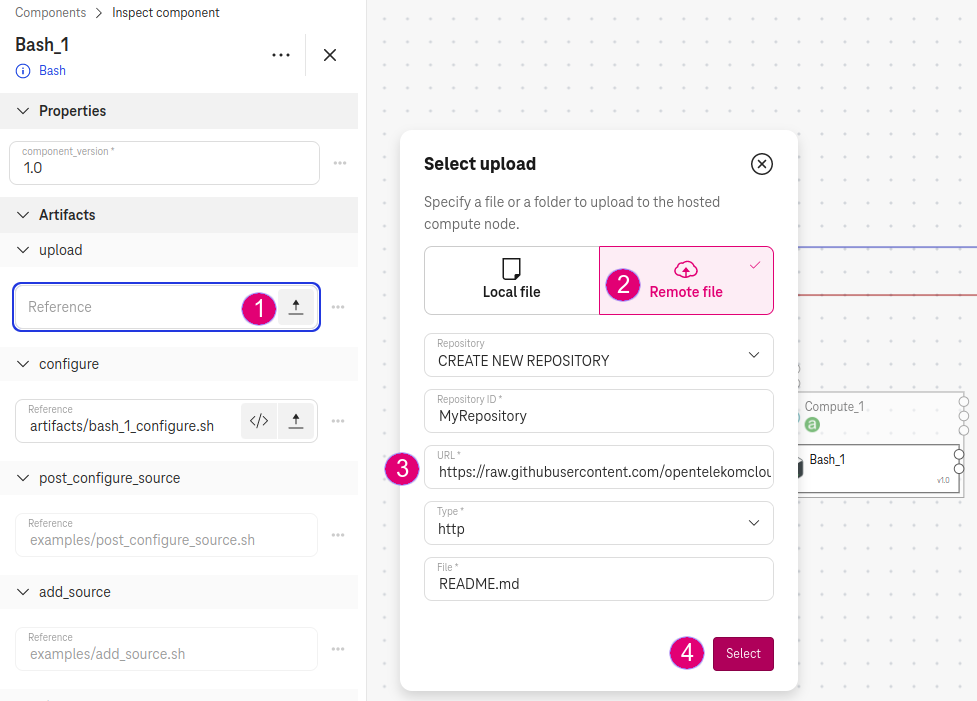
Go to Artifacts / Upload artifact.
Select Remote file.
Provide the URL of the remote file.

Figure 2. Upload a remote file
For example:
URL:
https://raw.githubusercontent.com/opentelekomcloud-blueprints/tosca-tutorials/masterFile:
README.md
In this example, the file README.md from Github will be downloaded to the compute node.
Note
We allow to download files from the following domains: .gitlab.com, .github.com, .githubusercontent.com, .t-systems.com, .rubygems.org, .treasuredata.com, .letsencrypt.org, .galaxy.ansible.com, .googleapis.com.
Step 2. How to use the uploaded file
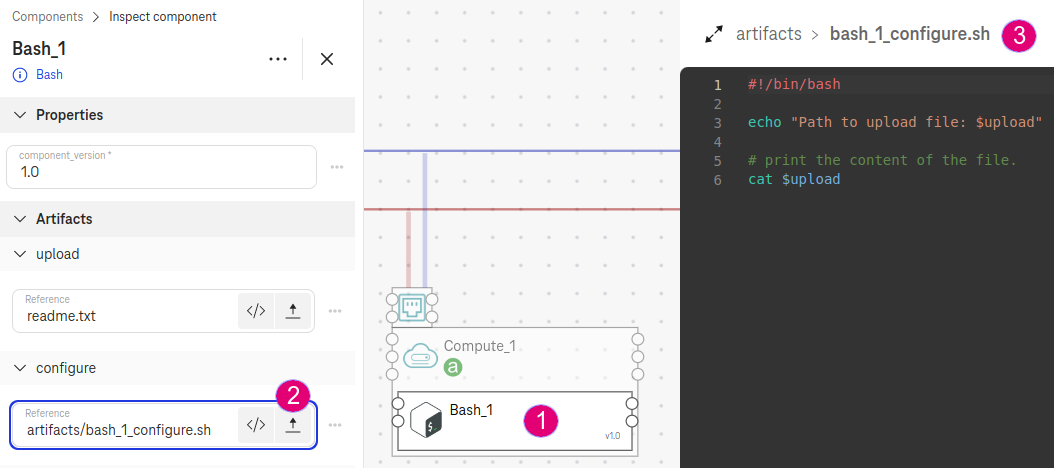
Go to Artifacts / Configure.
Provide a script (e.g.,
bash_1_configure.sh)

Figure 3. Write a script to use the uploaded file
with the following codes:
#!/bin/bash

echo "Path to upload file: $upload"

# print the content of the file.
cat $upload
In the script, the environment variable $upload holds the path to the file on the compute.
Expected result
When the Bash component is executed on the compute, the deployment logs will print out the path to the uploaded file (e.g., /home/ubuntu/.yorc.../readme.txt) and its content.

Figure 4. Deployment log shows path to the uploaded file