How to create a user account & login
1. How to login to Cloud Create
Login using an IAM user account with the Tenant Administrator role assigned to a project. This is the user created in the Identity Management of the Web console. If you do not have an IAM user, see Section 2. How to create an IAM user.
Attention
If you have an ICU account or you login from Telekom MMS IdP via an SSO, you can first login to the Web console and then create a new IAM user in the Web console. With the IAM user, you can login to Cloud Create.
If you have an IAM user account with the Security Administrator role (highest privilege), we strongly recommend you to create a new IAM user account with the Tenant Administrator role and assign it to a project (less privilege).
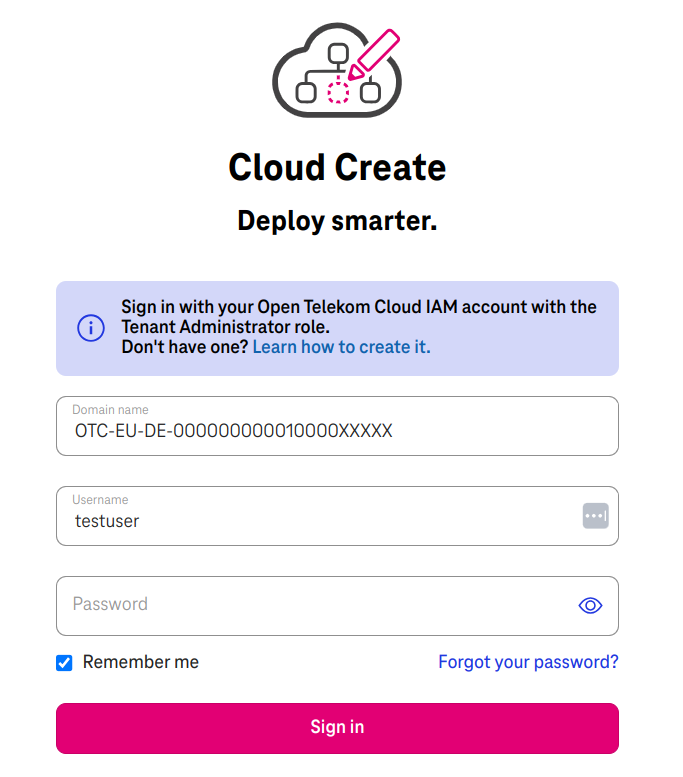
Figure 1. Login with domain name, username, and password
You cannot login?
You may have Virtual MFA Device enabled for login authentication. Please choose either SMS, Email, or disable it instead (Go to the console / click on username / My credentials / Login authentication).
You may login with a domain name NOT started with OTC. If you have a special domain name that does not start with this prefix, please contact us to enable it.
2. How to create an IAM user
The following tutorial shows how to create an IAM user and assign the given user to a project.
Note
To create an IAM user account, you must have the Security Administrator role in the IAM.
2.1. Create a project (optional, if you don't have one)
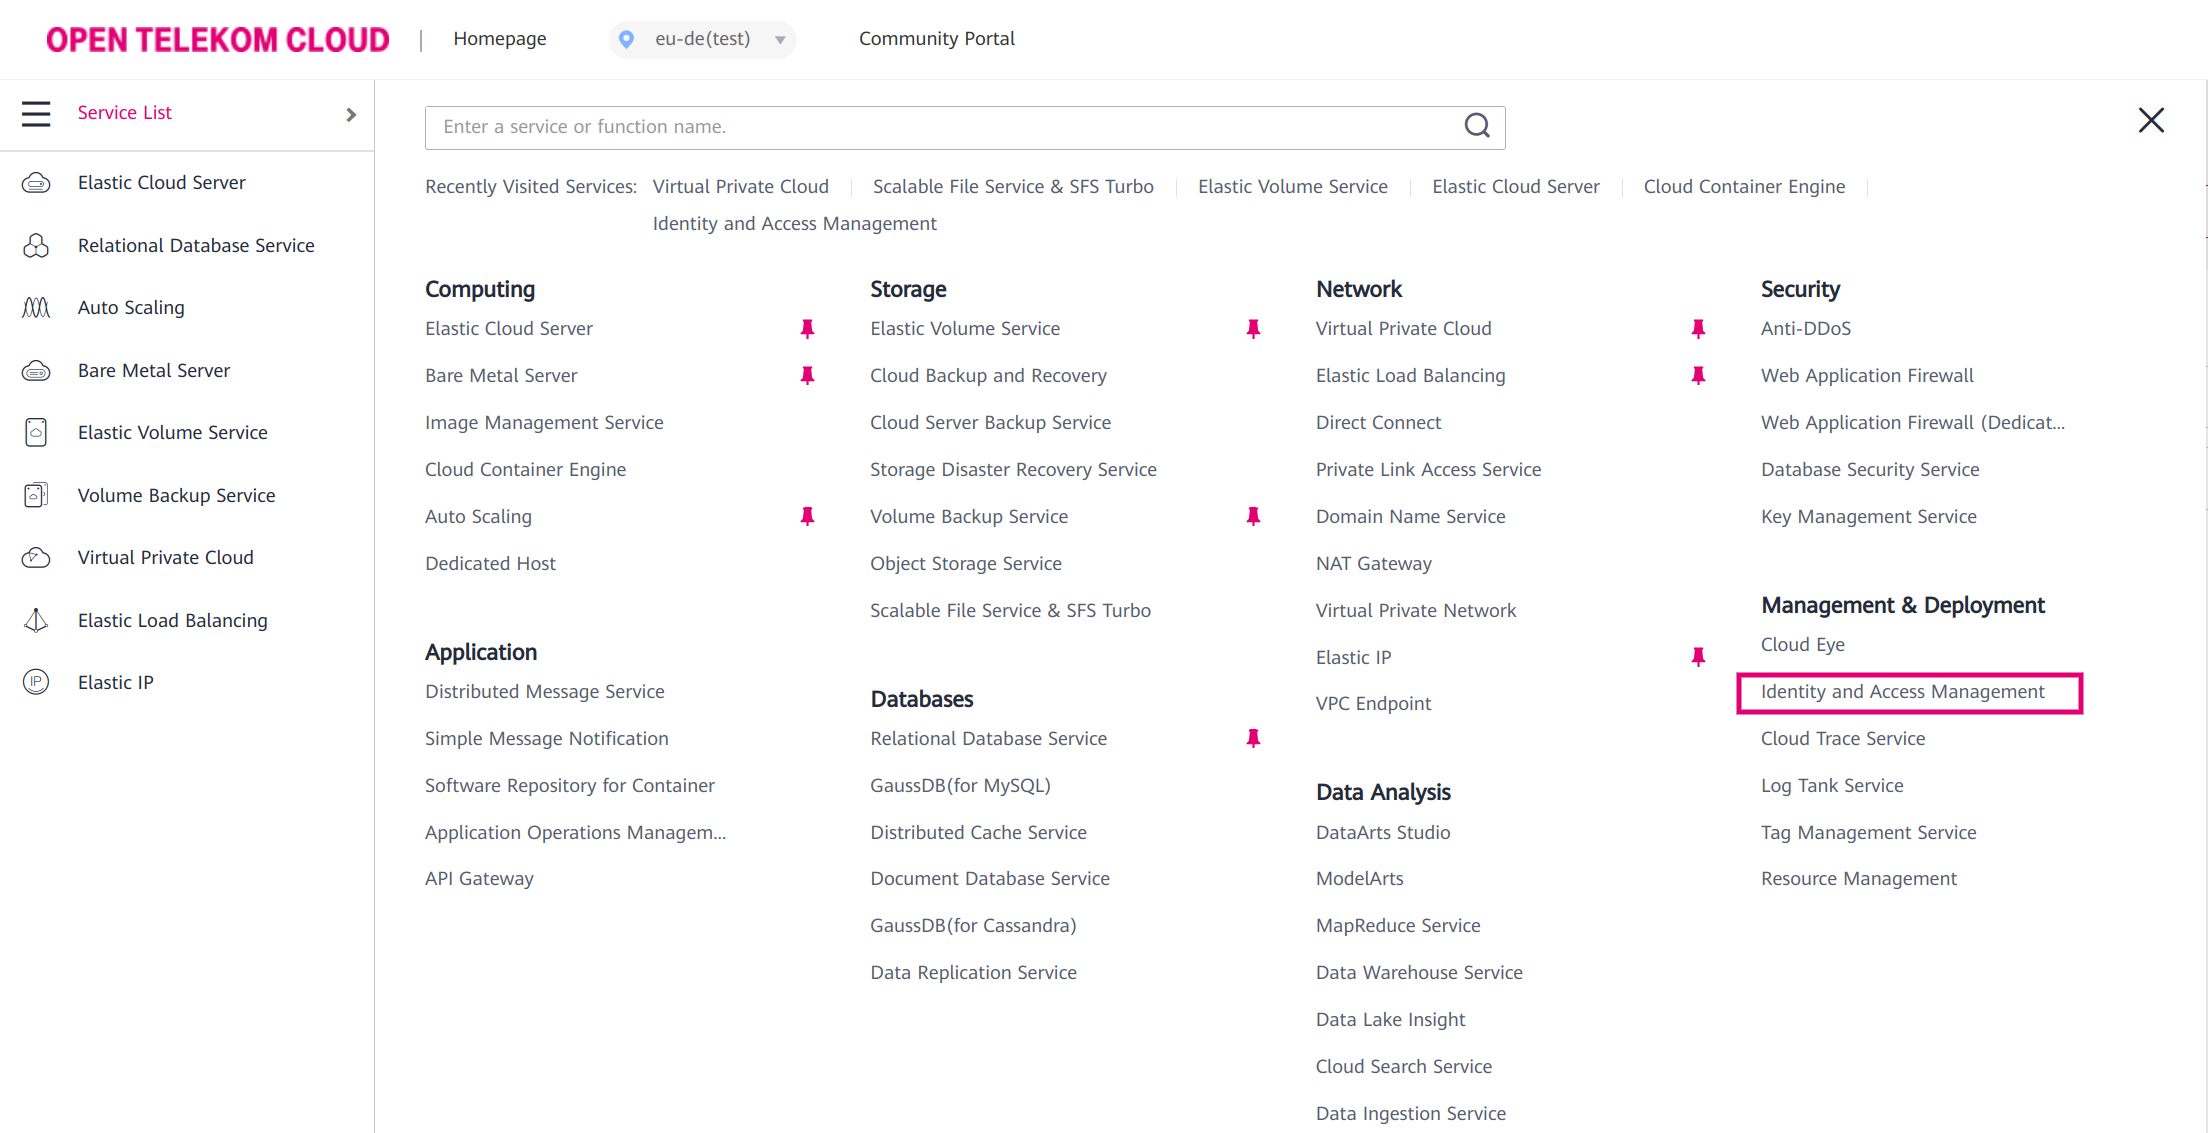
Figure 2. Identity Management
Go to: Projects
Go to: Create Project.
Input project name: eu-de_test
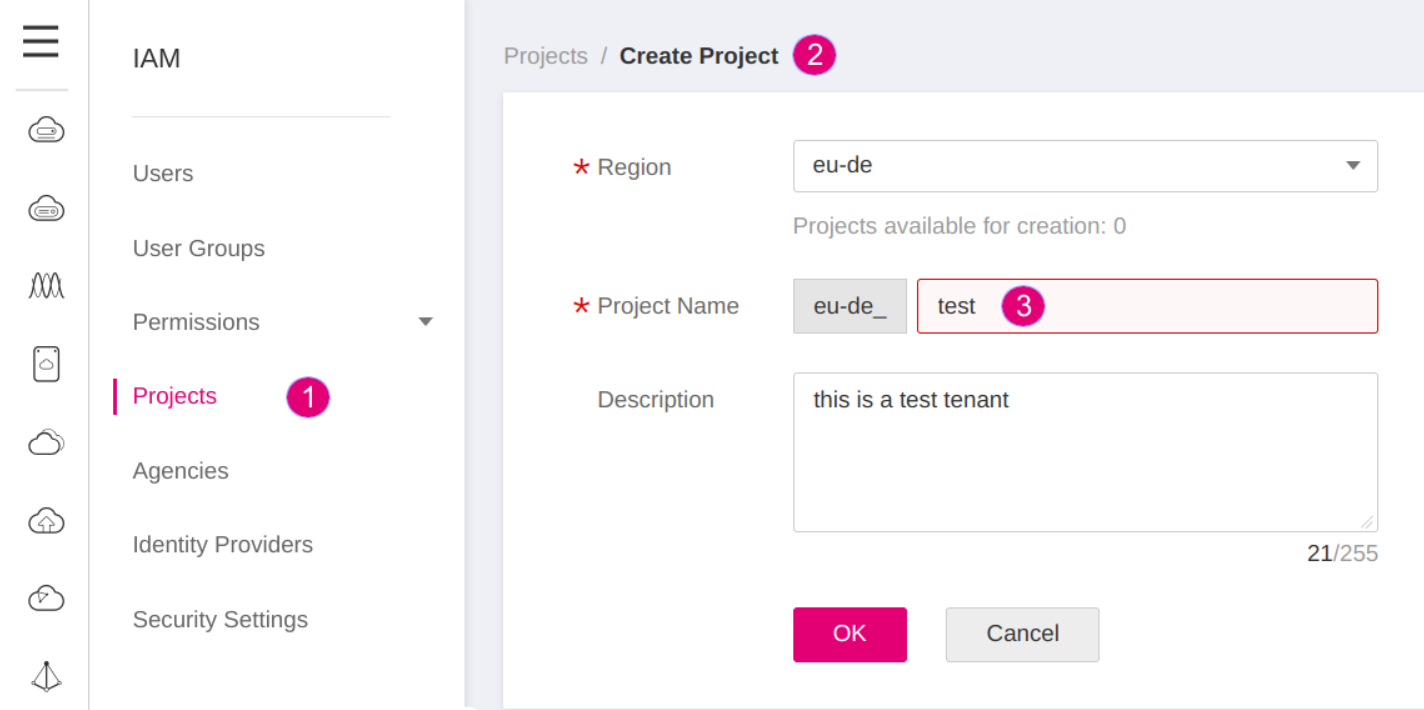
Figure 3. Create a project
2.2. Create a user group for the project
Go to: User Groups.
Go to: Create User Group
Input a group name: test
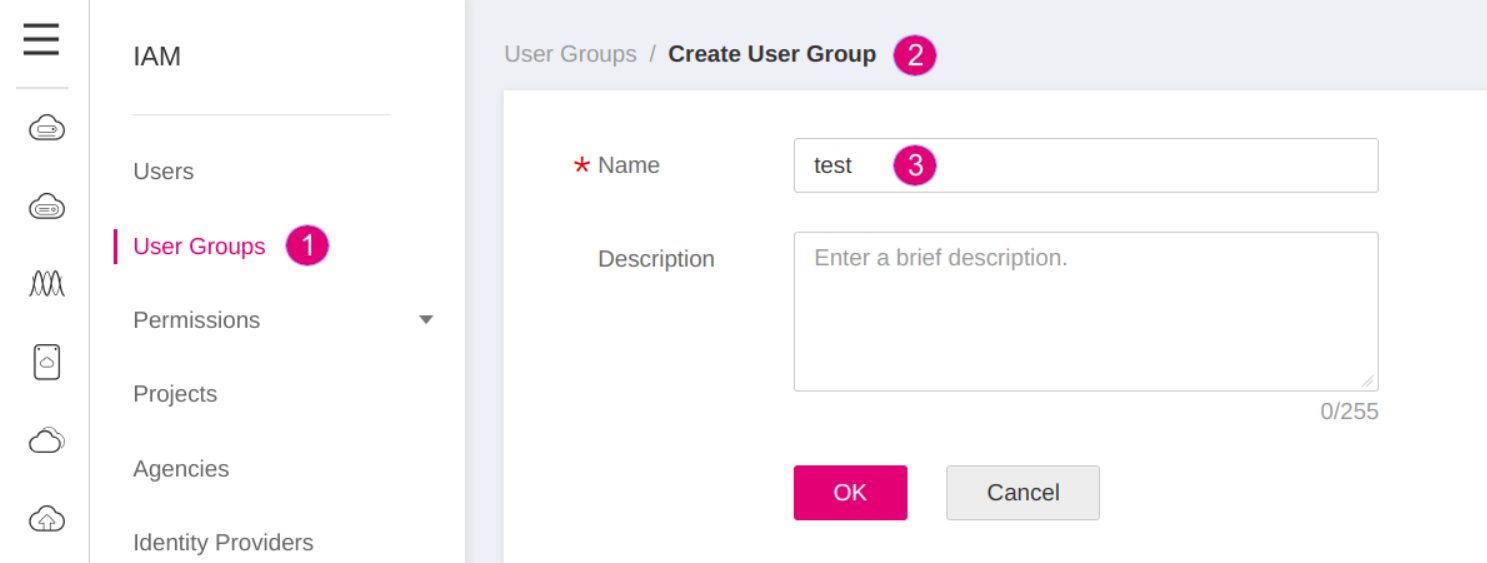
Figure 4. Create a user group
2.3. Set permissions for the new user group
Go to: User Groups
Search for the new group test.
Click Authorize.

Figure 5. Authorize the group test
In Step 1. Select Policy/Role, search for the role Tenant Administrator and select it.

Figure 6. Select role Tenant Administrator for the group
In Step 2. Select Scope, choose Region-specific projects.
Search for the project eu-de_test and select it.
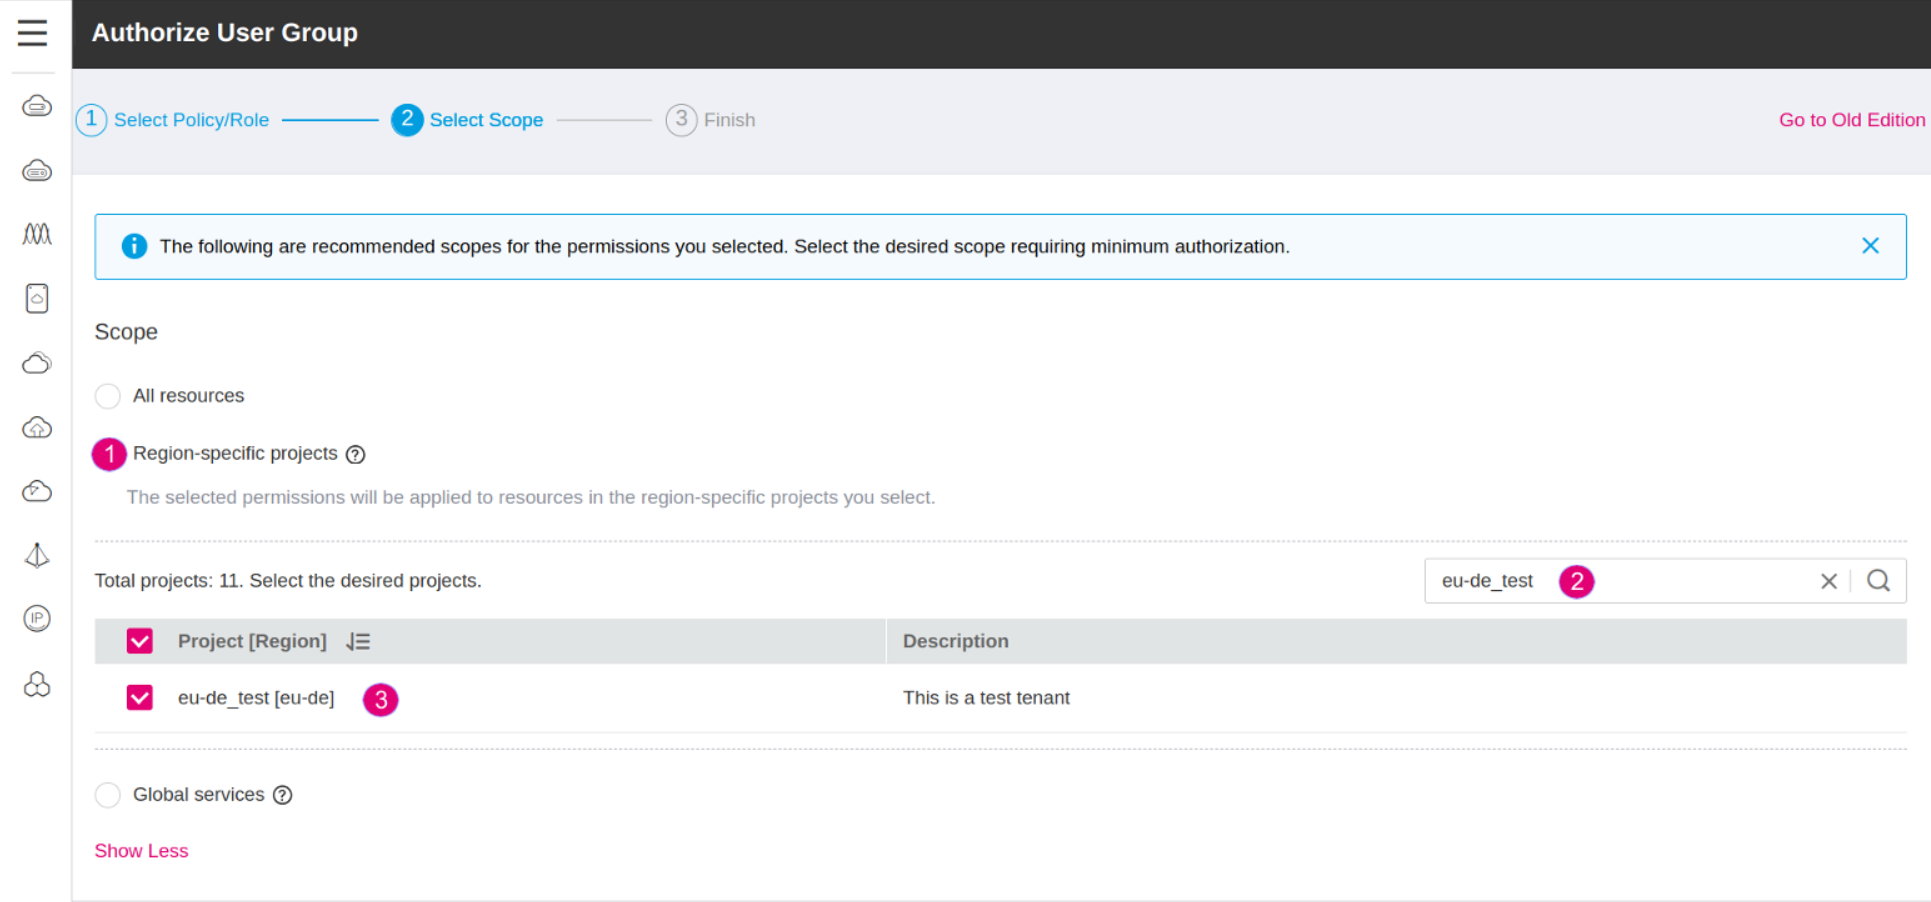
Figure 7. Select project eu-de_test for the group
Now users in the group test have the permissions to provision cloud resources in the project eu-de_test.
2.4. Create a new user in the user group
Go to: Users / Create User.
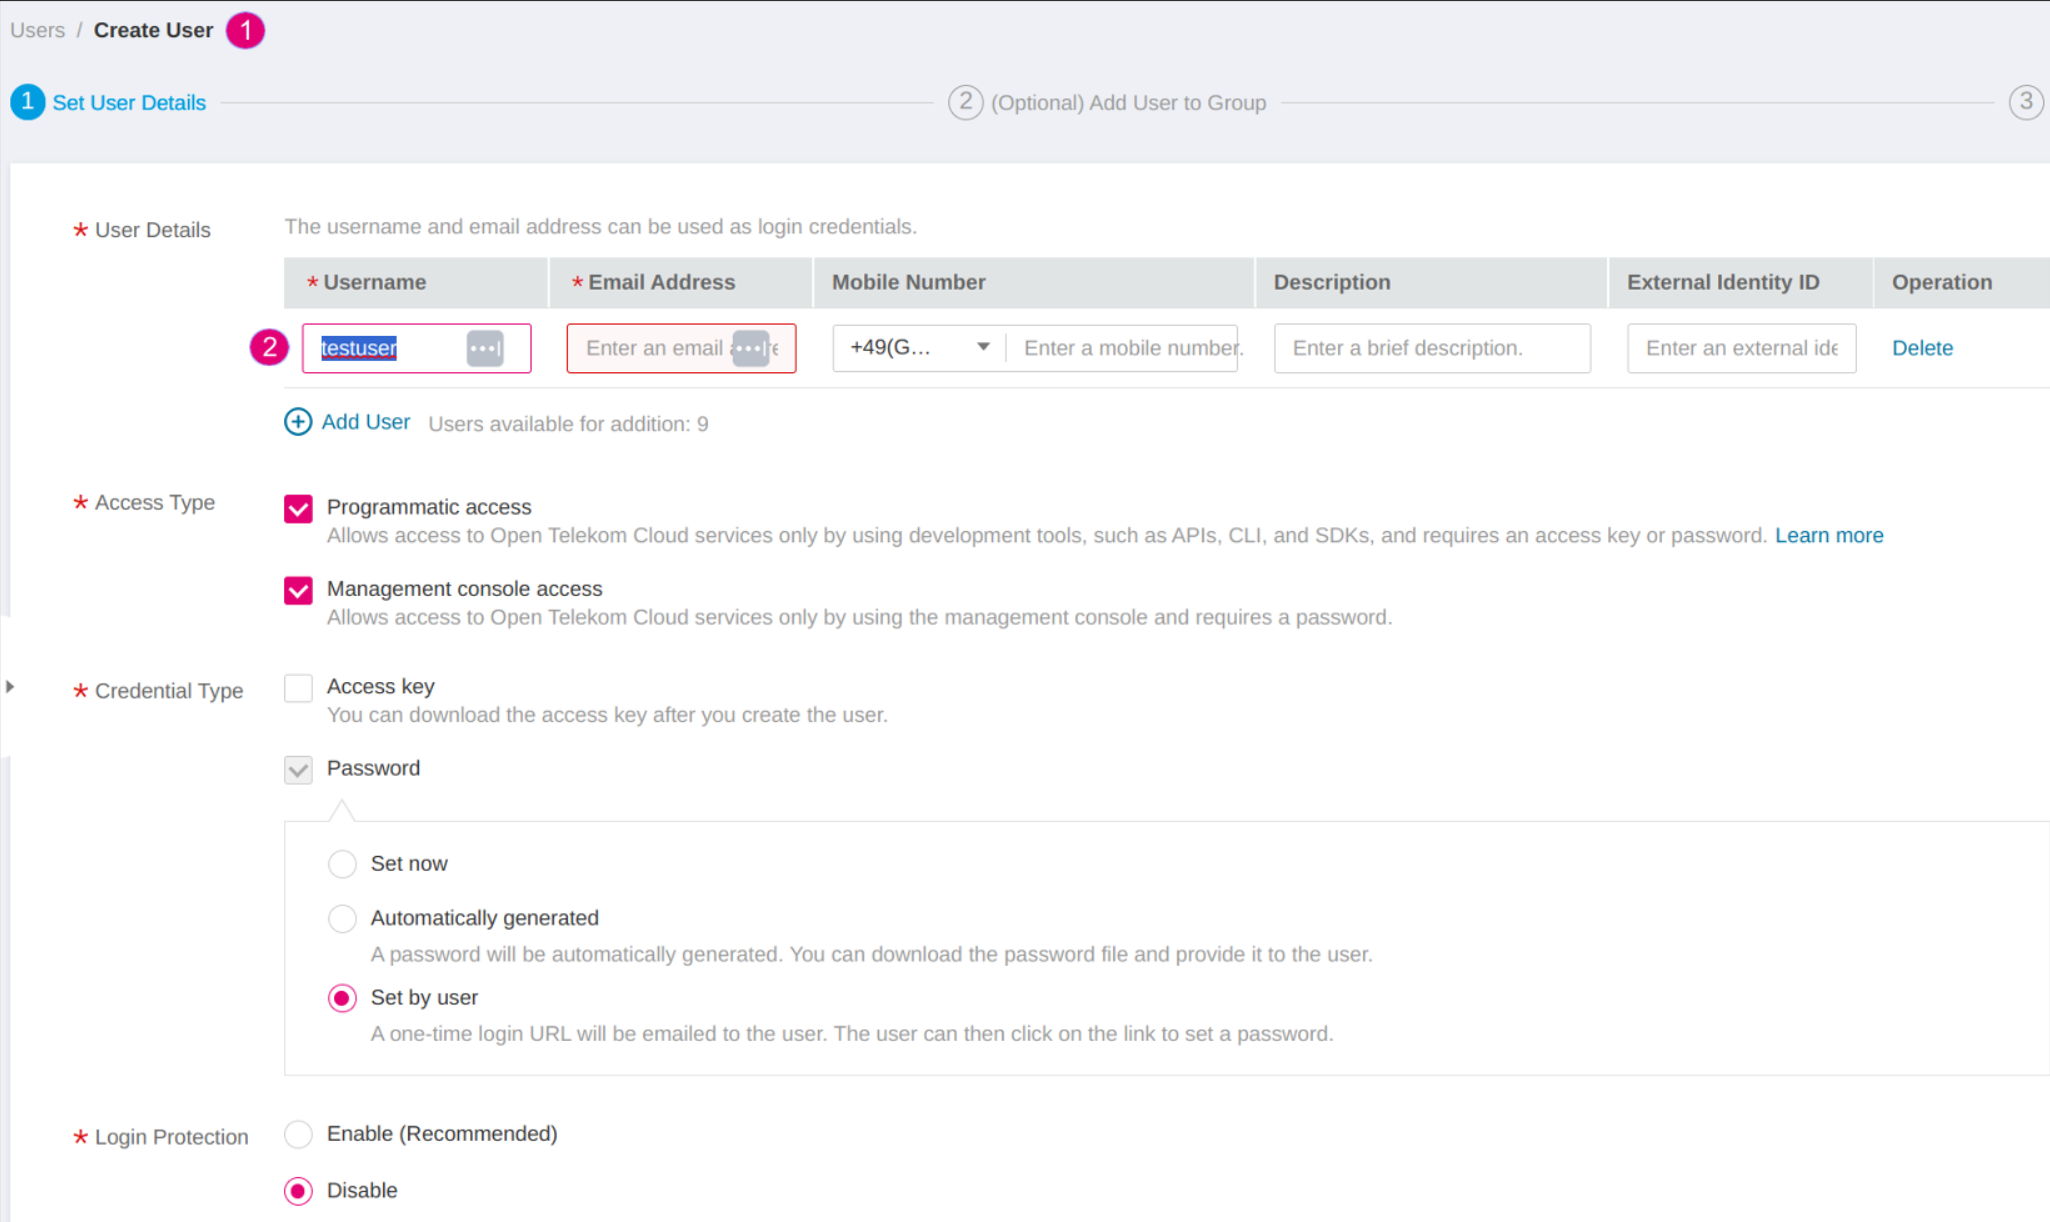
Figure 8. Input username 'testuser' and email address
In Step 2. Add User to Group, select the new group test.
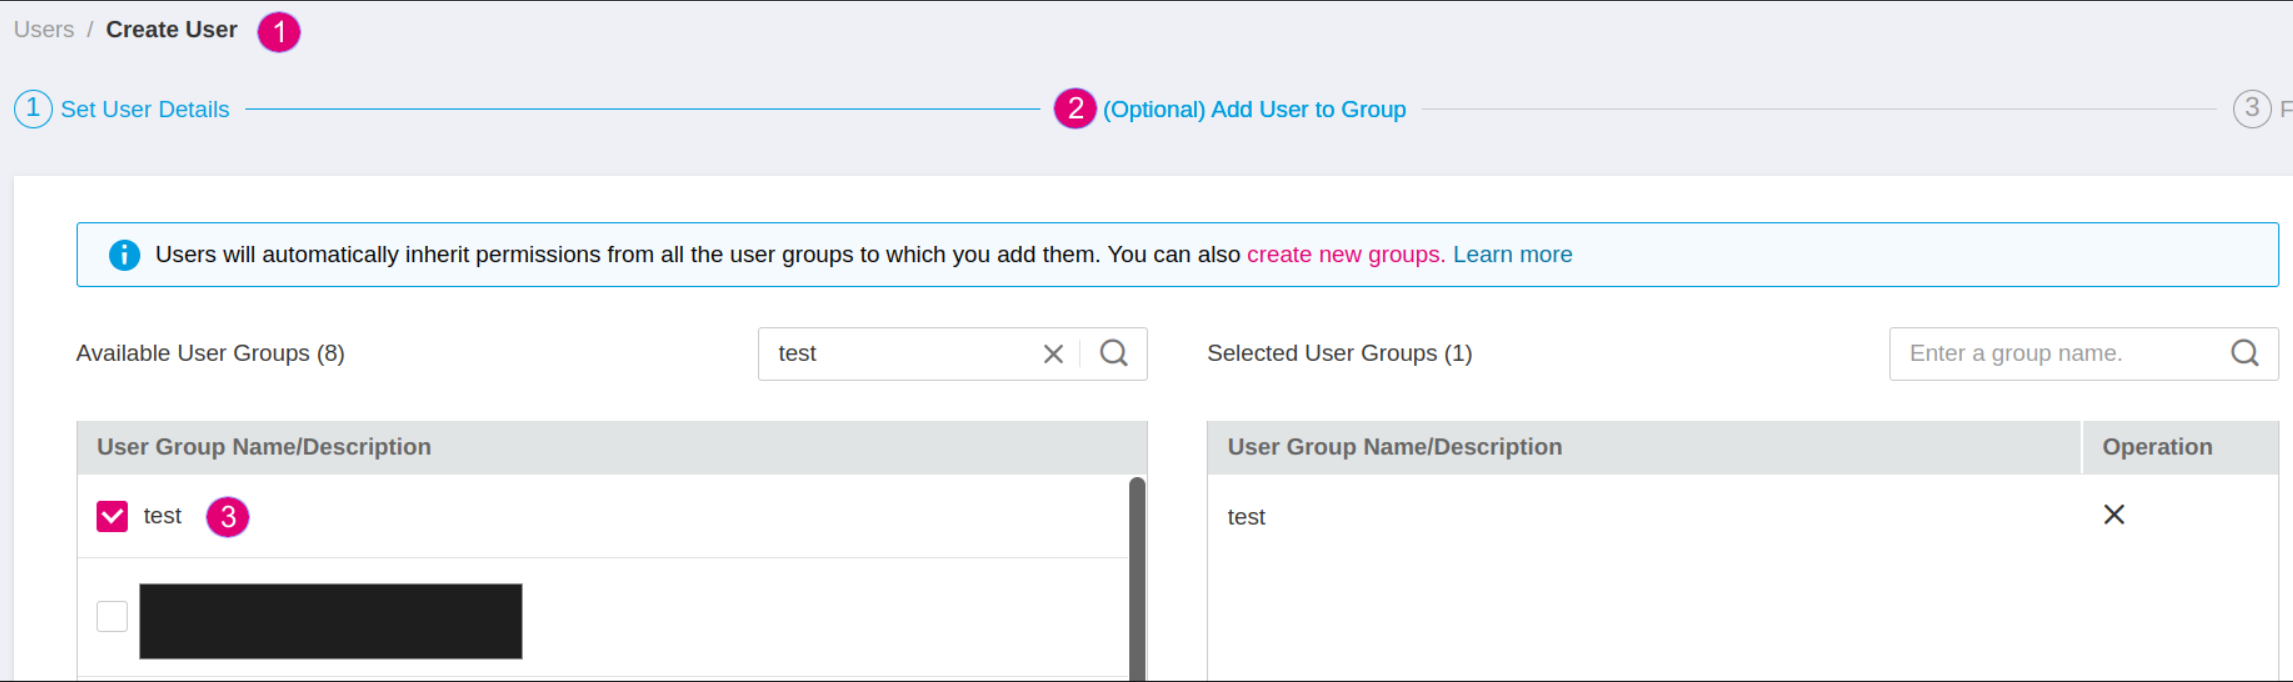
Figure 9. Add user to group test
Now the new user testuser has the role Tenant Administrator to provision cloud resources in the project eu-de_test and can login to Cloud Create.
3. How to choose a project
After logging in, you can choose a project, where you want to design and deploy your applications:
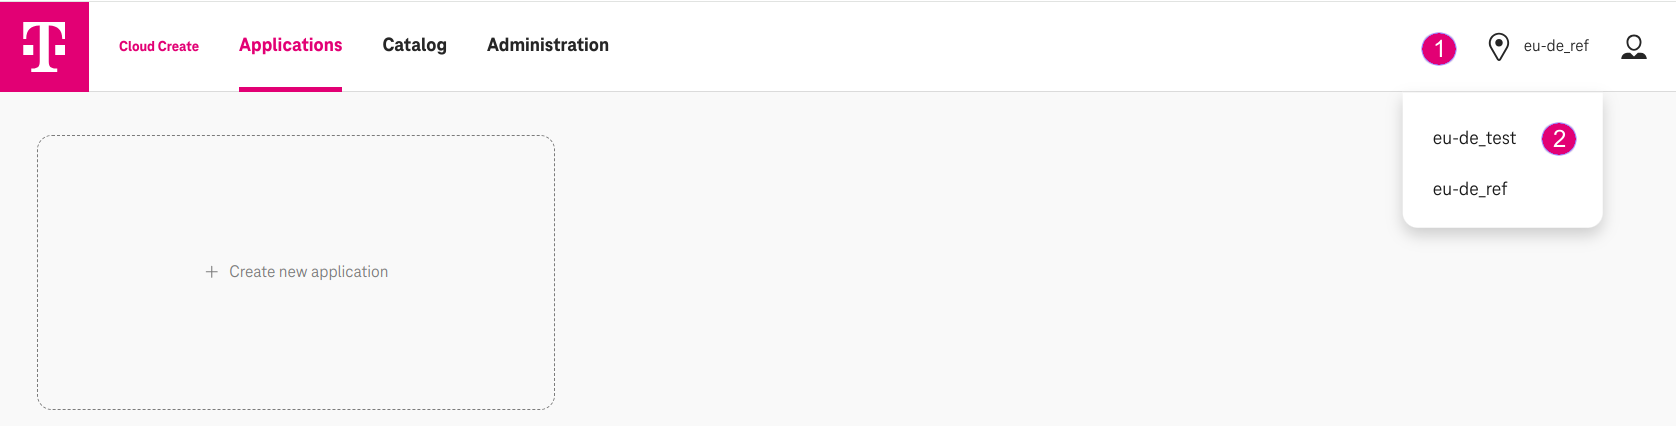
Figure 10. Choose a project