Adding Rules to One or More Policies
This topic describes how to add rules to one or more policies.
Adding Rules to One or More Policies
Log in to the management console.
Click
 in the upper left corner and select a region or project.
Click
 in the upper left corner and choose Web Application Firewall (Dedicated) under Security.
In the navigation pane on the left, click Policies.
In the upper left corner of the policy list, click View Rules.

Figure 1 View Rules
In the upper left corner above a list of a type of rule, click Add Rule.
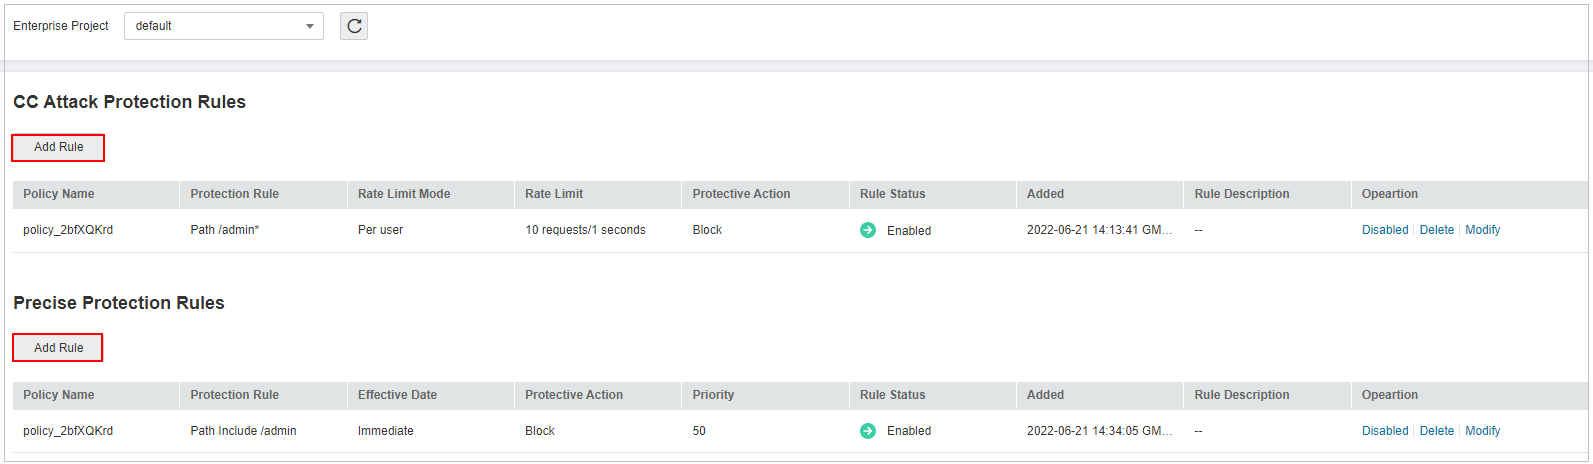
Figure 2 Adding a rule to one or more policies
Select one or more policies from the Policy Name drop-down list.
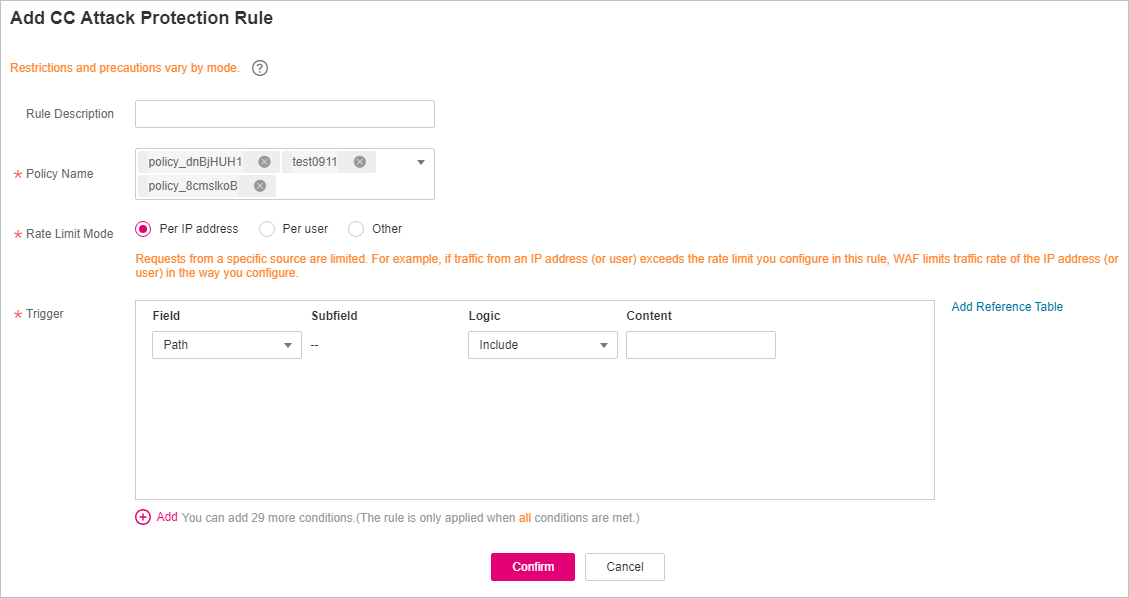
Figure 3 Adding a rule to one or more policies
Set other parameters in addition to Policy Name.
To add a CC attack protection rule, see Table 1.
To add a precise protection rule, see Table 1.
To add a blacklist or whitelist rule, see Table 1.
To add a geolocation access control rule, see Table 1.
To add a WTP rule, see Table 1.
To add an information leakage prevention rule, see Table 1.
To add a global protection whitelist rule, see Table 1.
To add a data masking rule, see Table 1.
Click Confirm.