Attaching a Shared Disk
Scenarios
Separately created shared EVS disks are data disks. In the disk list, the function of such a disk is displayed as Data disk, and the status is displayed as Available. In this case, you need to attach the shared data disk to servers for use.
Prerequisites
The shared disk status is In-use or Available.
Notes and Constraints
Important
If you simply attach a shared disk to multiple servers, files cannot be shared among them. Because there are no mutually agreed data read/write rules among servers, read and write operations from them may interfere with each other or unpredictable errors may occur. To share files between servers, you need to set up a shared file system or a clustered management system first.
A shared disk can be attached to a maximum of 16 servers. These servers and the shared disk must be in the same AZ within a region.
A shared, In-use disk can be attached to other servers only when the maximum number of servers that the disk can be attached to has not been reached.
A shared disk can only be attached to servers running the same type of OS (either Windows or Linux).
For example, if you attach a shared disk to multiple Windows servers and then detach it from these servers, the shared disk cannot be attached to Linux servers later. This is because Windows and Linux support different file systems and cannot identify the original file system on the disk. Improper operations may damage the original file system.
A shared disk can only be used as a data disk. It cannot be used as a system disk.
Cloud servers created from ISO images are only used for OS installation. They have limited functions and cannot have EVS disks attached.
A must be in the Running or Stopped state before disks can be attached to it.
A frozen disk cannot be attached.
Attaching the Disk on the EVS Console
Log in to the management console.
Click
 in the upper left corner and select a desired region and project.
Choose Storage > Elastic Volume Service.
The Elastic Volume Service page is displayed.
Locate the target disk in the list and click Attach.
The Attach Disk dialog box is displayed.
Shared disks support batch attachment, so you can attach a shared disk to multiple servers. In the Attach Disk dialog box, the left area shows the server list. After you select the target servers, they will be displayed in the right area.
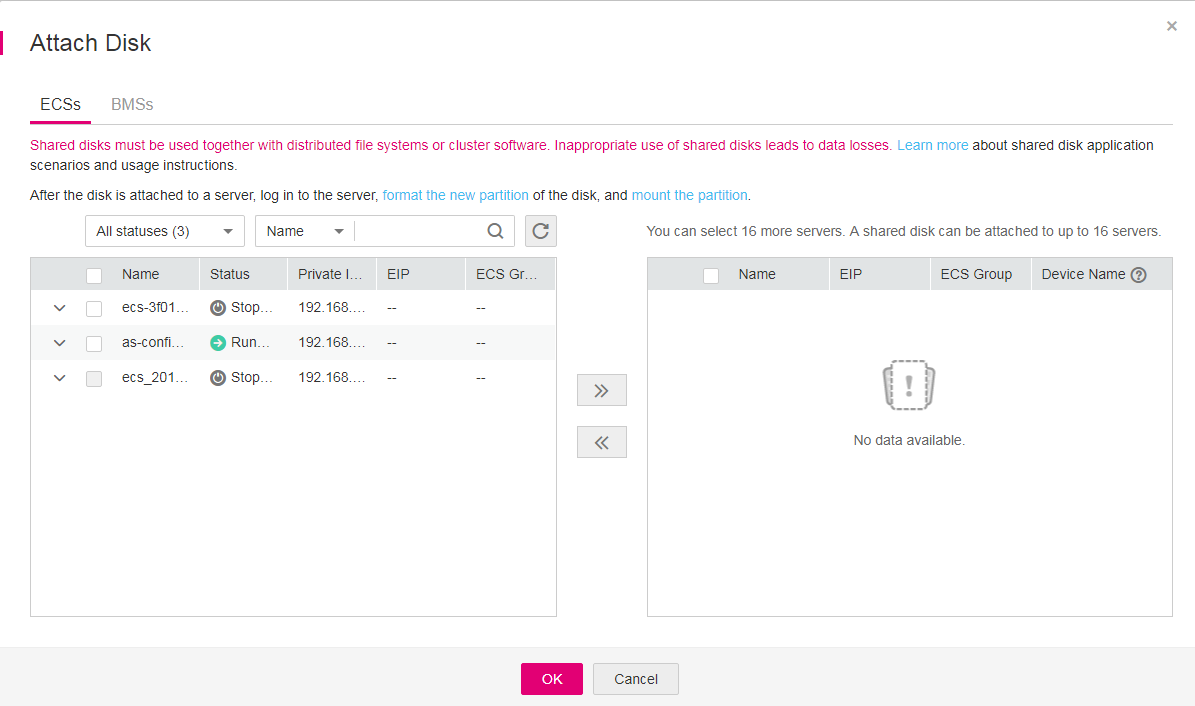
Figure 1 Attach Disk
Select the target servers you want to attach the shared disk. Ensure that the disk and servers are in the same AZ. After you select the servers, Data disk is automatically entered as the disk function for each server.
Click OK to go back to the disk list page. The status of the disk is Attaching, indicating that the disk is being attached to server. When the disk status changes to In-use, the disk is successfully attached.
Attaching the Disk on the ECS Console
Log in to the management console.
Click
 in the upper left corner and select a desired region and project.
Choose Compute > Elastic Cloud Server.
In the search box above the upper right corner of the ECS list, enter the ECS name, IP address, or ID for search.
Click the name of the target ECS.
The page providing details about the ECS is displayed.
Click the Disks tab. Then, click Attach Disk.
The Attach Disk page is displayed.
Select the target disk and specify it as the system disk or a data disk.
For Xen ECSs, you can specify a specific device name, such as /dev/sdb.
For KVM ECSs, you can specify the disk as the system disk or a data disk but cannot specify a specific device name.
Note
If no disks are available, click Create Disk in the lower part of the list.
For the restrictions on attaching disks, see FAQ "What Are the Requirements for Attaching an EVS Disk to an ECS?" in the Elastic Cloud Server User Guide.
The device names for the local disks and EVS disks attached to a disk-intensive ECS comply with the following rules:
System disk: sda or vda
Local disk: the device names in alphabetical order following sda or vda
EVS disk: the device names in alphabetical order following those used by local disks
Example:
A D1 ECS has two local disks. The device names of the two local disks are sdb and sdc (or vdb and vdc), and the device names of the EVS disks are sdd, sde, ... (or vdd, vde, ...).
Click OK.
After the disk is attached, you can view the information about it on the Disks tab.
Follow-Up Operations
If you are attaching a new disk, you need then log in to the server and initialize the disk before it can be used. To learn how to initialize disks, see Initialize an EVS Data Disk.
Helpful Links
If your disk cannot be attached to a server, see Why Can't I Attach My Disk to a Server?.
If the disk you are going to attach contains data, see Attaching an Existing EVS Disk.
If the attached data disk is not showing up, see Why Can't I View the Attached Data Disk on the Server?.