Scaling Up/Down a Stream
After a stream is created successfully, you can scale up or down a stream by adding or reducing partitions to meet capacity change requirements. Streams can be scaled automatically or manually.
Constraints
A maximum of 10 automatic scale-up, 10 manual scale-up, and 1 scale-down operations can be performed for each stream within one hour.
After scaling up or down a stream, pay attention to the following:
When uploading data, you are not advised to set PartitionKey. DIS automatically uploads data to multiple partitions based on the number of partitions in the stream. If you set PartitionKey, data skew and throttling may occur in the stream.
When downloading data, you need to periodically use the descriptStream API to check the partition quantity change so that DIS can download data from all partitions.
Auto Scaling
Auto Scaling Mechanism
If throttling is triggered in the last minute (that is, the maximum throughput of the partitions in the stream has been reached) and the upload traffic of the stream is greater than 80% of the stream bandwidth, an automatic scale-up is triggered. The number of target partitions is equal to the number of current partitions divided by 0.6 and rounded up.
For example, a stream has five common partitions, and the upload bandwidth of the stream is 5 Mbit/s. If throttling is triggered in the last minute and the upload traffic of the stream exceeds 4 Mbit/s, an automatic scale-up is triggered to add four more partitions. The number of target partitions is 8.3 (5/0.6), which is rounded up to 9.
If the upload traffic and download traffic of a stream are both less than 30% of the stream bandwidth, an auto scale-down is triggered. The number of target partitions is equal to the number of current partitions divided by 2 and rounded down.
For example, a stream has five common partitions, and its upload and download bandwidth is 5 Mbit/s and 10 Mbit/s, respectively. If the upload traffic of the stream is less than 1.5 Mbit/s and the download traffic is less than 3 Mbit/s, an automatic scale-down is triggered to remove three partitions. The number of target partitions is 2.5 (5/2), which is rounded down to 2.
Auto Scaling Rules
The interval between performing automatic scale-up and scale-down must be greater than 1 minute. Automatic scale-down cannot be triggered within 2 minutes after automatic or manual scale-up is performed, and meanwhile automatic scale-up cannot be triggered within 2 minutes after automatic or manual scale-down is performed.
When scaling up a stream, restore the DELETED and EXPIRED partitions to the ACTIVE partitions to make the partitions accessible. If the stream capacity is still insufficient, the system will create new partitions.
The partitions that have been scaled down will not be charged or occupy the quota. Data on those partitions is readable but is not writable during Data Retention configured in Step 1: Creating a DIS Stream. Once Data Retention is expired, the data will become inaccessible.
Enabling Auto Scaling
Use the account to log in to the DIS console.
Click
 in the upper left corner of the page and select a region and project.
Perform the following steps to automatically scale up or down a stream:
In the navigation tree on the left, choose Stream Management.
On the Stream Management page, click the name of the stream to be scaled.
Click
 next to Auto Scaling.
In the displayed Edit Auto-Scaling Parameter dialog box, enable Auto-Scaling.
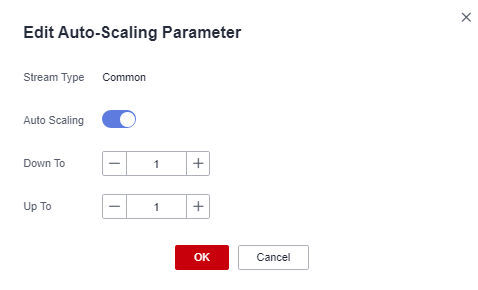
Figure 1 Edit Auto-Scaling Parameter
Set the upper and lower thresholds for automatic scaling and click OK.
Manual Scaling
Manual Scaling Rules
When scaling up a stream, ensure that the number of target partitions is greater than the number of the current partitions but is not greater than the total number of the remaining quotas and current partitions.
When scaling up a stream, restore the DELETED and EXPIRED partitions to the ACTIVE partitions to make the partitions accessible. If the stream capacity is still insufficient, the system will create new partitions.
When scaling down a stream, ensure that the number of target partitions is smaller than the number of current partitions but is not smaller than 1.
The partitions that have been scaled down will not be charged or occupy the quota. Data on those partitions is readable but is not writable during Data Retention configured in Step 1: Creating a DIS Stream. Once Data Retention is expired, the data will become inaccessible.
Manually Scaling Up/Down a Stream
Use the account to log in to the DIS console.
Click
 in the upper left corner of the page and select a region and project.
Perform either of the following operations to manually scale up or down a stream:
In the navigation tree on the left, choose Stream Management.
On the Stream Management page, click the name of the stream to be scaled.
In the upper right corner of the displayed page, click Scale Up/Down. The Scale Up/Down Stream dialog box is displayed.
Change the number of target partitions and click Yes.
In the navigation tree on the left, choose Stream Management.
In the Operation column of the stream to be scaled, click More and choose Scale Up/Down from the drop-down list.
The Scale Up/Down Partition dialog box is displayed.
Change the number of target partitions and click Yes.
Viewing Scale-Up/Down Logs
Use the account to log in to the DIS console.
Click
 in the upper left corner of the page and select a region and project.
In the navigation tree on the left, choose Stream Management.
Click the name of a stream to access its details page.
On the displayed page, click the Scale-Up/Down Logs tab. View the scaling details of the stream.