Uploading a Certificate to WAF
If you select Dedicated Mode as the access mode and set Client Protocol to HTTPS, a certificate is required for your website.
If you upload a certificate to WAF, you can directly select the certificate when adding a website to WAF.
Note
If you have enabled enterprise projects, ensure that you have all operation permissions for the project where your WAF instance locates. Then, you can select your enterprise project from the Enterprise Project drop-down list and upload certificates in the project.
Prerequisites
You have obtained the certificate file and certificate private key.
Specification Limitations
You can create as many certificates in WAF as the number of domain names that can be protected by your WAF instances in the same account. For example, if WAF can protect 10 domain names, you can create 10 certificates in WAF.
Constraints
If you import a new certificate when adding a protected website or updating a certificate, the certificate is added to the certificate list on the Certificates page, and the imported certificate is also counted towards your total certificate quota.
Application Scenario
If you select HTTPS for Client Protocol, a certificate is required.
Uploading a Certificate to WAF
Log in to the management console.
Click
 in the upper left corner and select a region or project.
Click
 in the upper left corner and choose Web Application Firewall (Dedicated) under Security.
In the navigation pane on the left, choose Objects > Certificates.
Click Add Certificate.
In the displayed dialog box, enter a certificate name, and copy and paste the certificate file and private key to the corresponding text boxes.
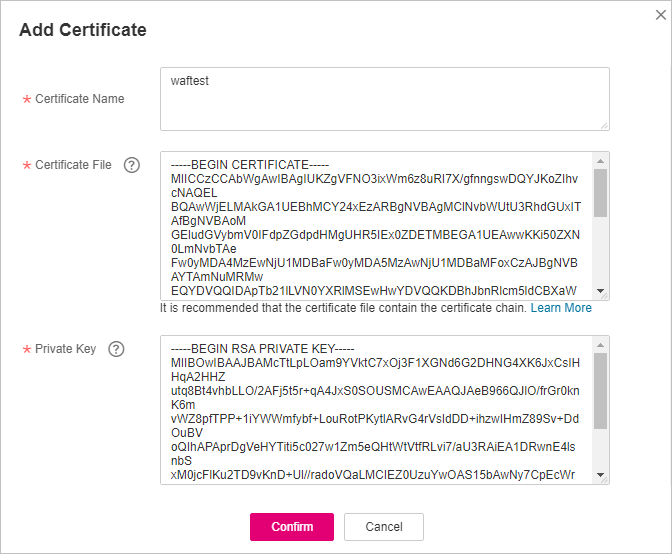
Figure 1 Uploading an international certificate
Only .pem certificates can be used in WAF. If the certificate is not in .pem format, convert it into .pem locally by referring to Table 1 before uploading it.
Table 1 Certificate conversion commands¶ Format
Conversion Method
CER/CRT
Rename the cert.crt certificate file to cert.pem.
PFX
Obtain a private key. For example, run the following command to convert cert.pfx into key.pem:
openssl pkcs12 -in cert.pfx -nocerts -out key.pem -nodes
Obtain a certificate. For example, run the following command to convert cert.pfx into cert.pem:
openssl pkcs12 -in cert.pfx -nokeys -out cert.pem
P7B
Convert a certificate. For example, run the following command to convert cert.p7b into cert.cer:
openssl pkcs7 -print_certs -in cert.p7b -out cert.cer
Rename certificate file cert.cer to cert.pem.
DER
Obtain a private key. For example, run the following command to convert **privatekey.der** into privatekey.pem:
openssl rsa -inform DER -outform PEM -in privatekey.der -out privatekey.pem
Obtain a certificate. For example, run the following command to convert cert.cer into cert.pem:
openssl x509 -inform der -in cert.cer -out cert.pem
Note
Before running an OpenSSL command, ensure that the OpenSSL tool has been installed on the local host.
If your local PC runs a Windows operating system, go to the command line interface (CLI) and then run the certificate conversion command.
Click Confirm.
Related Operations
To change the certificate name, move the cursor over the name of the certificate, click
 , and enter a certificate name.
Important
If the certificate is in use, unbind the certificate from the domain name first. Otherwise, the certificate name cannot be changed.
To view details about a certificate, click View in the Operation column of the certificate.
In the row containing the certificate you want, click Use in the Operation column to use the certificate to the corresponding domain name.
To delete a certificate, locate the row of the certificate and click More > Delete in the Operation column.
To update a certificate, locate the row of the certificate and click More > Update in the Operation column.