Creating a Custom Route Table
Scenarios
You can create a custom route table if you do not want to use the default one.
Procedure
Log in to the management console.
Click
 in the upper left corner and select the desired region and project.
On the console homepage, under Network, click Virtual Private Cloud.
In the navigation pane on the left, choose Route Tables.
In the upper right corner, click Create Route Table. On the displayed page, configure parameters as prompted.
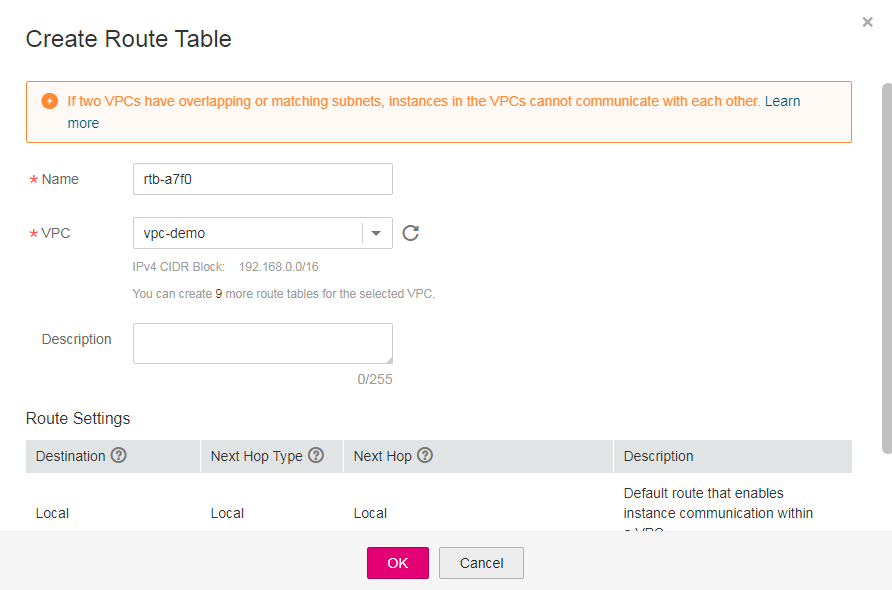
Figure 1 Create Route Table
Table 1 Parameter descriptions¶ Parameter
Description
Example Value
Name
The name of the route table. This parameter is mandatory.
The name can contain a maximum of 64 characters, which may consist of letters, digits, underscores (_), hyphens (-), and periods (.). The name cannot contain spaces.
rtb-001
VPC
The VPC that the route table belongs to. This parameter is mandatory.
vpc-001
Description
Supplementary information about the route table. This parameter is optional.
The description can contain a maximum of 255 characters and cannot contain angle brackets (< or >).
-Route Settings
The route information. This parameter is optional.
You can add a route when creating the route table or after the route table is created. For details, see Adding a Custom Route.
You can click + to add more routes.
-Click OK.
A message is displayed. You can determine whether to associate the route table with subnets immediately as prompted. If you want to associate immediately, perform the following operations:
Click Associate Subnet. The Associated Subnets page is displayed.
Click Associate Subnet and select the target subnets to be associated.
Click OK.