Creating a Full-ECS Image from a CBR Backup
Scenarios
You can use a Cloud Backup and Recovery (CBR) backup to create a full-ECS image, which can be used to create ECSs.
Background
CBR provides the backup service for EVS disks, BMSs, and ECSs. If you have created a backup for an ECS using CBR, you can use the backup to create a full-ECS image.
If you use a full-ECS image to change an ECS OS, only the system disk data can be written into the ECS. Therefore, if you want to restore or migrate the data disk data of an ECS by using a full-ECS image, you can only use the image to create a new ECS rather than use it to change the ECS OS.
Constraints
When creating a full-ECS image from a CBR backup, ensure that the source ECS of the CBR backup has been properly configured, or the image creation may fail.
A CBR backup can be used to create only one full-ECS image.
If an ECS is in Stopped state, do not start it when you are using it to create a full-ECS image.
A full-ECS image created from a CBR backup can be shared with other tenants. However, if it is a shared CBR backup, the full-ECS image created from it cannot be shared.
A full-ECS image cannot be exported or replicated.
Procedure
Access the IMS console.
Log in to the management console.
Under Computing, click Image Management Service.
The IMS console is displayed.
Create a full-ECS image.
Click Create Image in the upper right corner.
In the Image Type and Source area, select Create Image for Type and then select Full-ECS image for Image Type.
Select Cloud Server Backup for Source and then select an ECS from the list.
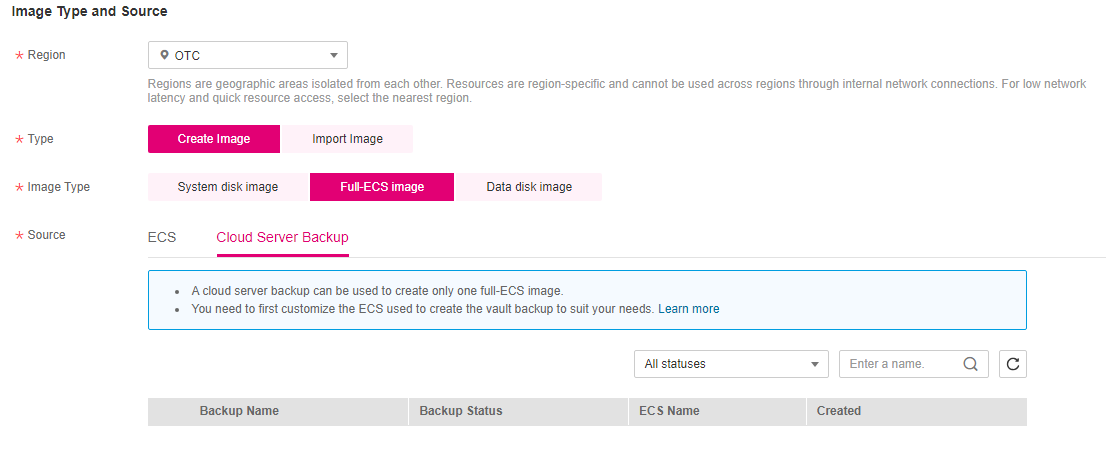
Figure 1 Creating a full-ECS image using a CBR backup
In the Image Information area, configure basic image details, such as the image name and description.
Click Create Now.
Confirm the settings and click Submit.
Switch back to the Image Management Service page to monitor the image status.
When the image status changes to Normal, the image creation is complete.
Follow-up Procedure
After the full-ECS image creation is complete, you can perform the following operations:
If you want to use the image to create ECSs, click Apply for Server in the Operation column. On the displayed page, select Private image and then select the full-ECS image. For details, see Elastic Cloud Server User Guide.
Note
When you use a full-ECS image to create an ECS:
The system and data disk information defaulted by the image will be automatically displayed.
If the full-ECS image contains multiple data disks, it takes some time to load and display the disk information.
If you want to share the image with other tenants, click More in the Operation column and select Share from the drop-down list. In the displayed dialog box, enter the project IDs of the image recipients. For details, see Sharing Specified Images.
If you use a full-ECS image to change an ECS OS, only the system disk data can be written into the ECS. Therefore, if you want to restore or migrate the data disk data of an ECS by using a full-ECS image, you can only use the image to create a new ECS rather than use it to change the ECS OS.