Configuring an Alarm Template
APM allows you to configure alarm templates. You can create multiple alarm policies under a template and bind them to nodes.
Procedure
Log in to the management console.
Click
 on the left and choose Application > Application Performance Management.
In the navigation pane, choose Application Monitoring > Metrics.
In the tree on the left, click an application. The metric details page of the application is displayed.
Click the Alarm Templates tab.
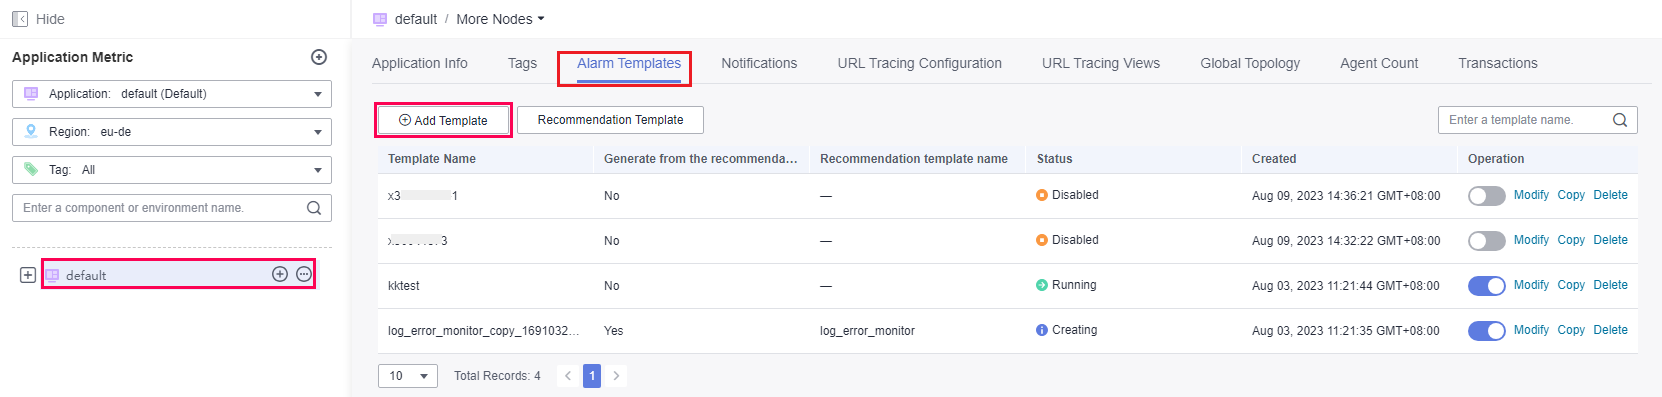
Figure 1 Adding an alarm template
Click Add Template to add an alarm template as prompted.
Enter basic information and then click Next.
Template Name: Enter up to 64 characters. Only letters, digits, underscores (_), and hyphens (-) are allowed.
Remarks: Enter up to 512 characters. Only letters, digits, underscores (_), and hyphens (-) are allowed.
Click Add Alarm Policy to add an alarm policy.
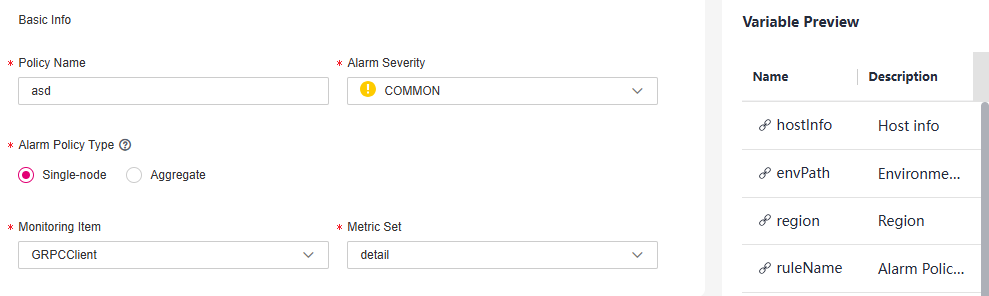
Basic information
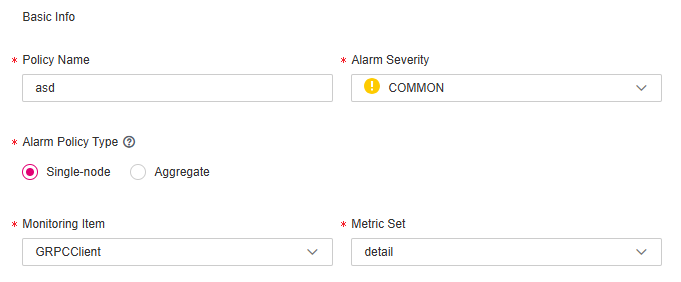
Figure 2 Basic information
Table 1 Basic information about an alarm policy¶ Parameter
Description
Policy Name
Custom name, which cannot be left blank.
Only letters, digits, underscores (_), and hyphens (-) are allowed. Enter up to 512 characters.
Alarm Severity
Severity of an alarm. Options: COMMON and CRITICAL.
Alarm Policy Type
Options: Single-node and Aggregate. Single-node indicates single-instance metric alarms, and Aggregate indicates aggregated metric alarms of all instances under a component.
Monitoring Item
Select a target monitoring item. The information about the selected item is displayed on the right.
Metric Set
Select a target metric set. The information about the selected metric set is displayed on the right.

Alarm rule
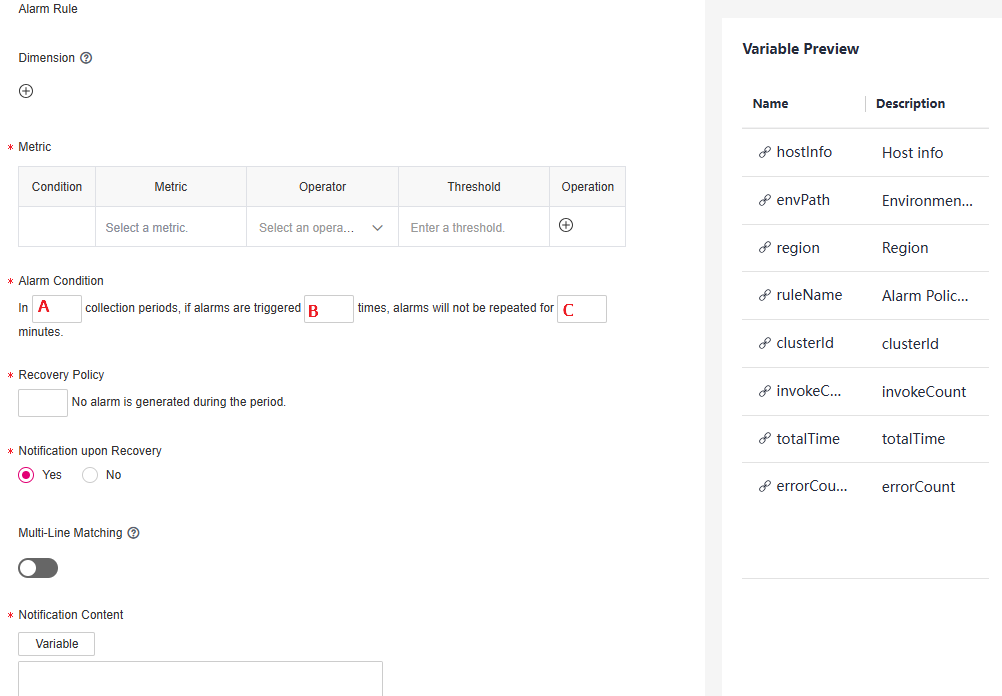
Figure 3 Alarm rule
Table 2 Alarm rule parameters¶ Parameter
Description
Dimension
(Optional) A category of metrics.
Metric
Metric for which you want to define one or more alarm rules.
Metric: a metric in the metric set. For example, if Monitoring Item is set to Url and Metric Set is set to total, you can select the errorCount metric.
Operator: operation to be performed.
Threshold: threshold of the metric.
Alarm Condition
Condition for triggering an alarm.
A: the number of collection periods. Range: 1-10.
B: the number of times the alarm is triggered. Range: 1-10. This value cannot be greater than that of A.
C: period (in minutes) during which identical alarms will not be sent. This period cannot be shorter than 10 minutes.
Recovery Policy
Condition for clearing an alarm. For example, if this parameter is set to 3, the alarm status will change to "Cleared" if no alarm is generated within 3 minutes.
Notification upon Recovery
Whether to notify recipients of alarm clearance.
Multi-Line Matching
(Optional) Whether to define data in the alarm notification content line by line.
Notification Content
Alarm details, which contain up to 500 characters.
If Multi-Line Matching is enabled, the alarm notification content supports both Variable and Loop. If Multi-Line Matching is disabled, only Variable can be selected.
Alarm notification content. You can customize the content or select metrics as required.
Alarm details, which contain up to 500 characters.
Select required metrics. Specifically, on the right of the page, click
 next to the target metric. The metric will then be displayed in the notification content.
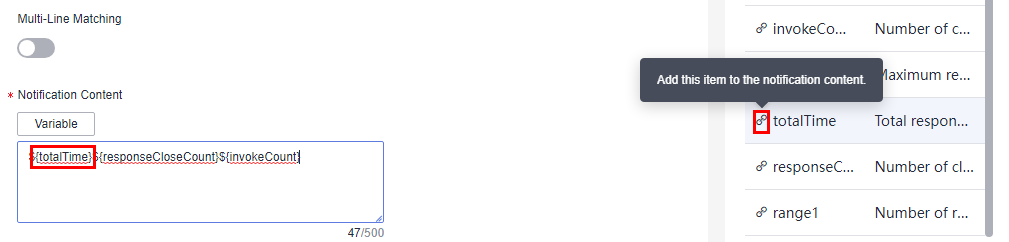
Notification object

Figure 4 Notification object
Table 3 Alarm notification parameters¶ Parameter
Description
Use default settings
If this option is enabled, alarms will be sent to one or more default notification objects. For details about how to set notification objects, see Alarm Notification.
After this option is enabled, you can no longer select notification objects from the Notification Object drop-down list.
If all the values in the Default column of the Notifications page are No, no default notification objects have been set. In this case, the Use default settings option on the alarm policy creation page is dimmed and cannot be enabled.
Notification Object
Select a notification object from the drop-down list.
Alarms will only be sent to the selected notification objects.
Click Yes.
Click Next. The Bind Node page is displayed.
Click Bind Node to bind nodes by environment, environment tag, or region.
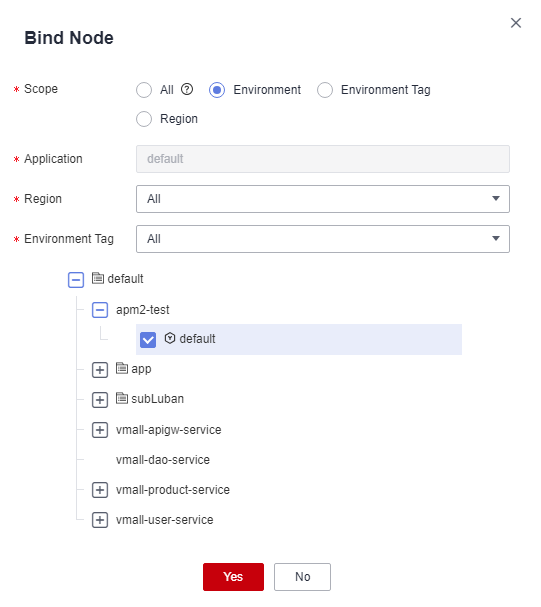
Figure 5 Binding nodes
Table 4 Node parameters¶ Parameter
Description
All
All nodes (including those added subsequently) in all regions will be bound.
Environment
All nodes in the selected environment will be bound.
Environment Tag
All nodes with the same tag will be bound.
Region
All nodes in the selected region will be bound.
Click Yes. The information about the bound nodes is displayed in the lower part of the page, including the environment, tag, and region names.
If there are multiple types of bound nodes, only information about the nodes with the same environment, tag, and region is displayed.
Click Complete.
More Operations
After the alarm template is created, perform the operations listed in Table 5 if needed.
Operation | Description |
|---|---|
Copying a template | Click Copy in the Operation column in the row that contains the template you want to copy. |
Modifying a template | Click Modify in the Operation column in the row that contains the template you want to modify. |
Deleting a template | Click Delete in the Operation column in the row that contains the template you want to delete. |
Starting and stopping a template | Turn on or off the button ( |
 ) in the Operation column in the row that contains the template you want to start or stop.