Creating a Subnet for the VPC
Scenarios
A VPC comes with a default subnet. If the default subnet cannot meet your requirements, you can create one.
The subnet is configured with DHCP by default. When an ECS in this subnet starts, the ECS automatically obtains an IP address using DHCP.
Procedure
Log in to the management console.
Click
 in the upper left corner and select the desired region and project.
On the console homepage, under Network, click Virtual Private Cloud.
In the navigation pane on the left, click Virtual Private Cloud.
On the Virtual Private Cloud page, locate the VPC for which a subnet is to be created and click the VPC name.
On the displayed Subnets tab, click Create Subnet.
Set the parameters as prompted.
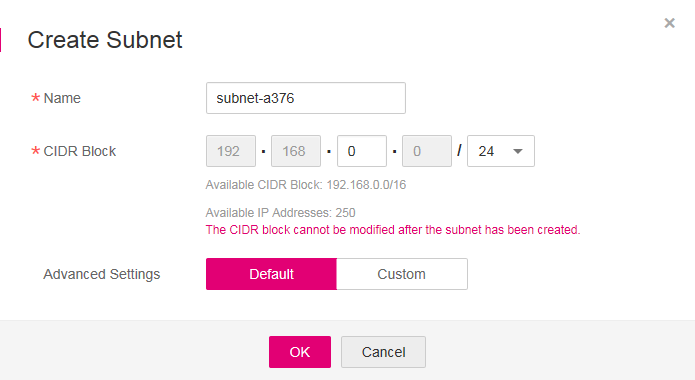
Figure 1 Create Subnet
Table 1 Parameter description¶ Parameter
Description
Example Value
Name
Specifies the subnet name.
The name can contain a maximum of 64 characters, which may consist of letters, digits, underscores (_), hyphens (-), and periods (.). The name cannot contain spaces.
Subnet
CIDR Block
Specifies the CIDR block for the subnet. This value must be within the VPC CIDR block.
192.168.0.0/24
Gateway
Specifies the gateway address of the subnet.
192.168.0.1
DNS Server Address
By default, two DNS server addresses are configured. You can change them if necessary. A maximum of five DNS server addresses can be configured. Multiple IP addresses must be separated using commas (,).
100.125.x.x
NTP Server Address
Specifies the IP address of the NTP server. This parameter is optional.
You can configure the NTP server IP addresses to be added to the subnet as required. The IP addresses are added in addition to the default NTP server addresses. If this parameter is left empty, no IP address of the NTP server is added.
A maximum of four IP addresses can be configured. Multiple IP addresses must be separated using commas (,).
192.168.2.1
Tag
Specifies the subnet tag, which consists of a key and value pair. You can add a maximum of ten tags to each subnet.
The tag key and value must meet the requirements listed in Table 2.
Key: subnet_key1
Value: subnet-01
Table 2 Subnet tag key and value requirements¶ Parameter
Requirements
Example Value
Key
Cannot be left blank.
Must be unique for each subnet.
Can contain a maximum of 36 characters.
Can contain only the following character types:
Uppercase letters
Lowercase letters
Digits
Special characters, including hyphens (-) and underscores (_)
subnet_key1
Value
Can contain a maximum of 43 characters.
Can contain only the following character types:
Uppercase letters
Lowercase letters
Digits
Special characters, including hyphens (-) and underscores (_)
subnet-01
Click OK.
Precautions
When a subnet is created, there are five reserved IP addresses, which cannot be used. For example, in a subnet with CIDR block 192.168.0.0/24, the following IP addresses are reserved:
192.168.0.0: Network ID. This address is the beginning of the private IP address range and will not be assigned to any instance.
192.168.0.1: Gateway address.
192.168.0.253: Reserved for the system interface. This IP address is used by the VPC for external communication.
192.168.0.254: DHCP service address.
192.168.0.255: Network broadcast address.
If you configured the default settings under Advanced Settings during subnet creation, the reserved IP addresses may be different from the default ones, but there will still be five of them. The specific addresses depend on your subnet settings.