Configuring a Security Zone
Security zone can be configured using Ranger. Ranger administrators can divide resources of each component into multiple security zones where administrators set security policies for specified resources in the zones to facilitate management. Policies defined in a security zone apply only to resources in the zone. After service resources are allocated to the security zone, the access permission policies for the resources in the non-security zone do not take effect. The administrator of a security zone can set policies only in the security zone that the administrator belongs to.
Adding a Security Zone
Log in to the Ranger management page as the Ranger administrator.
Click Security Zone. On the zone list page, click
 to add a zone.
Table 1 Parameters for configuring a security zone¶ Parameter
Description
Example Value
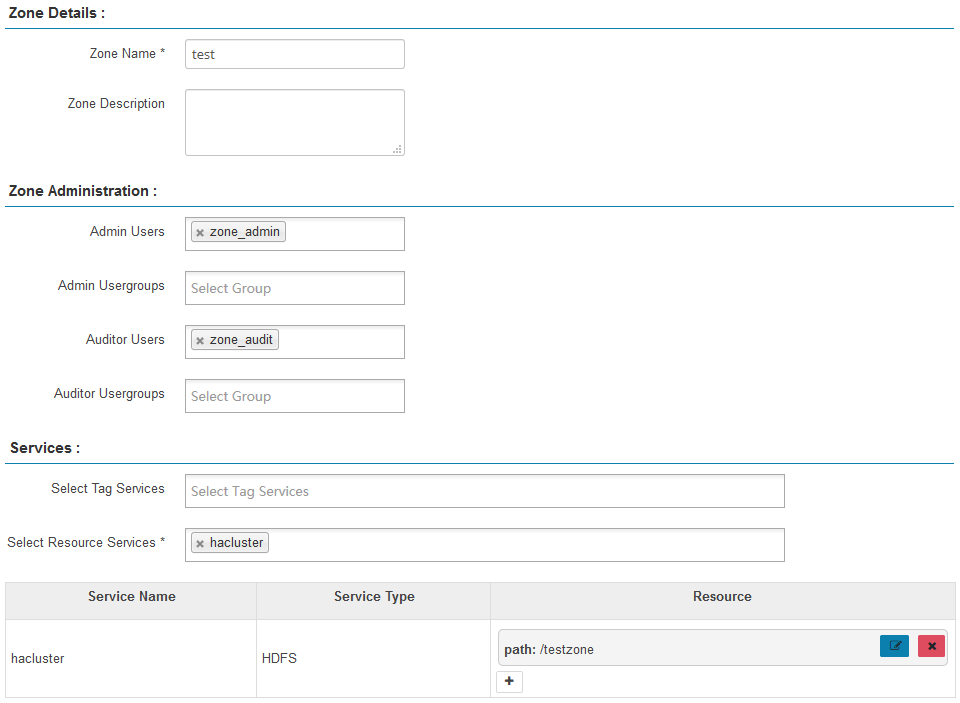
Zone Name
Security zone
test
Zone Description
Description of the security zone
-Admin Users/Admin Usergroups
Management users and user groups in a security zone. You can add and modify permission policies for related resources in the security zone.
At least one user or user group must be configured.
zone_admin
Auditor Users/
Auditor Usergroups
Audit users or user groups to be added. You can view the resource permission policies in the security zone.
At least one user or user group must be configured.
zone_user
Select Tag Services
Tag information of a service
-Select Resource Services
Services and resources in a security zone.
After selecting a service, you need to add specific resource objects in the Resource column, such as the file directories of the HDFS server, Yarn queues, Hive databases and tables, and HBase tables and columns.
/testzone
For example, to create a security zone for the /testzone directory in HDFS, the configuration is as follows:
Click Save and wait until the security zone is added successfully.
The Ranger administrator can view all security zones on the Security Zone page and click Edit to modify the attributes of a security zone. If resources do not need to be managed in a security zone, the Ranger administrator can click Delete to delete the security zone.
Configuring Permission Policies in a Security Zone
Log in to the Ranger management page as the administrator of a security zone.
Select a security zone from the Security Zone drop-down list in the upper right corner of the Ranger home page to switch to the permission view of the security zone.
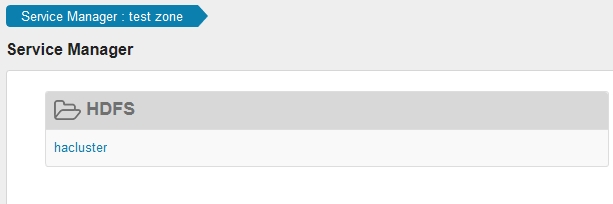
Click the permission plug-in name of a component. The page for security access policy list of the component is displayed.
Note
In the policy list of each component, the default items generated by the system are automatically inherited to the security zone to ensure the permissions of some default users or user groups in the cluster.
Click Add New Policy and configure resource access policies for related users or user groups based on the service scenario plan.
In this example, a policy that allows user test to access the /testzone/test directory is configured in the security zone.
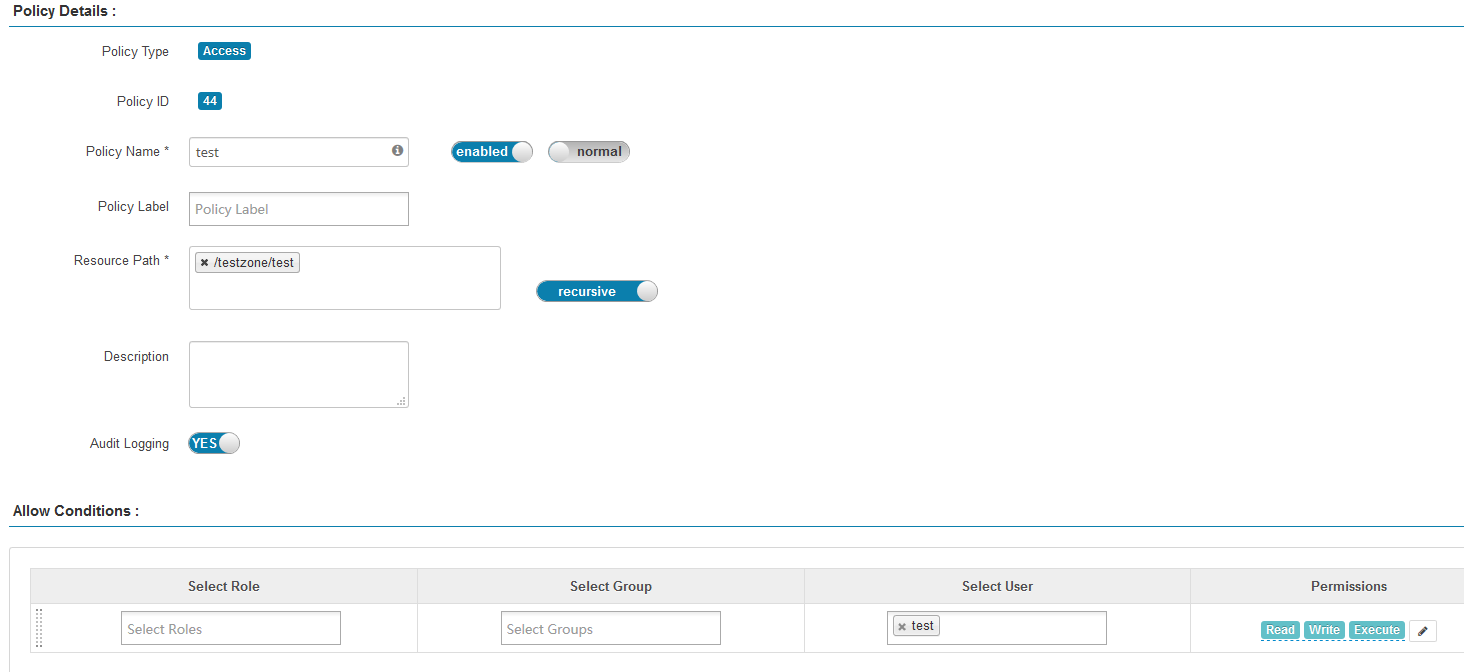
The following access policies are examples for different components:
After the policies are added, wait for about 30 seconds for them to take effect.
Note
Policies defined in a security zone apply only to resources in the zone. After service resources are allocated to the security zone, the access permission policies for the resources in the non-security zone do not take effect.
To configure access policies for resources outside the current security zone, click Security Zone in the upper right corner of the Ranger homepage to exit the current security zone.