Setting Up the Java Development Environment
With the information collected in Collecting Connection Information and the network environment prepared for Kafka clients, you can proceed to configuring Kafka clients. This section describes how to configure Kafka clients to produce and consume messages.
Preparing Tools
Maven
Apache Maven 3.0.3 or later can be downloaded from the Maven official website.
JDK
Java Development Kit1.8.111 or later can be downloaded from the Oracle official website.
After the installation, configure the Java environment variables.
IntelliJ IDEA
IntelliJ IDEA can be downloaded from the IntelliJ IDEA official website and be installed.
Procedure
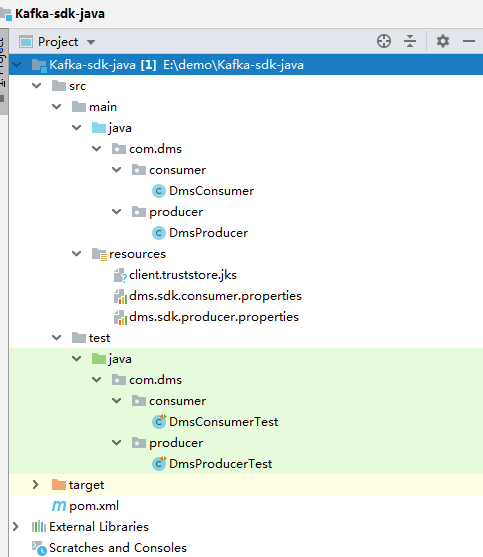
Decompress the package to obtain the following files.
Table 1 Files in the demo package¶ File
Directory
Description
DmsConsumer.java
.\src\main\java\com\dms\consumer
API for consuming messages
DmsProducer.java
.\src\main\java\com\dms\producer
API for producing messages
dms.sdk.consumer.properties
.\src\main\resources
Configuration information for consuming messages
dms.sdk.producer.properties
.\src\main\resources
Configuration information for producing messages
client.jks
.\src\main\resources
SSL certificate, used for SASL_SSL connection
DmsConsumerTest.java
.\src\test\java\com\dms\consumer
Test code of consuming messages
DmsProducerTest.java
.\src\test\java\com\dms\producer
Test code of producing messages
pom.xml
.\
Maven configuration file, containing the Kafka client dependencies
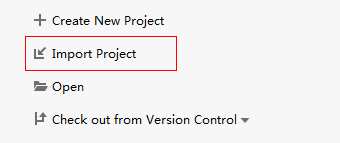
In IntelliJ IDEA, import the demo project.
The demo project is a Java project built in Maven. Therefore, you need the JDK and the Maven plugin in IDEA.

Figure 1 Click Import Project.

Figure 2 Choose Maven.

Figure 3 Select the JDK.
You can select other options or retain the default settings. Click Finish.
The demo project has been imported.

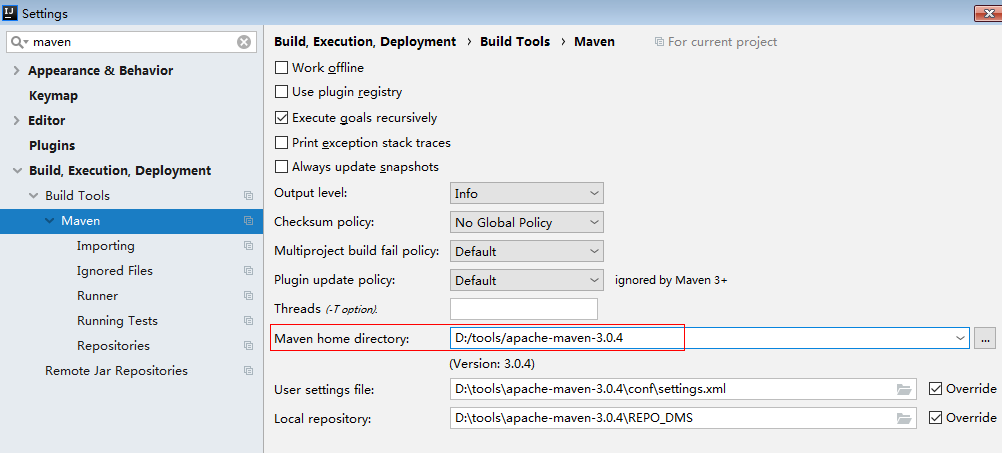
Configure Maven.
Choose Files > Settings, set Maven home directory correctly, and select the required settings.xml file.

Specify Kafka configurations.
This section uses the example of producing messages. For details, see Producer configuration file.
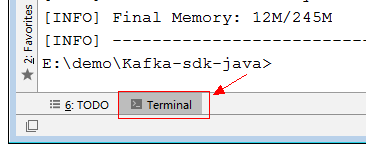
In the down left corner of IDEA, click Terminal. In terminal, run the mvn test command to see how the demo project goes.

Figure 4 Opening terminal in IDEA
The following information is displayed for the producer:
-------------------------------------------------------
 T E S T S
-------------------------------------------------------
Running com.dms.producer.DmsProducerTest
produce msg:The msg is 0
produce msg:The msg is 1
produce msg:The msg is 2
produce msg:The msg is 3
produce msg:The msg is 4
produce msg:The msg is 5
produce msg:The msg is 6
produce msg:The msg is 7
produce msg:The msg is 8
produce msg:The msg is 9
Tests run: 1, Failures: 0, Errors: 0, Skipped: 0, Time elapsed: 138.877 sec
The following information is displayed for the consumer:
-------------------------------------------------------
 T E S T S
-------------------------------------------------------
Running com.dms.consumer.DmsConsumerTest
the numbers of topic:0
the numbers of topic:0
the numbers of topic:6
ConsumerRecord(topic = topic-0, partition = 2, offset = 0, CreateTime = 1557059377179, serialized key size = -1, serialized value size = 12, headers = RecordHeaders(headers = [], isReadOnly = false), key = null, value = The msg is 2)
ConsumerRecord(topic = topic-0, partition = 2, offset = 1, CreateTime = 1557059377195, serialized key size = -1, serialized value size = 12, headers = RecordHeaders(headers = [], isReadOnly = false), key = null, value = The msg is 5)