Creating a Cloud Disk Backup
This section describes how to quickly create a cloud disk backup.
Backing up a server does not impact the disk performance.
Peak hours of the backup service are from 22:00 to 08:00, during which there may be delays. So you are advised to evaluate your service types and schedule backups in discrete time periods.
Prerequisites
A disk can be backed up only when its status is Available or In-use. If you have performed operations such as expanding, attaching, detaching, or deleting a disk, refresh the page first to ensure that the operation is complete and then determine whether to back up the disk.
Procedure
Log in to the CBR console.
Log in to the management console.
Click
 in the upper left corner and select a region.
Click
 and choose Storage > Cloud Backup and Recovery. Select a backup type from the left navigation pane.
On the Cloud Disk Backups page, click the Vaults tab and find the vault to which the disk is associated.
Perform backup in either of the following ways:
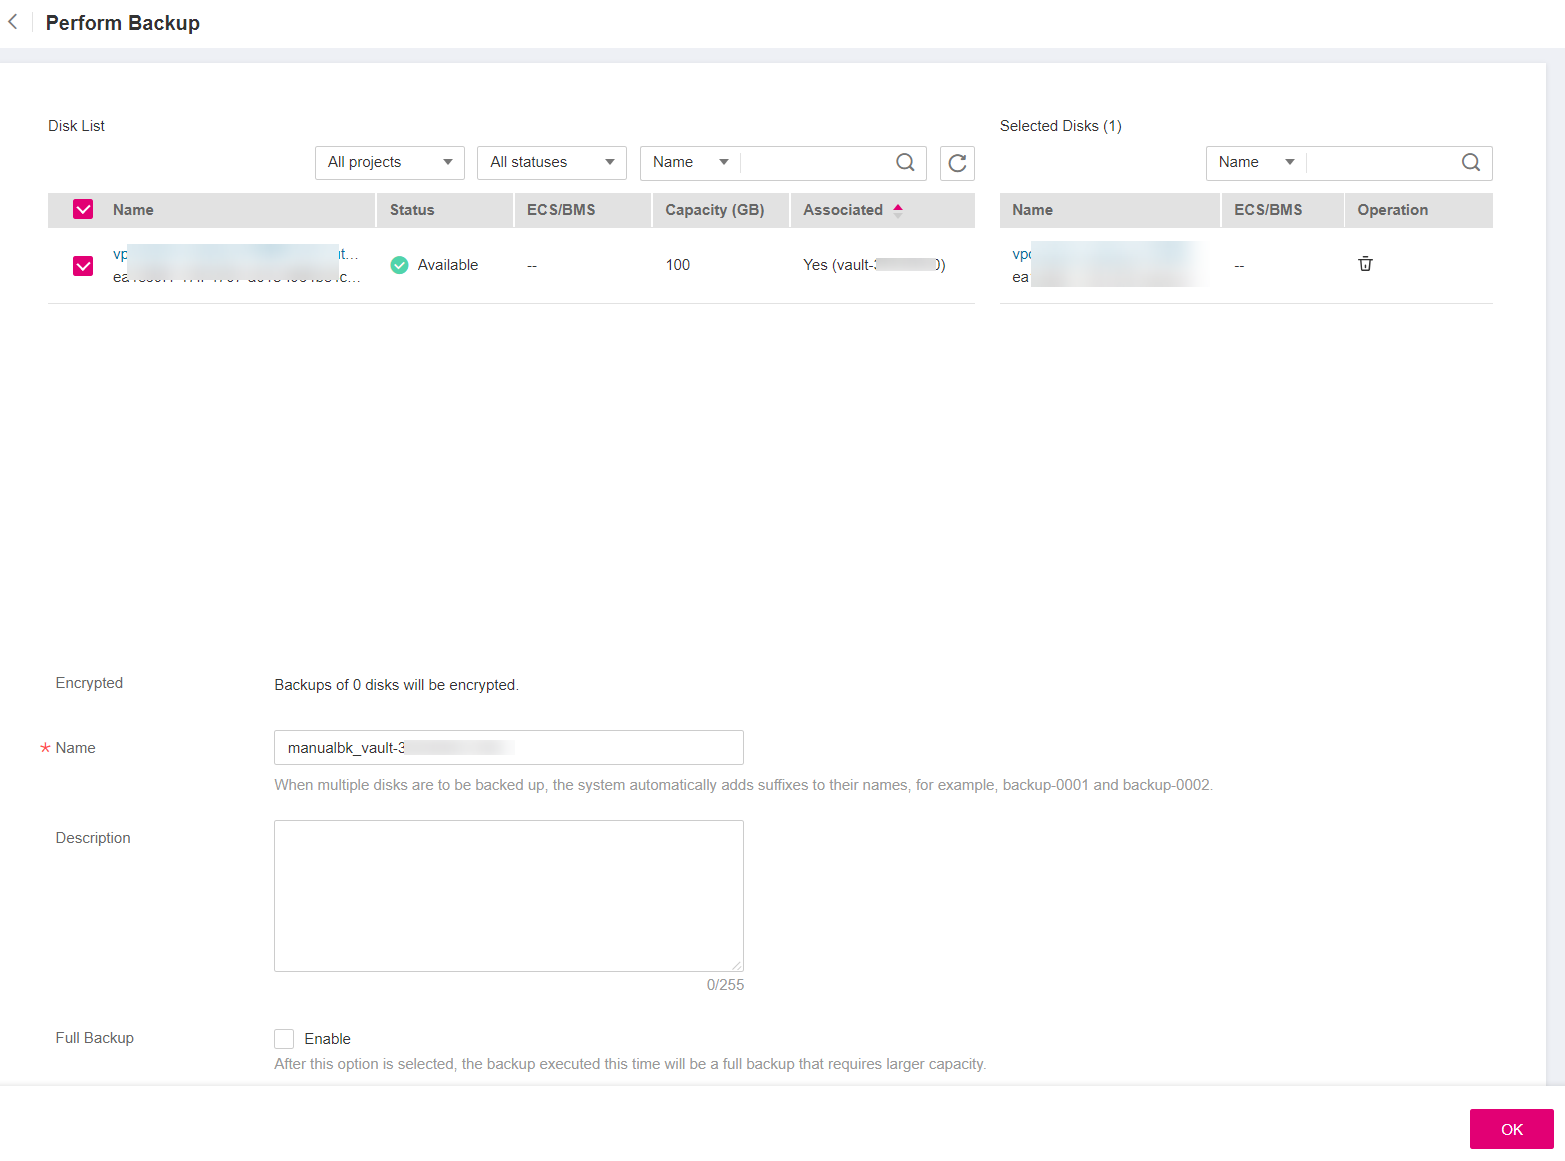
Click Perform Backup in the Operation column. In the disk list, select the disk you want to back up. After a disk is selected, it is added to the list of selected disks. See Figure 1.
Figure 1 Selecting the disk to be backed up
Click the vault name to go to the vault details page. On the Associated Disks tab page, locate the target disk and click Perform Backup in the Operation column. See Figure 2.
Figure 2 Perform Backup

Note
CBR will identify whether the selected disk is encrypted. If it is encrypted, the backups will be automatically encrypted.
Set Name and Description for the backup. Table 1 describes the parameters.
Table 1 Parameter description¶ Parameter
Description
Remarks
Name
Name of the backup you are creating.
A name must contain 1 to 64 characters including digits, letters, underscores (_), or hyphens (-).
Note
You can also use the default name manualbk_xxxx.
If multiple disks are to be backed up, the system automatically adds suffixes to their backup names, for example, backup-0001 and backup-0002.
manualbk_d819
Description
Description of the backup.
It cannot exceed 255 characters.
--
Choose whether to enable full backup. If full backup is enabled, CBR performs a full backup on every associated disk, which requires a larger capacity compared to an incremental backup. See Figure 3.
Figure 3 Full Backup
Click OK. CBR automatically creates a backup for the disk.
On the Backups tab page, if the status of the backup is Available, the backup task is successful.
Note
If you delete data from the disk during the backup, the deleted data may fail to be backed up. Therefore, to ensure data integrity, delete the target data after the backup is complete, and then perform the backup.
After the backup is complete, you can use the backup to restore disk data. For details, see Restoring from a Cloud Disk Backup.