Viewing Basic Information
This section describes how to view domain information and edit server information.
Prerequisites
Login credentials have been obtained.
Procedure
Log in to the management console.
Click
 in the upper left corner of the management console and select a region or project.
Choose Security > Web Application Firewall. In the navigation pane on the left, choose Domains. Figure 1 shows an example. Table 1 describes parameters.
In the upper right corner of the list, query domain information by domain name, policy name, or tag.

Figure 1 Domains page
Note
In the upper part of the domain name list, click Quota details to view the domain name quota.
Table 1 Parameter description¶ Parameter
Description
Name
Protected domain name
Mode
WAF mode of the protected domain name
Enabled: WAF is enabled.
Disabled: WAF is disabled.
Bypassed: In this mode, requests are directly sent to the backend server without passing through WAF.
DNS
DNS resolution status
Unconfigured: The domain name is not connected to WAF or domain connection fails. To solve the problem, see What Should I Do If the DNS Status Is Unconfigured?
Normal: The domain name is connected to WAF.
Protection Status over Past 3 Days
Protection status of the domain name over the past three days. Choose More >View Attack in the Operation column to view specific protection logs.
Policy
Policy configuration of the domain name. Click Configure Policy to configure rules by referring to Rule Configurations.
In the Name column, click the target domain name to go to the basic information page.
View domain information.
View Basic Information and WAF Information. Figure 2 and Figure 3 show examples.
In the upper right corner of the domain information page, click
 to refresh the page.
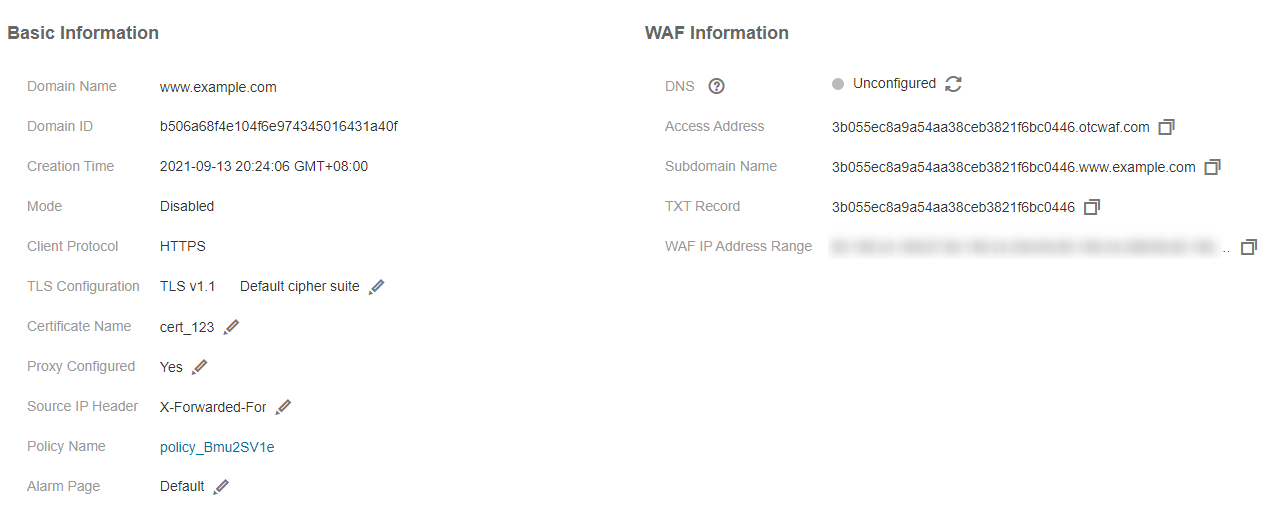
Figure 2 Viewing basic information (with a proxy)
Note
Domain ID: unique ID that is generated randomly for a domain name.
Creation Time: time when the domain name is created.
Click
 in the Access Address, Subdomain Name, TXT Record, or WAF IP Address Range row to copy the required value.
If Client Protocol is set to HTTPS, updating the certificate is required. To do so, click
 next to Certificate Name. In the displayed dialog box, select an existing certificate.
If your web server stops using a proxy, click
next to the value of Proxy Configured. In the dialog box displayed, select No.
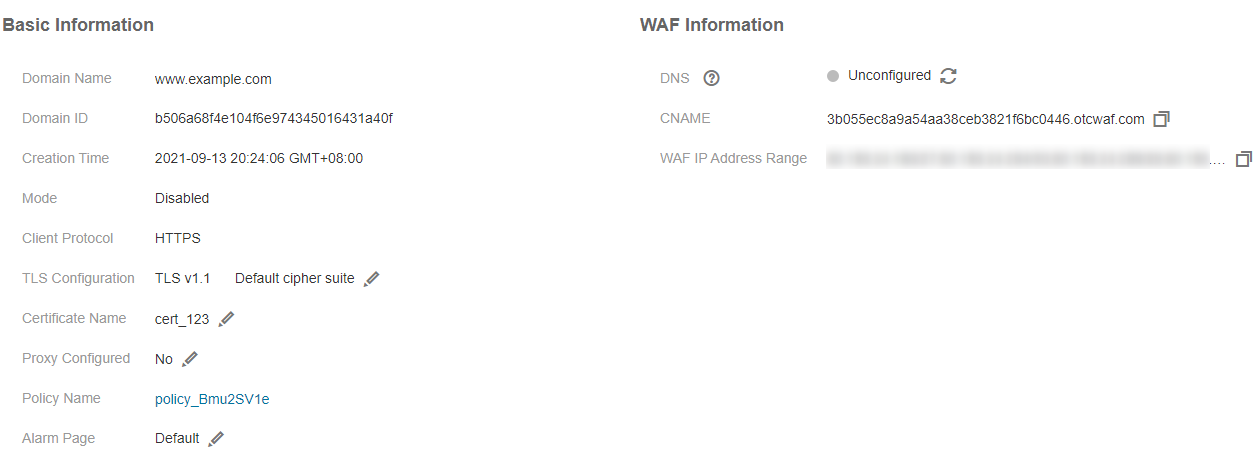
Figure 3 Viewing basic information (without a proxy)
Note
Domain ID: unique ID that is generated randomly for a domain name.
Creation Time: time when the domain name is created.
Click
in the target row to copy the value of CNAME or WAF IP Address Range.If Client Protocol is set to HTTPS, updating the certificate is required. To do so, click
next to Certificate Name. In the displayed dialog box, select an existing certificate.If your web server starts using a proxy, click
next to the value of Proxy Configured. In the dialog box displayed, select Yes.
View Server Information. Figure 4 shows an example.

Figure 4 Server Information
Click Edit Server Information. On the Edit Server Information page shown in Figure 5, edit server configurations (such as client protocol and associated certificate).

Figure 5 Editing server information
Note
Web Application Firewall (WAF) does not support health check. If you want to use health check, use WAF along with Elastic Load Balancing (ELB). For details about how to configure ELB, see Backend Server (Enhanced Load Balancer). After ELB is configured, the elastic IP address (EIP) of ELB is used as the value of Server Address to connect to WAF for health check.
Click the Tags tab and view the tags, as shown in Figure 6.

Figure 6 Tags
In the Operation column of the tag list, click Edit to change the value.
Click Delete to delete a tag. A deleted tag cannot be restored. Exercise caution when performing this operation.
In the upper left corner of the tag list, click Add Tag to add one. See Figure 7.
You can select an existing tag key and tag value from the Tag key and Tag value drop-down lists or click View predefined tags to create a tag on the TMS console.
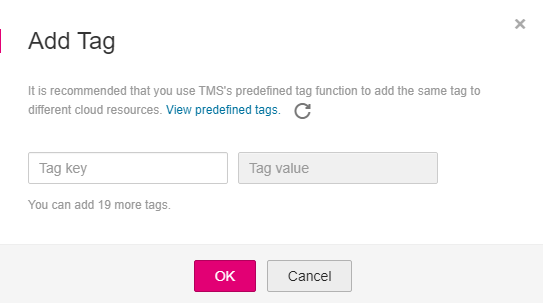
Figure 7 Add Tag