Configuring Multi-VPC Access
VPC provisions an isolated virtual network environment defined and managed by yourself, improving the security of cloud resources and simplifying network deployment. When using SFS, a file system and the associated ECSs need to belong to the same VPC for file sharing.
In addition, VPC can use network access control lists (ACLs) to implement access control. A network ACL is an access control policy system for one or more subnets. Based on inbound and outbound rules, it determines whether data packets are allowed in or out of any associated subnet. In the VPC list of a file system, each time an authorized address is added and corresponding permissions are set, a network ACL is created.
For more information about VPC, see the Virtual Private Cloud User Guide.
Scenarios
Multi-VPC access can be configured for an SFS Capacity-Oriented or a general purpose file system so that ECSs in different VPCs can share the same file system, as long as the VPCs that the ECSs belong to are added as authorized VPCs of the file system or the ECS IP addresses are added as authorized IP addresses of the VPCs.
This section describes how to configure multi-VPC access for an SFS Capacity-Oriented or a general purpose file system.
Restrictions
You can add a maximum of 20 VPCs for each file system. A maximum of 400 ACL rules for added VPCs can be created. When adding a VPC, the default IP address 0.0.0.0/0 is automatically added.
If a VPC added to a file system has been deleted from the VPC console, the IP addresses or IP address ranges of this VPC can still be seen as activated in the file system's VPC list. But this VPC can no longer be used and you are advised to delete it from the list.
You need to configure a VPC endpoint for each VPC you want to create the general purpose file system. Or, the file system will fail to be mounted.
Procedure for SFS Capacity-Oriented
Log in to the SFS console.
In the file system list, click the name of the target file system. On the displayed page, locate the Authorizations area.
If no VPCs are available, create one. You can add multiple VPCs for a file system. Click Add Authorized VPC and the Add Authorized VPC dialog box is displayed. See Figure 1.
You can select multiple VPCs from the drop-down list.
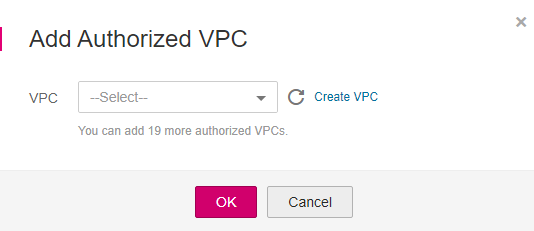
Figure 1 Adding VPCs
Click OK. A successfully added VPC is displayed in the list. When adding a VPC, the default IP address 0.0.0.0/0 is automatically added. The default read/write permission is Read-write, the default user permission is no_all_squash, and the default root permission is no_root_squash.
View the VPC information in the VPC list. For details about the parameters, see Table 1.
Table 1 Parameter description¶ Parameter
Description
Name
Name of the added VPC, for example, vpc-01
Authorized Addresses/Segments
Number of added IP addresses or IP address segments
Operation
The value can be Add or Delete. Add: Adds an authorized VPC. This operation configures the IP address, read/write permission, user permission, user root permission, and priority. For details, see Table 2. Delete: Deletes this VPC.
Click
 on the left of the VPC name to view details about the IP addresses/segments added to this VPC. You can add, edit, or delete IP addresses/segments. In the Operation column of the target VPC, click Add. The Add Authorized Address/Segment dialog box is displayed. See Figure 2. Table 2 describes the parameters to be configured.
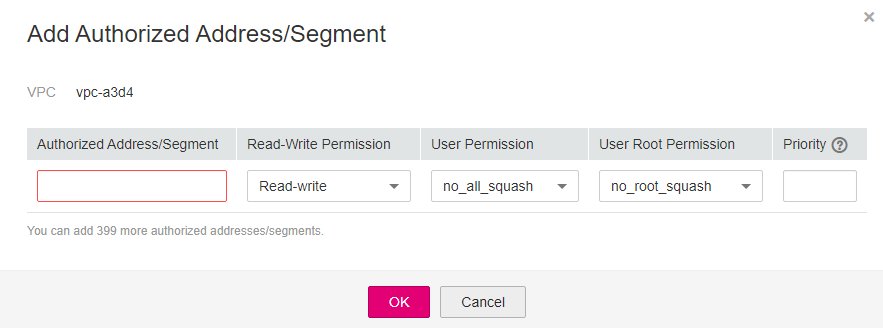
Figure 2 Adding an authorized address or segment
Table 2 Parameter description¶ Parameter
Description
Authorized Address/Segment
Enter one IPv4 address or address segment at a time.
The entered IPv4 address or address segment must be valid and cannot be one starting with 0 except 0.0.0.0/0. If you add 0.0.0.0/0, any IP address within this VPC will be authorized for accessing the file system. Class D and class E IP addresses are not supported. Therefore, do not enter an IP address or address segment starting with any number ranging from 224 to 255, for example 224.0.0.1 or 255.255.255.255. IP addresses or address segments starting with 127 are also not supported. If an invalid IP address or address segment is used, the access rule may fail to be added or the added access rule cannot take effect.
Do not enter multiple IP addresses (separated using commas) at a time. For example, do not enter 10.0.1.32,10.5.5.10.
If you enter an IP address segment, enter it in the format of IP address/mask. For example, enter 192.168.1.0/24. Do not enter in the format of 192.168.1.0-255 or 192.168.1.0-192.168.1.255. The number of bits in a subnet mask must be an integer ranging from 0 to 31, and mask value 0 is valid only in 0.0.0.0/0.
Read-Write Permission
The value can be Read-write or Read-only. The default value is Read-write.
User Permission
Whether to retain the user identifier (UID) and group identifier (GID) of the shared directory. The default value is no_all_squash.
all_squash: The UID and GID of a shared directory are mapped to user nobody, which is applicable to public directories.
no_all_squash: The UID and GID of a shared directory are retained.
User Root Permission
Whether to allow the root permission of the client. The default value is no_root_squash.
root_squash: Clients cannot access as the root user. When a client accesses as the root user, the user is mapped to the nobody user.
no_root_squash: Clients are allowed to access as the root user who has full control and access permissions of the root directories.
Priority
The value must be an integer ranging from 0 to 100. 0 indicates the highest priority, and 100 indicates the lowest priority. In the same VPC, the permission of the IP address or address segment with the highest priority is preferentially used. If some IP addresses or address segments are of the same priority, the permission of the most recently added or modified one is used.
For example, if the IP address for mounting is 10.1.1.32 and both 10.1.1.32 (read/write) with priority 100 and 10.1.1.0/24 (read-only) with priority 50 meet the requirements, the permission of 10.1.1.0/24 (read-only) with priority 50 is used. That is, if there is no other authorized priority, the permission of all IP addresses in the 10.1.1.0/24 segment, including 10.1.1.32, is read-only.
Note
For an ECS in VPC A, its IP address can be added to the authorized IP address list of VPC B, but the file system of VPC B cannot be mounted to this ECS. The VPC of the ECS and the file system must be the same.
Procedure for General Purpose File System
Log in to the SFS console.
In the file system list, click the name of the target file system. On the displayed page, locate the permissions list.
If no VPCs are available, create one. Click Add VPC.
Table 3 describes the parameters.
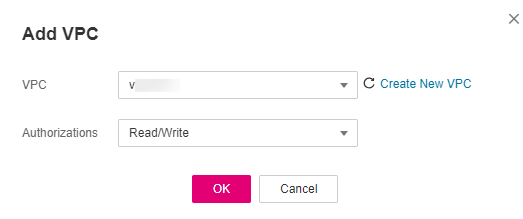
Figure 3 Add VPC
Table 3 Parameter description¶ Parameter
Description
VPC
VPC you want to add, for example, vpc-30e0. If no VPC is available, create one.
Authorizations
The value can be Read/Write or Read-only. The default value is Read/Write.
Click OK. The added VPC will be displayed in the list.
On the VPC Endpoints page, click Create VPC Endpoint.
The Create VPC Endpoint page is displayed.
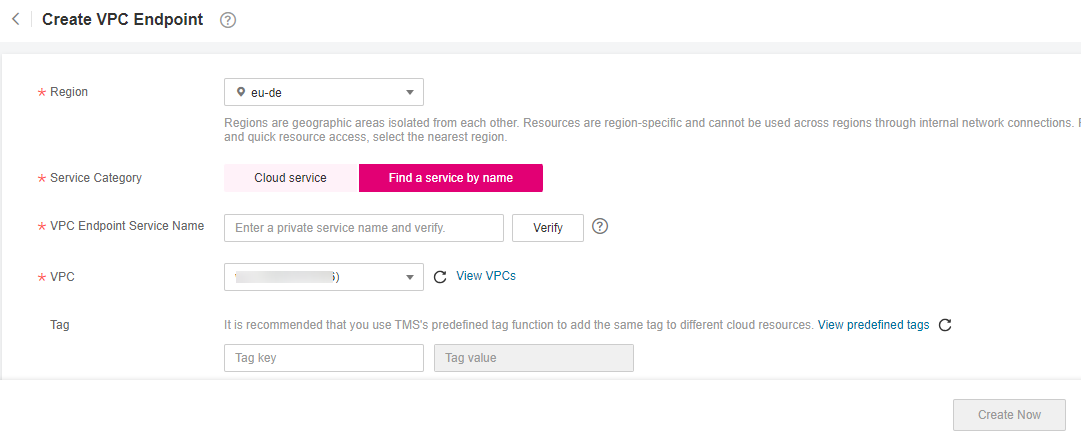
Figure 4 Create VPC Endpoint
Set the parameters as prompted.
Table 4 Parameters for purchasing an endpoint¶ Parameter
Description
Region
Region where the VPC endpoint is located. Ensure that this region is the same as the one where the planned general purpose file system resides.
Service Category
Select Find a service by name.
After entering the service name, click Verify.
If Service name found is displayed, proceed with subsequent steps.
If Service name not found is displayed, check whether the entered service name is correct. If the problem persists, contact the website administrator.
VPC
Select the VPC you have added as authorized VPC of the general purpose file system.
Tag
Optional
VPC endpoint tags. Each tag consists of a key and a value.
Tag keys and values must meet the requirements listed in Table 5.
Note
If a predefined tag has been created in TMS, you can select the corresponding tag key and value.
For details about predefined tags, see section "Predefined Tag Overview" in the Tag Management Service User Guide.
Table 5 describes the tag parameters.
Table 5 Tag parameter description¶ Parameter
Description
Example Value
Tag key
Each tag has a unique key. You can customize the key or select the key of an existing tag created in TMS.
A tag key:
Can contain 1 to 36 Unicode characters.
Can contain only letters, digits, hyphens (-), and underscores (_).
Key_0001
Tag value
A tag value can be repetitive or left blank.
A tag value:
Can contain 0 to 43 Unicode characters.
Can contain only letters, digits, hyphens (-), and underscores (_).
Value_0001
Click Next.
If you do not need to modify the specifications, click Submit.
If you need to modify the specifications, click Previous, modify the parameters as needed, and then click Submit.
Go back to the VPC endpoint list and check whether the status of the VPC endpoint changes to Accepted. If so, the VPC endpoint has been connected to the VPC endpoint service.
Verification
After another VPC is configured for the file system, if the file system can be mounted to ECSs in the VPC and the ECSs can access the file system, the configuration is successful.
Example
A user creates an SFS Capacity-Oriented file system A in VPC-B. The network segment is 10.0.0.0/16. The user has an ECS D in VPC-C, using the private IP address 192.168.10.11 in network segment 192.168.10.0/24. If the user wants to mount file system A to ECS D and allow the file system to be read and written, the user needs to add VPC-C to file system A's VPC list, add ECS D's private IP address or address segment to the authorized addresses of VPC-C, and then set Read-Write Permission to Read-write.
The user purchases an ECS F that uses the private IP address 192.168.10.22 in the VPC-C network segment 192.168.10.0/24. If the user wants ECS F to have only the read permission for file system A and its read priority to be lower than that of ECS D, the user needs to add ECS F's private IP address to VPC-C's authorized addresses, set Read-Write Permission to Read-only, and set Priority to an integer between 0 and 100 and greater than the priority set for ECS D.