Deploying an AI Application Created Using a Custom Image as a Service
For AI engines that are not supported by ModelArts, you can import the models you compile to ModelArts from custom images for creating the AI applications. This section describes how to use a custom image to create an AI application and deploy it as a real-time service.
The general procedure is as follows:
Building an Image Locally: Create a custom image package locally. For details about the image package specifications, see Custom Image Specifications for Creating an AI Application.
Verifying the Image on the Local Host and Uploading the Image to SWR: Verify the API functions of the custom image and upload the custom image to SWR.
Creating an AI Application Using a Custom Image: Import the image uploaded to SWR to ModelArts model management.
Deploying the AI Application as a Real-Time Service: Deploy the imported model.
Building an Image Locally
A Linux x86_x64 host is used here. You can use an existing local host to create a custom image.
Install Docker. For details, see Docker Documentation. You can install Docker as follows:
curl -fsSL get.docker.com -o get-docker.sh
sh get-docker.sh
Obtain basic images. Ubuntu18.04 is used in this example.
docker pull ubuntu:18.04
Create the self-define-images folder, and compile the Dockerfile file and the test_app.py application service code for the custom image in the folder. In this sample code, the application service code uses the Flask framework.
The file structure is as follows:
self-define-images/
    --Dockerfile
    --test_app.py
Dockerfile
From ubuntu:18.04
# Configure the source and install Python, Python3-PIP, and Flask.
RUN cp -a /etc/apt/sources.list /etc/apt/sources.list.bak && \
  sed -i "s@http://.*security.ubuntu.com@http://repo.xxx.com@g" /etc/apt/sources.list && \
  sed -i "s@http://.*archive.ubuntu.com@http://repo.xxx.com@g" /etc/apt/sources.list && \
  apt-get update && \
  apt-get install -y python3 python3-pip && \
  pip3 install  --trusted-host https://repo.xxx.com -i https://repo.xxx.com/repository/pypi/simple  Flask

# Copy the application service code to the image.
COPY test_app.py /opt/test_app.py

# Specify the boot command of the image.
CMD python3  /opt/test_app.py
test_app.py
from flask import Flask, request
import json
app = Flask(__name__)

@app.route('/greet', methods=['POST'])
def say_hello_func():
    print("----------- in hello func ----------")
    data = json.loads(request.get_data(as_text=True))
    print(data)
    username = data['name']
    rsp_msg = 'Hello, {}!'.format(username)
    return json.dumps({"response":rsp_msg}, indent=4)

@app.route('/goodbye', methods=['GET'])
def say_goodbye_func():
    print("----------- in goodbye func ----------")
    return '\nGoodbye!\n'


@app.route('/', methods=['POST'])
def default_func():
    print("----------- in default func ----------")
    data = json.loads(request.get_data(as_text=True))
    return '\n called default func !\n {} \n'.format(str(data))

# host must be "0.0.0.0", port must be 8080
if __name__ == '__main__':
    app.run(host="0.0.0.0", port=8080)
Note
ModelArts forwards requests to port 8080 of the service started from the custom image. Therefore, the service listening port in the container must be port 8080. See the test_app.py file.
Go to the self-define-images folder and run the following command to create custom image test:v1:
docker build -t test:v1 .
You can run docker image to view the custom image you have created.
Verifying the Image on the Local Host and Uploading the Image to SWR
Run the following command in the local environment to start the custom image:
docker run -it -p 8080:8080 test:v1
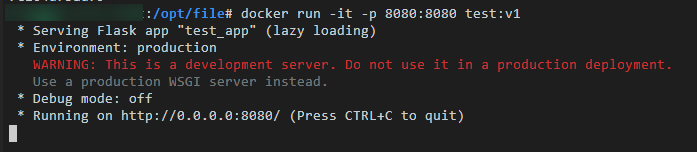
Figure 1 Starting a custom image
Open another terminal and run the following commands to verify the functions of the three APIs of the custom image:
curl -X POST -H "Content-Type: application/json" --data '{"name":"Tom"}'  127.0.0.1:8080/
curl -X POST -H "Content-Type: application/json" --data '{"name":"Tom"}' 127.0.0.1:8080/greet
curl -X GET 127.0.0.1:8080/goodbye
If information similar to the following is displayed, the function verification is successful.

Figure 2 API function verification
Upload the custom image to SWR. For details about how to upload an image, see Software Repository for Container (SWR) User Guide.
After the custom image is uploaded, view the uploaded image on the My Images > Private Images page of the SWR console.
Creating an AI Application Using a Custom Image
When you import a meta model from a container image, pay attention to the following parameters:
Meta Model Source: Select Container image.
Container Image Path: Select the created private image.
Apis : This parameter is used to edit the apis of a custom image and is optional. The model APIs must comply with ModelArts specifications. For details, see "Specifications for Compiling the Model Configuration File".
The configuration file is as follows:
[{
        "url": "/",
        "method": "post",
        "request": {
            "Content-type": "application/json"
        },
        "response": {
            "Content-type": "application/json"
        }
    },
{
        "url": "/greet",
        "method": "post",
        "request": {
            "Content-type": "application/json"
        },
        "response": {
            "Content-type": "application/json"
        }
    },
{
        "url": "/goodbye",
        "method": "get",
        "request": {
            "Content-type": "application/json"
        },
        "response": {
            "Content-type": "application/json"
        }
    }
]
Deploying the AI Application as a Real-Time Service
Deploy the AI application as a real-time service. For details, see "Deploying a Model as a Real-Time Service".
View the details about the real-time service.
Access the real-time service on the Predictions tab page.