Creating an Algorithm
Your locally developed algorithms or algorithms developed using other tools can be uploaded to ModelArts for unified management. Note the following when creating a custom algorithm:
Prerequisites
Training data is available. You can create a dataset in ModelArts or upload an existing dataset used for training to the OBS directory.
Your training script has been uploaded to an OBS directory. For details about how to develop a training script, see Developing a Custom Script.
At least one empty folder has been created in OBS for storing the training output.
Accessing the Algorithm Creation Page
Log in to the ModelArts console and choose Algorithm Management in the navigation pane on the left.
On the My algorithm page, click Create. The Create Algorithm page is displayed.
Setting Basic Information
Enter basic information, including Name and Description.

Figure 1 Setting basic information
Setting the Boot Mode
Select a preset image to create an algorithm.
Set Image, Code Directory, and Boot File based on the algorithm code. Ensure that the framework of the AI image you select is the same as the one you use for editing algorithm code. For example, if TensorFlow is used for editing algorithm code, select a TensorFlow image when you create an algorithm.
Parameter | Description |
|---|---|
Boot Mode > Preset image | AI images supported by the new-version training are displayed by default. For details, see Overview. |
Code Directory | OBS path for storing the algorithm code. The files required for training, such as the training code, dependence installation packages, and pre-generated models, are uploaded to the code directory. The code directory cannot contain files and directories uploaded by others or irrelevant files or directories. Otherwise, uploading data may fail. Do not store training data in the code directory. When the training job starts, the data stored in the code directory will be downloaded to the backend. A large amount of training data may lead to a download failure. After you create the training job, ModelArts downloads the code directory and its subdirectories to the training container. Take OBS path obs://obs-bucket/training-test/demo-code as an example. The content in the OBS path will be automatically downloaded to ${MA_JOB_DIR}/demo-code in the training container, and demo-code (customizable) is the last-level directory of the OBS path. Note
|
Boot File | The file must be stored in the code directory and end with .py. ModelArts supports boot files edited only in Python. The boot file in the code directory is used to start a training job. |

Figure 2 Using a custom script to create an algorithm
Configuring Pipelines
A preset image-based algorithm obtains data from an OBS bucket or dataset for model training. The training output is stored in an OBS bucket. The input and output parameters in your algorithm code must be parsed to enable data exchange between ModelArts and OBS. For details about how to develop code for training on ModelArts, see Developing a Custom Script.
When you use a preset image to create an algorithm, configure the input and output parameters defined in the algorithm code.
Input configurations
Table 2 Input configurations¶ Parameter
Description
Parameter Name
If you use argparse in the algorithm code to parse data_url into the data input, set this parameter to data_url when creating the algorithm. Set this parameter based on the data input parameter in your algorithm code.
The code path parameter must be the same as the data input parameter parsed in your algorithm code. Otherwise, the algorithm code cannot obtain the input data.
Description
Customize the description of the input parameter.
Obtained from
Select a source of the input parameter, Hyperparameters (default) or Environment variables.
Constraints
Enable this parameter to specify the input source. You can select a storage path or ModelArts dataset. This parameter is optional.
If you select a ModelArts dataset, set the following parameters:
Labeling Type: For details, see Creating a Labeling Job.
Data Format, which can be Default, CarbonData, or both. Default indicates the manifest format.
Data Segmentation is available only for image classification, object detection, text classification, and sound classification datasets.
The options are Segmented dataset, Dataset not segmented, and Unlimited. For details, see Publishing a Data Version.
Add
Add multiple input data sources based on your algorithm.
Output configurations
Table 3 Output configurations¶ Parameter
Description
Parameter Name
If you use argparse in the algorithm code to parse train_url into the data output, set this parameter to train_url when creating the algorithm. Set this parameter based on the data output parameter in your algorithm code.
The code path parameter must be the same as the data output parameter parsed in your algorithm code. Otherwise, the algorithm code cannot obtain the output path.
Description
Customize the description of the output parameter.
Obtained from
Select a source of the output parameter, Hyperparameters (default) or Environment variables.
Add
Add multiple output data paths based on your algorithm.
Defining Hyperparameters
When you use a preset image to create an algorithm on ModelArts, you can customize hyperparameters so you can review or modify them anytime. Defined hyperparameters are displayed in the boot command and passed to your boot file as CLI parameters.
Import hyperparameters.
You can click Add hyperparameter to manually add hyperparameters.
Edit hyperparameters. For details, see Table 4.
Table 4 Hyperparameter parameters¶ Parameter
Description
Name
Enter the hyperparameter name.
Enter 1 to 64 characters. Only letters, digits, hyphens (-), and underscores (_) are allowed.
Type
Select the data type of the hyperparameter. The value can be String, Integer, Float, or Boolean
Default
Set the default value of the hyperparameter. This value will be used for training jobs by default.
Restrain
Click Restrain and set the range of the default value or enumerated value in the dialog box displayed.
Required
Whether the hyperparameter is mandatory. The value can be Yes or No. If you select No, you can delete the hyperparameter on the training job creation page when using this algorithm to create a training job. If you select Yes, the hyperparameter cannot be deleted.
Description
Enter the description of the hyperparameter.
Only letters, digits, spaces, hyphens (-), underscores (_), commas (,), and periods (.) are allowed.
Supported Policies
Only the pytorch_1.8.0-cuda_10.2-py_3.7-ubuntu_18.04-x86_64 and tensorflow_2.1.0-cuda_10.1-py_3.7-ubuntu_18.04-x86_64 images are available for auto search.
Adding Training Constraints
You can add training constraints of the algorithm based on your needs.
Resource Type: The options are CPU, Ascend, and GPU. You can select multiple options.
Multicard Training: Select supported or not supported.
Distributed Training: Select supported or not supported.
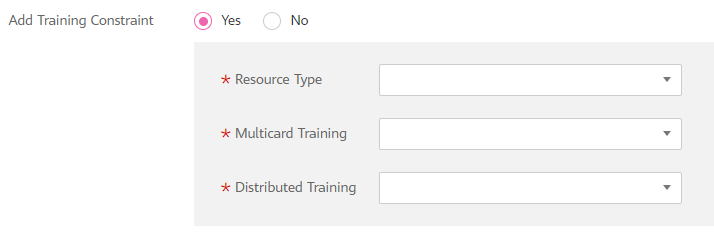
Figure 3 Training constraints
Previewing the Runtime Environment
When creating an algorithm, click the arrow on 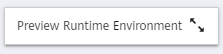 in the lower right corner of the page to know the paths of the code directory, boot file, and input and output data in the training container.
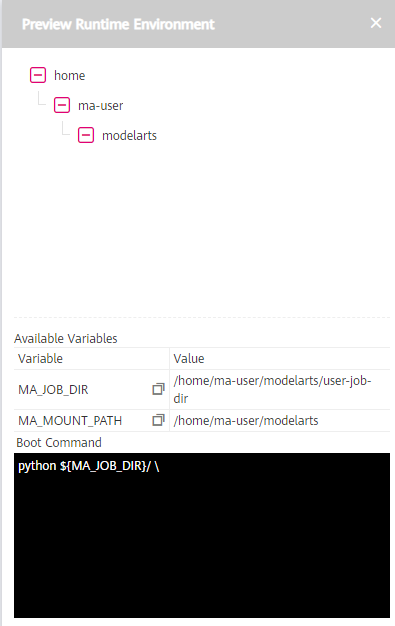
Figure 4 Preview Runtime Environment
Follow-Up Operations
After an algorithm is created, use it to create a training job. For details, see Creating a Training Job.