Named Entity Recognition
Named entity recognition assigns labels to named entities in text, such as time and locations. Before labeling, you need to understand the following:
A label name can contain a maximum of 32 characters, including letters, digits, hyphens (-), and underscores (_).
Starting Labeling
Log in to the ModelArts console. In the navigation pane, choose Data Management > Datasets. The Datasets page is displayed.
In the dataset list, select the dataset to be labeled based on the labeling type, and click the dataset name to go to the Dashboard tab page of the dataset.
By default, the Dashboard tab page of the current dataset version is displayed. If you need to label the dataset of another version, click the Versions tab and then click Set to Current Version in the right pane. For details, see Managing Dataset Versions.
On the Dashboard page of the dataset, click Label in the upper right corner. The dataset details page is displayed. By default, all data of the dataset is displayed on the dataset details page.
Labeling Content
The dataset details page displays the labeled and unlabeled text files in the dataset. The Unlabeled tab page is displayed by default.
On the Unlabeled tab page, the objects to be labeled are listed in the left pane. In the list, click the text object to be labeled, select a part of text displayed under Label Set for labeling, and select a label in the Label Set area in the right pane. Multiple labels can be added to a labeling object.
You can repeat this operation to select objects and add labels to the objects.
Click Save Current Page in the lower part of the page to complete the labeling.
Adding Labels
Adding labels on the Unlabeled tab page: Click the plus sign (+) next to Label Set. On the Add Label page that is displayed, add a label name, select a label color, and click OK.
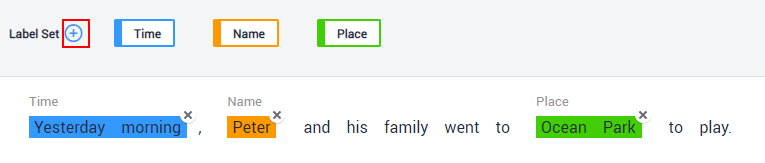
Figure 1 Adding a named entity label (1)
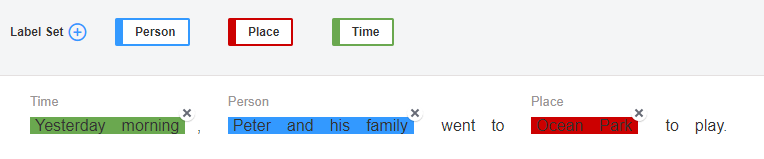
Figure 2 Adding a named entity label (1)
Adding labels on the Labeled tab page: Click the plus sign (+) next to All Labels. On the Add Label page that is displayed, add a label name, select a label color, and click OK.
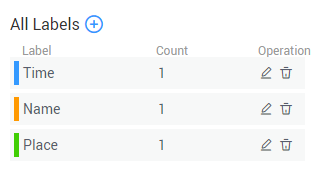
Figure 3 Adding a named entity label (2)

Figure 4 Adding a named entity label
Viewing the Labeled Text
On the dataset details page, click the Labeled tab to view the list of the labeled text. You can also view all labels supported by the dataset in the All Labels area on the right.
Modifying Labeled Data
After labeling data, you can modify labeled data on the Labeled tab page.
On the dataset details page, click the Labeled tab, and modify the text information in the label information area on the right.
Modifying based on texts
On the dataset details page, click the Labeled tab, and select the text to be modified from the text list.
Manual deletion: In the text list, click the text. When the text background turns blue, the text is selected. On the right of the page, click
 above a text label to delete the label.
Modifying based on labels
On the dataset details page, click the Labeled tab. The information about all labels is displayed on the right.
Batch modification: In the All Labels area, click the editing icon in the Operation column, add a label name in the text box, select a label color, and click OK.
Batch deletion: In the All Labels area, click the deletion icon in the Operation column to delete the label. In the dialog box that is displayed, select Delete label or Delete label and objects with only the label, and click OK.
Adding Files
In addition to automatically synchronizing data from Input Dataset Path, you can directly add text files on ModelArts for data labeling.
On the dataset details page, click the Unlabeled tab. Then click Add File.
In the displayed Add File dialog box, set the parameters as required and then select the file to be uploaded.
Select one or more files to be uploaded in the local environment. Only .txt and .csv files are supported. The total size of files uploaded at a time cannot exceed 8 MB.
In the Add File dialog box, click Upload. The files you add will be automatically displayed on the Unlabeled tab page.
Deleting a File
You can quickly delete the files you want to discard.
On the Unlabeled tab page, select the text to be deleted, and click Delete in the upper left corner to delete the text.
On the Labeled tab page, select the text to be deleted and click Delete. Alternatively, tick Select Current Page to select all text objects on the current page and click Delete in the upper left corner.
The background of the selected text is blue.