Authentication
You can use either of the authentication methods below to call APIs. AK/SK-based authentication is recommended because it is more secure than token-based authentication.
Token-based authentication: General requests are authenticated using tokens.
AK/SK-based authentication: Requests are authenticated by encrypting the request body using an AK/SK.
Token-based Authentication
Note
The validity period of a token is 24 hours. When using a token for authentication, cache it to prevent frequently calling the IAM API used to obtain a user token.
A token specifies certain permissions in a computer system. During token-based authentication, the token is added to requests to get permissions for calling the API.
In Making an API Request, the process of calling the API used to obtain a user token is described.
{
    "auth": {
        "identity": {
            "methods": [
                "password"
            ],
            "password": {
                "user": {
                    "name": "user_name",
                    "password": "user_password",
                    "domain": {
                        "name": "domain_name"
                    }
                }
            }
        },
        "scope": {
            "project": {
                "name": "project_name"
            }
        }
    }
}
After a token is obtained, the X-Auth-Token header must be added to requests to specify the token when calling other APIs. For example, if the token is ABCDEFJ...., add X-Auth-Token: ABCDEFJ.... to a request as follows:
POST https://{endpoint}/v1/{project_id}/services
Content-Type: application/json
X-Auth-Token: ABCDEFJ....
AK/SK-based Authentication
You can use AK/SK encryption to verify the identity of a request sender. In AK/SK-based authentication, a signature needs to be obtained and then added to requests.
Note
AK: access key ID, which is a unique identifier used with a secret access key to sign requests cryptographically.
SK: secret access key, which is used in conjunction with an AK to sign requests cryptographically. It identifies a request sender and prevents the request from being modified.
The following demo shows how to sign a request and use an HTTP client to send an HTTPS request.
Download the demo project at https://github.com/api-gate-way/SdkDemo.
Note
ModelArts is a regional service. Specify the project ID when calling the API. Therefore, before running the demo project, add the project ID (X-Project-Id) in line 110 of access() in AccessServicelmpl.java. For details about how to obtain a project ID, see Obtaining a Project ID and Name.
If you do not need the demo project, visit the following URL to download the API Gateway signing SDK:
Obtain the API Gateway signature tool package from the enterprise administrator.
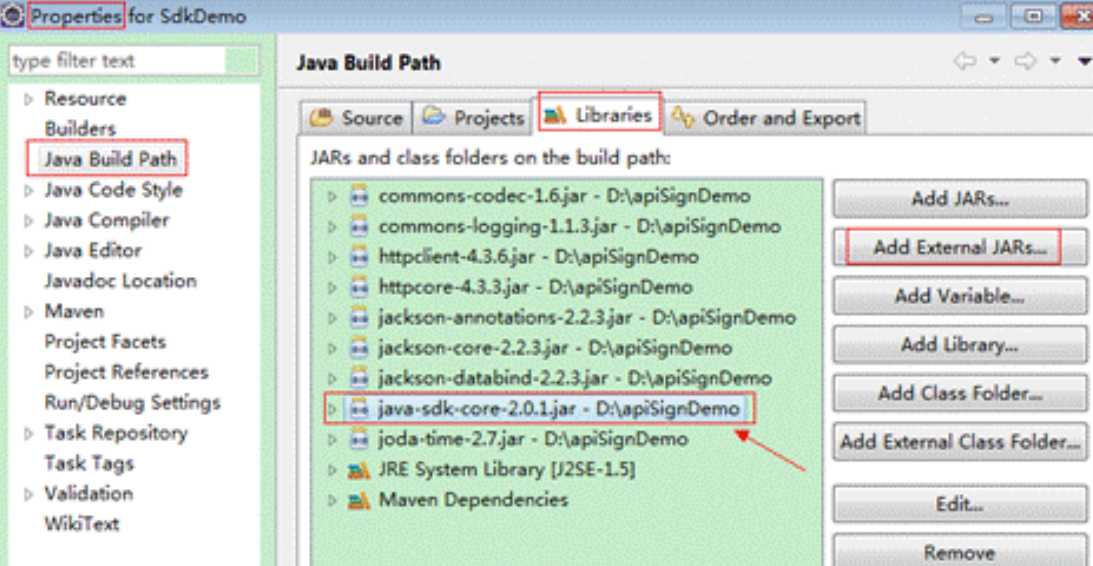
Decompress the downloaded package and reference the obtained JAR files as dependencies, as shown below.
Generate an AK/SK. (If an AK/SK file has already been obtained, skip this step and locate the downloaded AK/SK file. Generally, the file name will be credentials.csv.)
Note
If you use a RightCloud account, contact the administrator to obtain the AK/SK.
Log in to the console, enter the My Credentials page, and choose Access Keys > Create Access Key.
In the Create Access Key dialog box that is displayed, use the login password for verification.
Click OK, open the credentials.csv file, and save the key file as prompted. The access key file is saved to the default download location in your browser. Then, the access key (Access Key Id and Secret Access Key) is obtained.
Obtain and decompress the demo project.
Import the demo project to Eclipse.
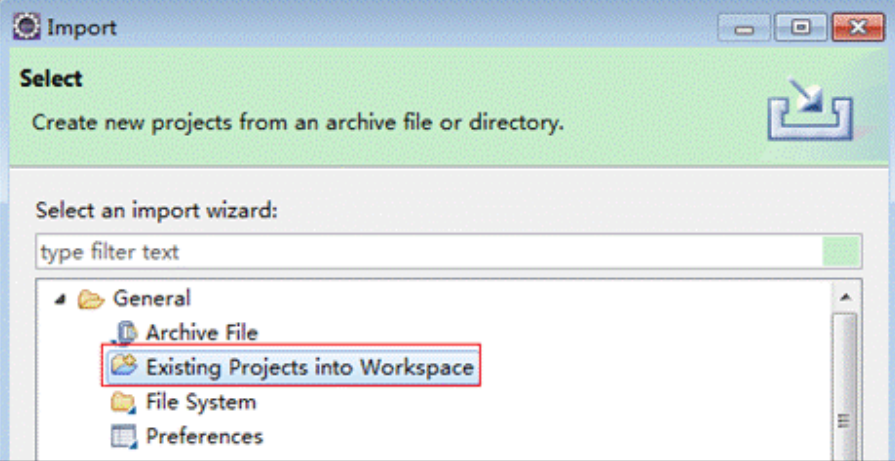
Figure 1 Select an existing project
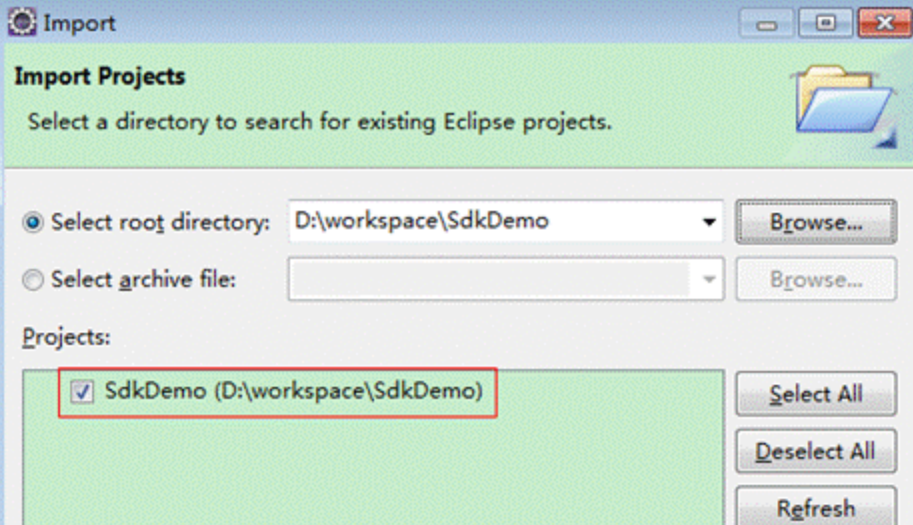
Figure 2 Selecting the demo project
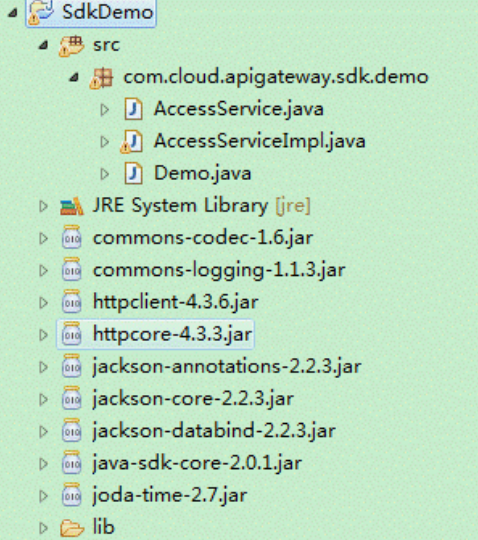
Figure 3 Structure of the demo project
Sign the request.
The request signing method is integrated in the JAR files imported in 3. Before sending the request, sign the requested content. The obtained signature is included in the HTTP header of the request.
The demo code is classified into the following classes to demonstrate signing and sending the HTTP request:
AccessService: An abstract class that merges the GET, POST, PUT, and DELETE methods into the access method.
Demo: An execution entry used to simulate the sending of GET, POST, PUT, and DELETE requests.
AccessServiceImpl: Implements the access method, which contains the code required for communication with APIG.
The following describes how to invoke the POST method to sign the request.
Add a request header.
Comment out the following second line of code in the AccessServiceImpl.java file, and specify the project ID.
//TODO: Add special headers.
//request.addHeader("X-Project-Id", "xxxxx");
Edit the main method in the Demo.java file.
Replace the bold texts with actual values. If you use other methods, such as POST, PUT, and DELETE, see the corresponding annotations. Replace the values of region, serviceName, ak, sk, and url. The URL for obtaining the VPC is used in the sample project. Replace it with the actual URL. For details about how to obtain the endpoint, see Regions and Endpoints.
//TODO: Replace region with the name of the region in which the service to be accessed is located.
private static final String region = "";

//TODO: Replace vpc with the name of the service you want to access. For example, ecs, vpc, iam, and elb.
private static final String serviceName = "";

public static void main(String[] args) throws UnsupportedEncodingException
{
//TODO: Replace the AK and SK with those obtained on the My Credential page.
String ak = "ZIRRKMTWP******1WKNKB";
String sk = "Us0mdMNHk******YrRCnW0ecfzl";

//TODO: To specify a project ID (multi-project scenarios), add the X-Project-Id header.
//TODO: To access a global service, such as IAM, DNS, CDN, and TMS, add the X-Domain-Id header to specify an account ID.
//TODO: To add a header, find "Add special headers" in the AccessServiceImple.java file.

//TODO: Test the API
String url = "https://{Endpoint}/v1/{project_id}/vpcs";
get(ak, sk, url);

//TODO: When creating a VPC, replace {project_id} in postUrl with the actual value.
//String postUrl = "https://serviceEndpoint/v1/{project_id}/cloudservers";
//String postbody ="{\"vpc\": {\"name\": \"vpc\",\"cidr\": \"192.168.0.0/16\"}}";
//post(ak, sk, postUrl, postbody);

//TODO: When querying a VPC, replace {project_id} in url with the actual value.
//String url = "https://serviceEndpoint/v1/{project_id}/vpcs/{vpc_id}";
//get(ak, sk, url);

//TODO: When updating a VPC, replace {project_id} and {vpc_id} in putUrl with the actual values.
//String putUrl = "https://serviceEndpoint/v1/{project_id}/vpcs/{vpc_id}";
//String putbody ="{\"vpc\":{\"name\": \"vpc1\",\"cidr\": \"192.168.0.0/16\"}}";
//put(ak, sk, putUrl, putbody);

//TODO: When deleting a VPC, replace {project_id} and {vpc_id} in deleteUrl with the actual values.
//String deleteUrl = "https://serviceEndpoint/v1/{project_id}/vpcs/{vpc_id}";
//delete(ak, sk, deleteUrl);
}
Compile and run the code to call an API.
In the Package Explorer area on the left, right-click Demo.java, choose Run AS > Java Application from the shortcut menu to run the demo code.
You can view the calling logs on the console.