Getting Started with Spark
This section describes how to use Spark to submit a SparkPi job. SparkPi, a typical Spark job, is used to calculate the value of Pi (Pi).
Procedure
Prepare the SparkPi program.
Multiple open-source Spark sample programs are provided, including SparkPi. Click https://archive.apache.org/dist/spark/spark-2.1.0/spark-2.1.0-bin-hadoop2.7.tgz to download the software package.
Decompress the software package to obtain the spark-examples_2.11-2.1.0.jar file, the sample program package, in the spark-2.1.0-bin-hadoop2.7/examples/jars directory. The spark-examples_2.11-2.1.0.jar sample program package contains the SparkPi program.
Upload data to OBS.
Log in to OBS Console.
Choose Parallel File System > Create Parallel File System to create a file system named sparkpi.
sparkpi is only an example. The file system name must be globally unique. Otherwise, the parallel file system fails to be created. Use the default values for other parameters.
Click the file system name sparkpi and click Files.
Click Create Folder to create the program folder..
Go to the program folder, click Upload Object, select the program package downloaded in 1 from the local PC, and set Storage Class to Standard.
Log in to the MRS console. In the left navigation pane, choose Clusters > Active Clusters, and click a cluster name.
Submit the SparkPi job.
On the MRS console, click the Jobs tab and click Create. The Create Job page is displayed. For details about how to submit the job, see Running a SparkSubmit or Spark Job.
Set Type to SparkSubmit.
Set Name to sparkPi.
Set Program Path to the path where programs are stored on OBS, for example, obs://sparkpi/program/spark-examples_2.11-2.1.0.jar.
In Program Parameter, select --class for Parameter and set Value to org.apache.spark.examples.SparkPi.
Set Parameters to 10.
Leave Service Parameter blank.
A job can be submitted only when the cluster is in the Running state.
After a job is submitted successfully, it is in the Accepted state by default. You do not need to manually execute the job.
View the job execution result.
Go to the Jobs tab page and view job execution status.
The job execution takes a while. After the jobs are complete, refresh the job list.
Once a job has succeeded or failed, you cannot execute it again. However, you can add or copy a job, and set job parameters to submit a job again.
Go to the native Yarn page and view the job output information.
On the Jobs tab page, locate the row that contains the target job and click View Details in the Operation column to obtain the actual job ID.
Log in to Manager and choose Services > Yarn > ResourceManager WebUI > ResourceManager (Active). The Yarn page is displayed.
Click the ID corresponding to the actual job ID.
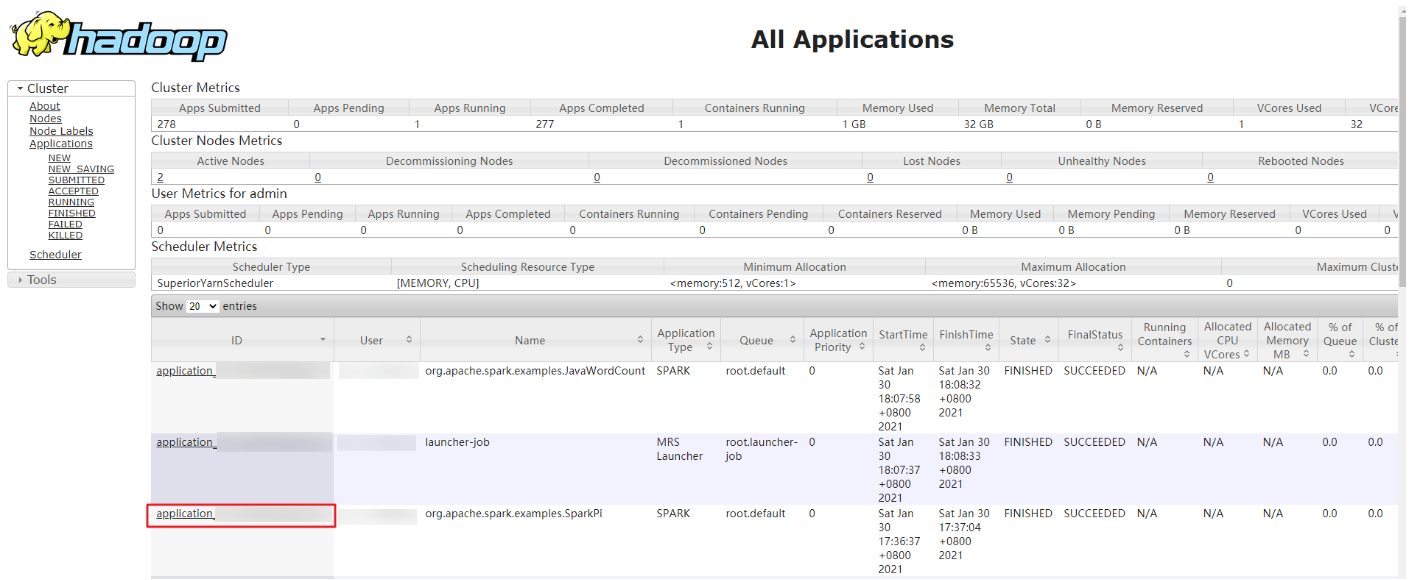
Figure 1 Yarn Web UI
Click Logs in the job log area.
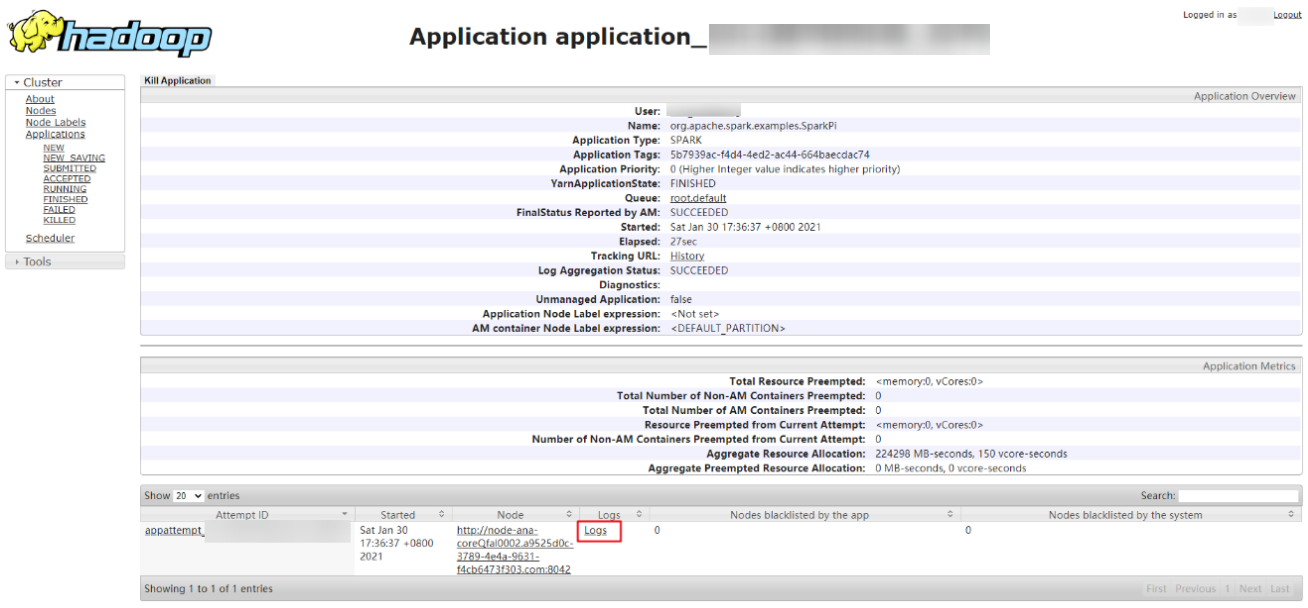
Figure 2 SparkPi job logs
Click here to obtain more detailed logs.

Figure 3 More detailed logs of sparkPi jobs
Obtain the job execution result.
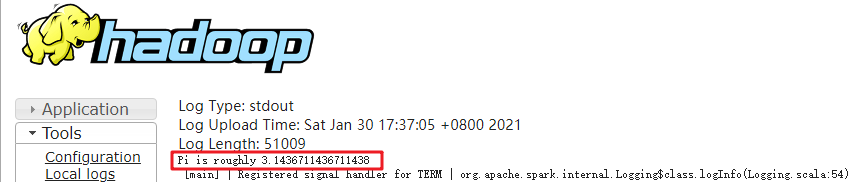
Figure 4 SparkPi job execution result