Configuring HBase Access Permissions in Ranger
After an MRS cluster with Ranger installed is created, HBase access control is not integrated into Ranger. This section describes how to integrate HBase into Ranger.
Log in to the Ranger web UI.
In the Service Manager area, click
 next to HBASE to add an HBase service.
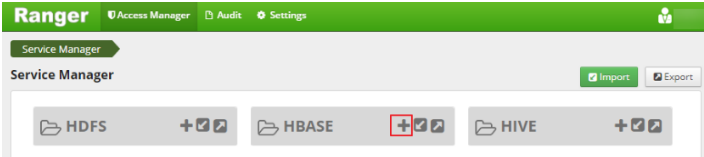
Figure 1 Adding an HBase service
Adding a Hive service
Set the parameters for adding an HBase service according to Table 1. Use the default values for the parameters that are not listed in the table.
Table 1 Parameter description¶ Parameter
Description
Example Value
Service Name
Name of the service to be created. The value is fixed to hbasedev.
hbasedev
Username
You can set this parameter to any value.
admin
Password
You can set this parameter to any value.
-hadoop.security.authentication
Hadoop authentication mode. The value is fixed to Simple.
Simple
hbase.security.authentication
HBase authentication mode. The value is fixed to Simple.
Simple
hbase.zookeeper.property.clientPort
Port number of ZooKeeper in the HBase cluster.
2181
hbase.zookeeper.quorum
ZooKeeper address in the HBase cluster.
192.168.0.7,192.168.0.8,192.168.0.9
zookeeper.znode.parent
Path of the root node of HBase in ZooKeeper. The value is fixed to /hbase.
/hbase
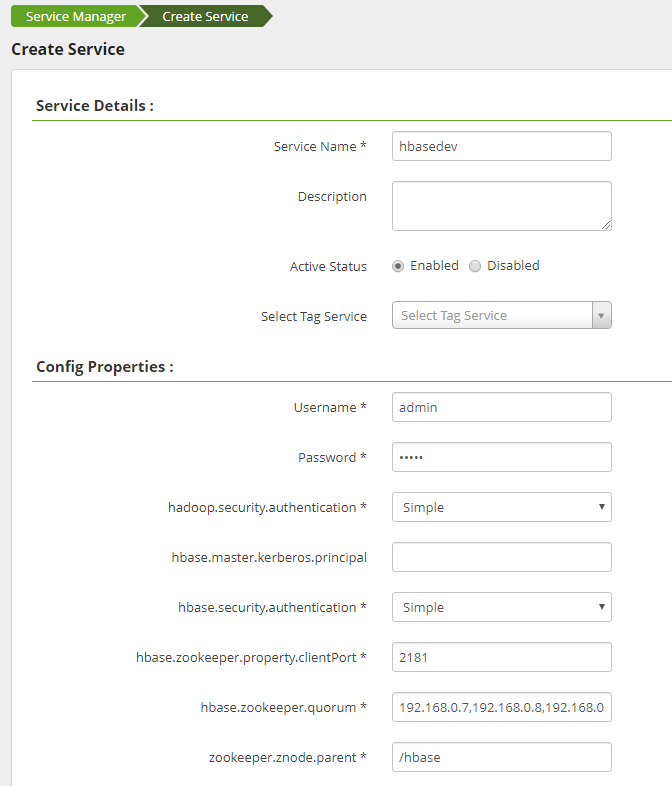
Figure 2 Creating hbasedev
Click Add to add the service.
Start the Ranger HBase plugin to authorize Ranger to manage HBase.
On the MRS management console, click the cluster name to go to the cluster details page.
Click the Components tab.
Choose HBase > Service Configuration and switch Basic to All.
Search for hbase.security.authorization and change its value to true (select the first HBase parameter).
Search for hbase.coprocessor.master.classes and append ,org.apache.ranger.authorization.hbase.RangerAuthorizationCoprocessor to its original value.
Search for hbase.coprocessor.region.classes and append ,org.apache.ranger.authorization.hbase.RangerAuthorizationCoprocessor to its original value.
Click Save Configuration and select Restart the affected services or instances to restart the HMaster and RegionServer instances.
Create a policy under HBase Service hbasedev.
Log in to the Ranger web UI.
In the HBASE area, click the added service hbasedev.
Click Add New Policy to add an access control policy.
Set the parameters according to Table 2. Use the default values for the parameters that are not listed in the table.
Table 2 Parameter description¶ Parameter
Description
Example Value
Policy Name
Policy name
Policy002
HBase Table
Name of the HBase table that the policy allows to access
test1
HBase Column-family
Column family of the HBase table that the policy allows to access
cf1
HBase Column
Column name of the table corresponding to the HBase table that the policy allows to access
name
Allow Conditions
Select Group: user group that the policy allows to access
Select User: user in the user group that the policy allows to access
Permissions: permissions that the policy allows the user to have
Select Group: testuser
Select User: testuser
Permissions: Create and Select
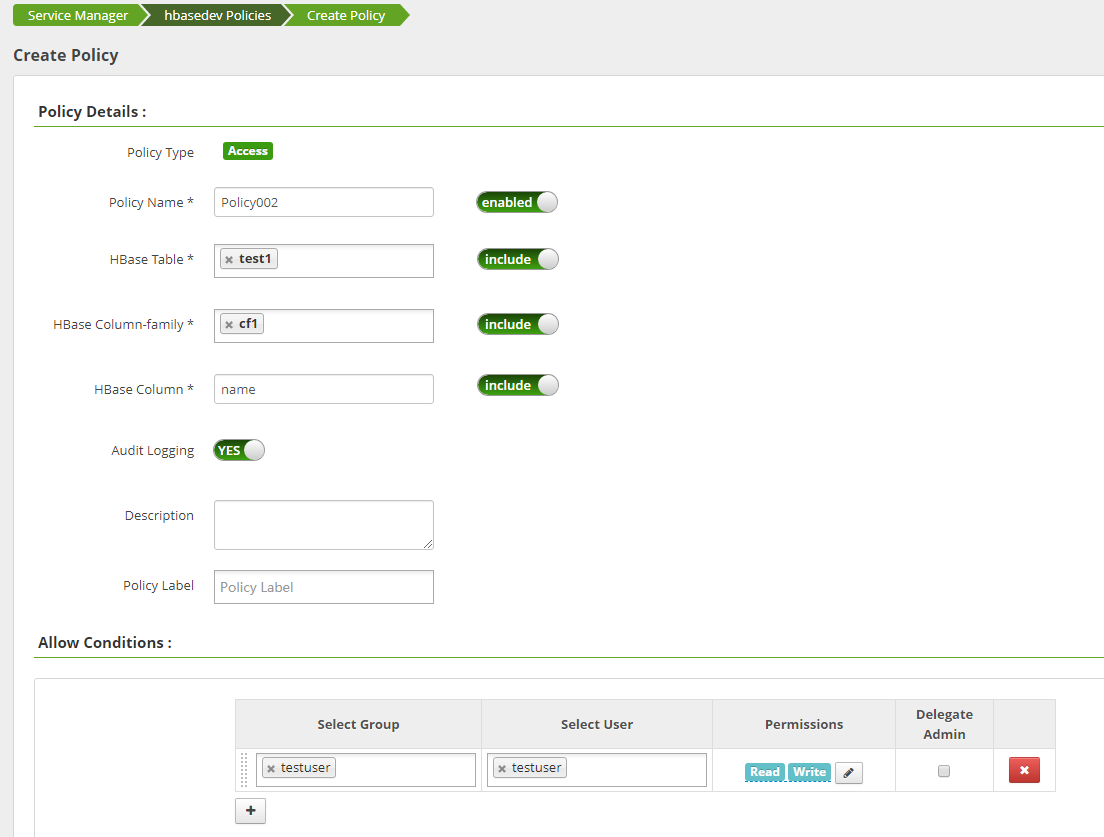
Figure 3 Adding an access control policy for hbasedev
Click Add to add the policy. According to the preceding policy, user testuser in the testuser user group has the Create and Select permissions on the cf1:name column in the test1 table of the default namespace in HBase, but no permissions to access other columns.
Update and log in to the HBase client by referring to Using HBase from Scratch, and check whether HBase has been integrated into Ranger.
Run the following command to access the HBase shell:
source /opt/client/bigdata_env
hbase shell

Figure 4 Accessing the HBase shell
Add data and check whether Ranger is integrated.
Add data to the cf1:name column in the test1 table.
put 'test1','001','cf1:name','tom'
Add data to the cf1:age column in the test1 table. If the user has no permission to access this column, the data fails to be added.
put 'test1','001','cf1:age',10
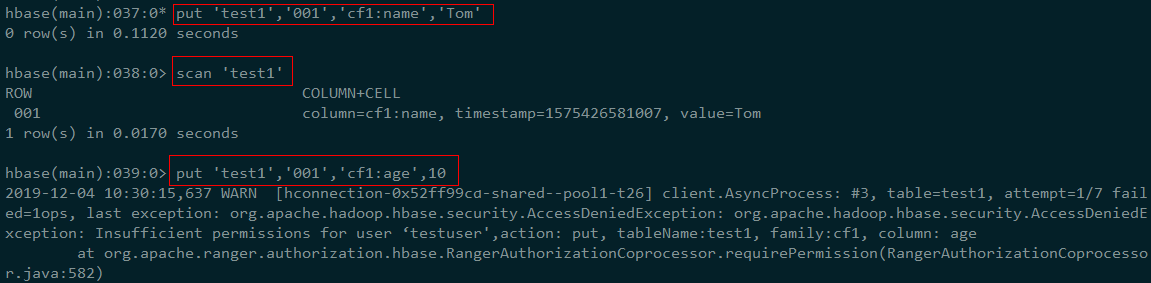
Figure 5 Verifying the integration of Ranger with HBase