Kafka Cluster Monitoring Management
This section applies to MRS 1.9.2 clusters.
The Kafka cluster monitoring management includes the following operations:
Viewing Broker Information
Log in to the KafkaManager web UI.
On the cluster list page, click a cluster name to access the Summary page of the cluster.

Figure 1 Summary page of a cluster
Click Brokers to access the Broker monitoring page. The page displays the Broker list and I/O statistics of the Broker nodes.
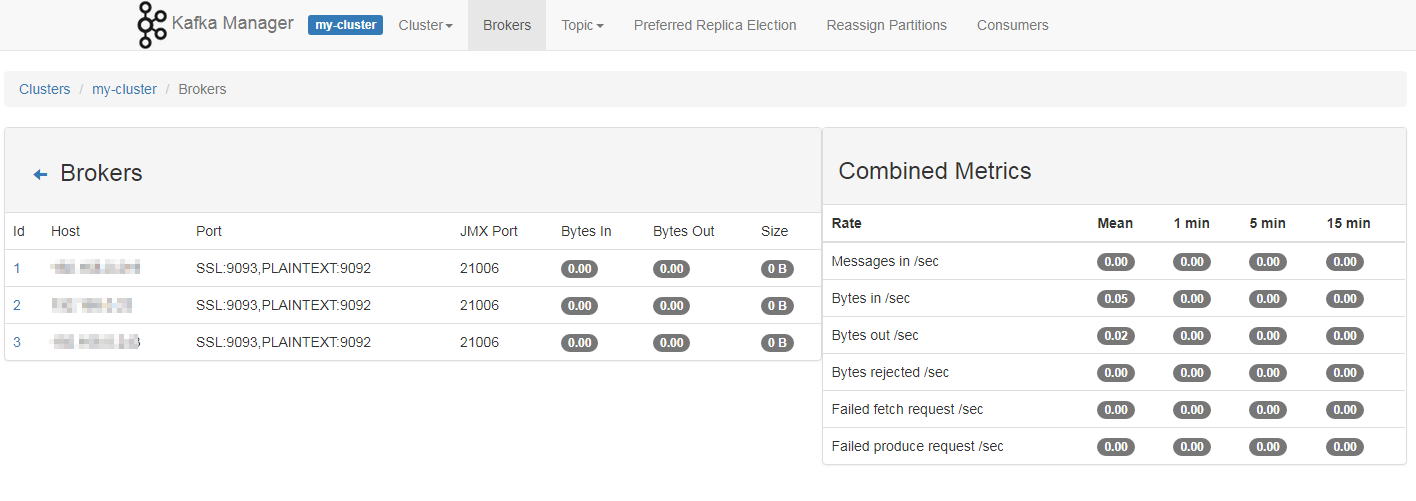
Figure 2 Broker monitoring page
Viewing Topic Information
Log in to the KafkaManager web UI.
On the cluster list page, click a cluster name to access the Summary page of the cluster.
Choose Topic > List to view the topic list of the current cluster and information about each topic.
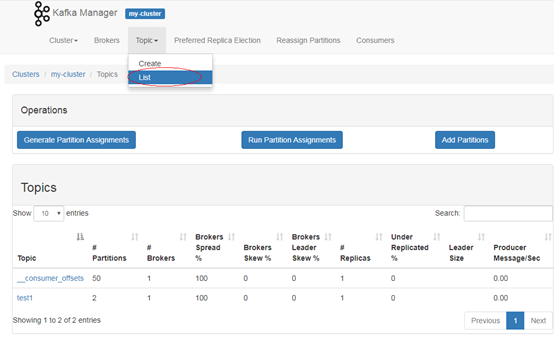
Figure 3 Topic list
Click a topic name to view details about the topic.
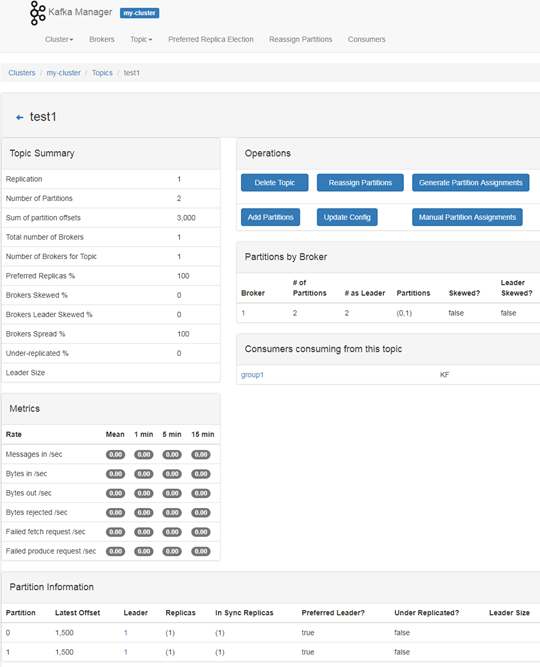
Figure 4 Topic details
Viewing Consumers Information
Log in to the KafkaManager web UI.
On the cluster list page, click a cluster name to access the Summary page of the cluster.
Click Consumers to view the consumers of the current cluster and each consumer's consumption information.
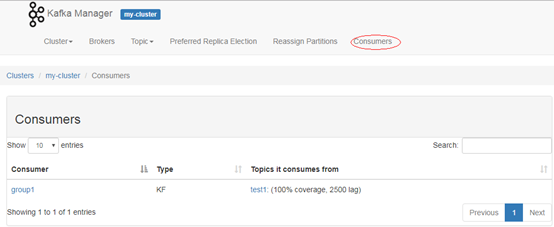
Figure 5 Consumers
Click a consumer name to view the list of the consumed topics.
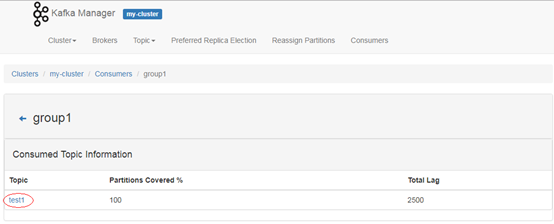
Figure 6 List of topics consumed by the consumer
Click a topic name in the topic list of the consumer to view consumption information about the topic.
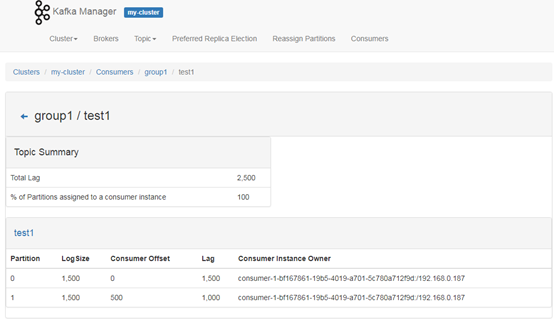
Figure 7 Topic consumption details
Modifying the Partition of a Topic Through KafkaManager
Log in to the KafkaManager web UI.
On the cluster list page, click a cluster name to access the Summary page of the cluster.
Choose Topic > List to access the topic list page of the current cluster.
Click a topic name to access the Topic Summary page.
Click Add Partitions. The page for adding partitions is displayed.
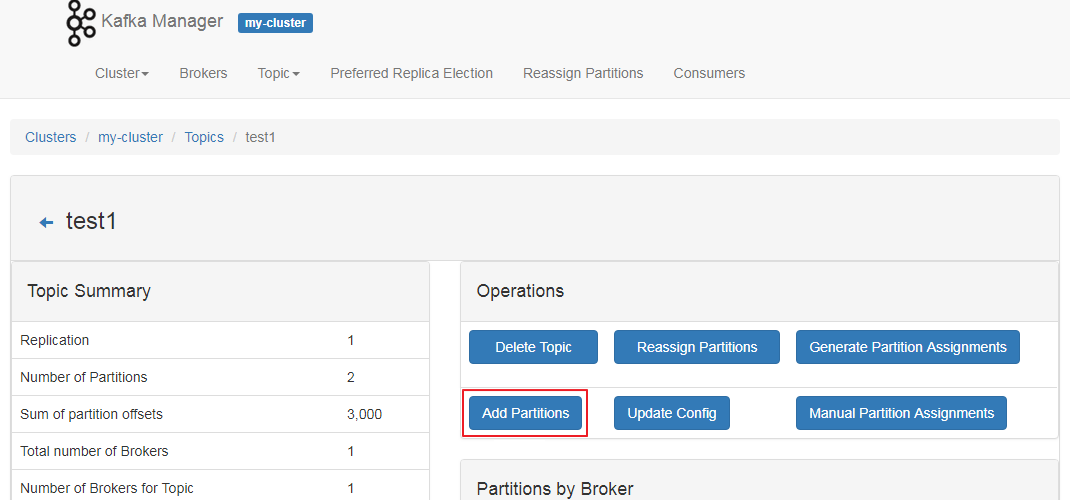
Figure 8 Adding partitions
Confirm the topic name and modify the value of the Partitions parameter and click Add Partitions to add partitions.
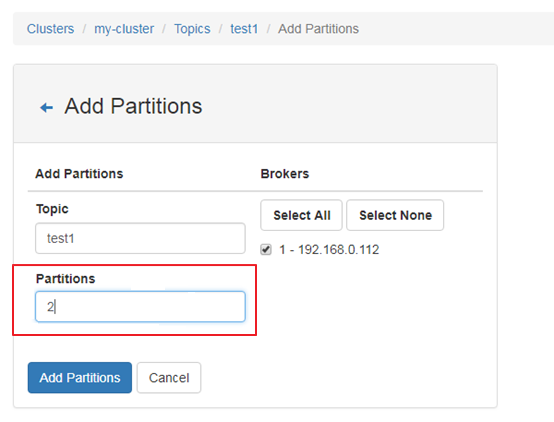
Figure 9 Modifying the number of partitions
After the partitions are added successfully, click Go to topic view to return to the Topic Summary page.
Check the number of partitions in Partition Information in the lower part of the Topic Summary page.
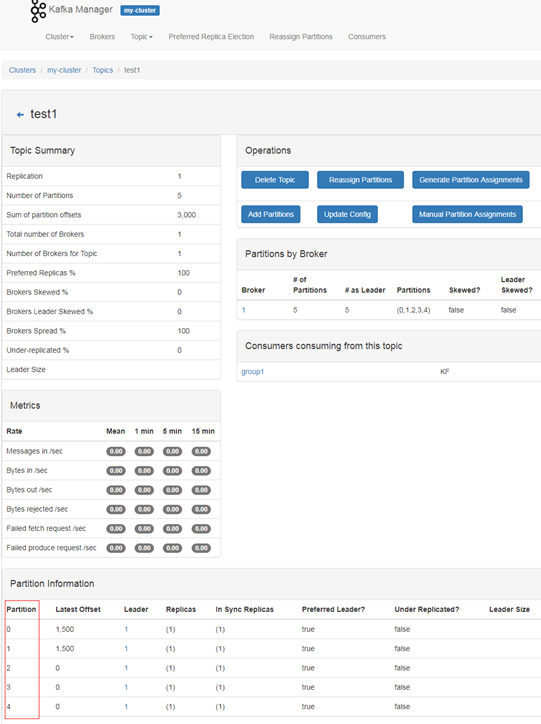
Figure 10 Partition Information
(Optional) If you are not satisfied with the assigned partitions, you can use the partition reassignment function to automatically reassign partitions.
On the Topic Summary page, click Generate Partition Assignments.
Select the broker instance and click Generate Partition Assignments to generate a partition.
After partition generation, click Go to topic view to return to the Topic Summary page.
On the Topic Summary page, click Reassign Partitions to automatically assign partitions to the broker instance of the cluster.
Click Go to reassign partitions to view details about the reassigned partitions.
(Optional) If you are not satisfied with the automatically assigned partitions, you can manually assign the partitions.
On the Topic Summary page, click Manual Partition Assignments to access the page for manually assign partitions.
Manually assign a broker ID to each partition replica, and click Save Partition Assignment to save the changes.
Click Go to topic view to return to the Topic Summary page and view the partition details.