Typical Scenario: Importing Data from HBase to HDFS/OBS
Scenario
This section describes how to use Loader to export data from HBase to HDFS/OBS.
Prerequisites
You have obtained the service user name and password for creating a Loader job.
You have had the permission to access the HDFS/OBS directories and data involved in job execution.
You have had the permission to access the HBase tables or phoenix tables that are used during job execution.
No disk space alarm is reported, and the available disk space is sufficient for importing and exporting data.
If a configured task requires the Yarn queue function, the user must be authorized with related Yarn queue permission.
The user who configures a task must obtain execution permission on the task and obtain usage permission on the related connection of the task.
Procedure
Setting Basic Job Information
Access the Loader web UI.
Log in to FusionInsight Manager. For details, see Accessing FusionInsight Manager.
Choose Cluster > Name of the desired cluster > Services > Loader.
Click LoaderServer(Node name, Active). The Loader web UI is displayed.
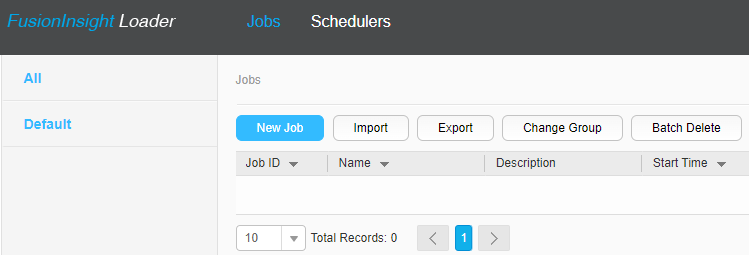
Figure 1 Loader web UI
Click New Job to go to the Basic Information page and set basic job information.
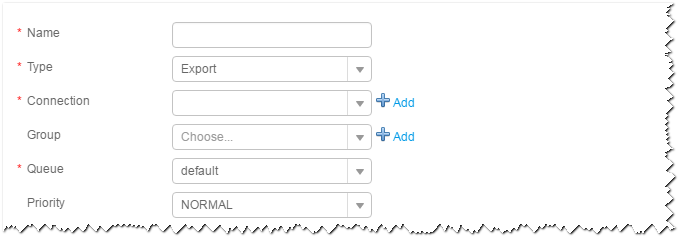
Figure 2 Basic Information
Set Name to the name of the job.
Set Type to Export.
Set Group to the group to which the job belongs. No group is created by default. You need to click Add to create a group and click OK to save the created group.
Set Queue to the Yarn queue that executes the job. The default value is root.default.
Set Priority to the priority of the Yarn queue that executes the job. The default value is NORMAL. The options are VERY_LOW, LOW, NORMAL, HIGH, and VERY_HIGH.
In the Connection area, click Add to create a connection, set Connector to hdfs-connector, set connection parameters, and click Test to verify whether the connection is available. When "Test Success" is displayed, click OK.
Setting Data Source Information
Click Next. On the displayed From page, set Source type to HBASE.
Table 1 Parameter description¶ Parameter
Description
Example
HBase instance
Specifies the HBase service instance that Loader selects from all available HBase service instances in the cluster. If the selected HBase service instance is not added to the cluster, the HBase job cannot be run properly.
HBase
Quantity
Specifies the number of maps that are started at the same time in a MapReduce job of a data configuration operation. The value must be less than or equal to 3000.
20
Setting Data Transformation
Click Next. On the displayed Transform page, set the transformation operations in the data transformation process. For details about how to select operators and set parameters, see Operator Help and Table 2.
Table 2 Setting the input and output parameters of the operator¶ Input Type
Export Type
HBase input
File output
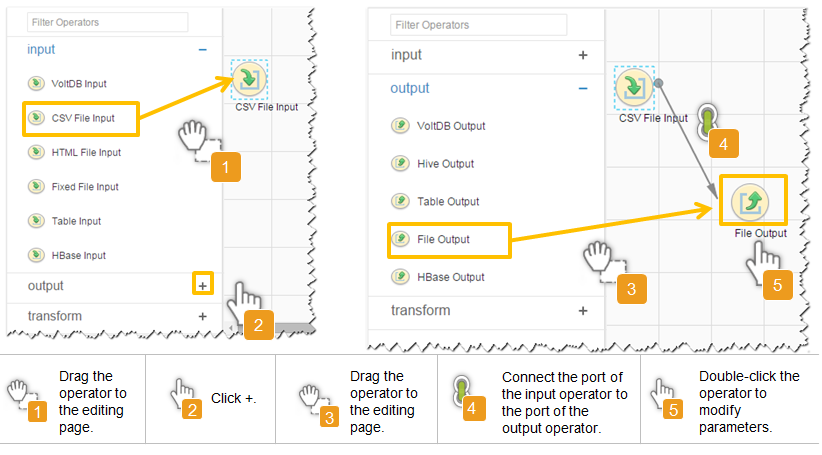
Figure 3 Operator operation procedure
Setting Data Storage Information and Executing the Job
Click Next. On the displayed To page, set the data storage mode.
Table 3 Parameter description¶ Parameter
Description
Example
Output path
Specifies the output directory or file name of the export file in the HDFS/OBS.
Note
You can use macros to define path parameters. For details, see Using Macro Definitions in Configuration Items.
/user/test
File Format
Specifies the file export type.
TEXT_FILE: imports a text file and stores it as a text file.
SEQUENCE_FILE: imports a text file and stores it as a sequence file.
BINARY_FILE: imports files of any format by using binary streams.
TEXT_FILE
Compression codec
Specifies the compression format of files exported to HDFS/OBS. Select a format from the drop-down list. If you select NONE or do not set this parameter, data is not compressed.
NONE
Click Save and run to save and run the job.
Checking the Job Execution Result
Go to the Loader WebUI. When Status is Succeeded, the job is complete.
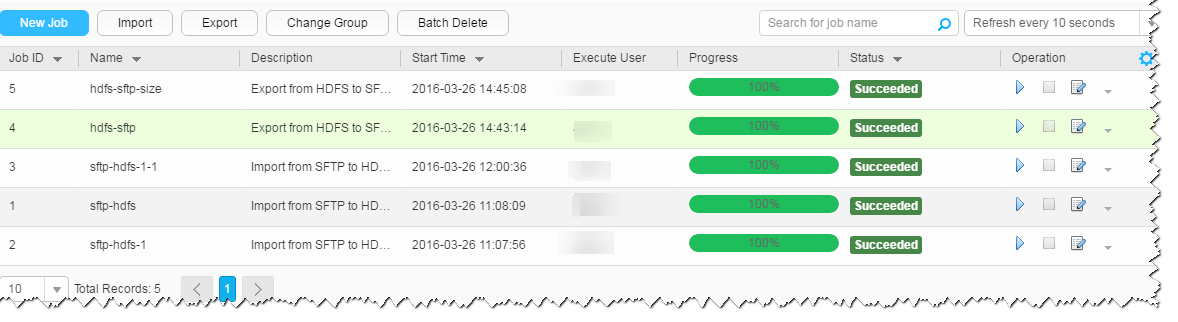
Figure 4 Viewing job