Using Flink from Scratch
Scenario
This section describes how to use Flink to run wordcount jobs.
Prerequisites
Flink has been installed in the MRS cluster and all components in the cluster are running properly.
The cluster client has been installed, for example, in the /opt/hadoopclient directory.
Procedure
Log in to the node where the client is installed as the client installation user.
Run the following commands to go to the client installation directory.
cd /opt/hadoopclient
Run the following command to initialize environment variables:
source /opt/hadoopclient/bigdata_env
If Kerberos authentication is enabled for the cluster, perform the following substeps. If Kerberos authentication is not enabled for the cluster, skip the following substeps.
Create a user, for example, test, for submitting Flink jobs.
After a human-machine user is created, log in to FusionInsight Manager as the new user and change the initial password as prompted.
Note
To submit or run jobs on Flink, the user must have the following permissions:
If Ranger authentication is enabled, the current user must belong to the hadoop group or the user has been granted the /flink read and write permissions in Ranger.
If Ranger authentication is disabled, the current user must belong to the hadoop group.
Log in to FusionInsight Manager and choose System > Permission > User. On the displayed page, locate the row that contains the added user, click More in the Operation column, and select Download Authentication Credential to download the authentication credential file of the user to the local PC and decompress the file.
Copy the decompressed user.keytab and krb5.conf files to the /opt/hadoopclient/Flink/flink/conf directory on the client node.
Log in to the client node and add the service IP address of the client node and the floating IP address of FusionInsight Manager to the jobmanager.web.allow-access-address configuration item in the /opt/hadoopclient/Flink/flink/conf/flink-conf.yaml file. Use commas (,) to separate the IP addresses.
vi /opt/hadoopclient/Flink/flink/conf/flink-conf.yaml
Configure security authentication.
Add the keytab path and username to the /opt/hadoopclient/Flink/flink/conf/flink-conf.yaml configuration file.
security.kerberos.login.keytab: <user.keytab file path>
security.kerberos.login.principal: <Username>
Example:
security.kerberos.login.keytab: /opt/hadoopclient/Flink/flink/conf/user.keytab
security.kerberos.login.principal: test
Configure security hardening by referring to Authentication and Encryption. Run the following commands to set a password for submitting jobs.
cd /opt/hadoopclient/Flink/flink/bin
sh generate_keystore.sh
The script automatically changes the SSL-related parameter values in the /opt/hadoopclient/Flink/flink/conf/flink-conf.yaml file.
Configure paths for the client to access the flink.keystore and flink.truststore files.
Absolute path
After the generate_keystore.sh script is executed, the flink.keystore and flink.truststore file paths are automatically set to absolute paths in the flink-conf.yaml file by default. In this case, you need to place the flink.keystore and flink.truststore files in the conf directory to the absolute paths of the Flink client and each Yarn node, respectively.
Relative path (recommended)
Perform the following steps to set the file paths of flink.keystore and flink.truststore to relative paths and ensure that the directory where the Flink client command is executed can directly access the relative paths.
Create a directory, for example, ssl, in /opt/hadoopclient/Flink/flink/conf/.
cd /opt/hadoopclient/Flink/flink/conf/
mkdir ssl
Move the flink.keystore and flink.truststore files to the new paths.
mv flink.keystore ssl/
mv flink.truststore ssl/
Change the values of the following parameters to relative paths in the flink-conf.yaml file:
vi /opt/hadoopclient/Flink/flink/conf/flink-conf.yaml
security.ssl.keystore: ssl/flink.keystore
security.ssl.truststore: ssl/flink.truststore
Run a wordcount job.
Normal cluster (Kerberos authentication disabled)
Run the following commands to start a session and submit a job in the session:
yarn-session.sh -nm "session-name"
flink run /opt/hadoopclient/Flink/flink/examples/streaming/WordCount.jar
Run the following command to submit a single job on Yarn:
flink run -m yarn-cluster /opt/hadoopclient/Flink/flink/examples/streaming/WordCount.jar
Security cluster (Kerberos authentication enabled)
If the flink.keystore and flink.truststore file paths are relative paths:
Run the following command in the directory at the same level as ssl to start the session and submit the job in the session. ssl/ is a relative path.
cd /opt/hadoopclient/Flink/flink/conf/
yarn-session.sh -t ssl/ -nm "session-name"
...
Cluster started: Yarn cluster with application id application_1624937999496_0017
JobManager Web Interface: http://192.168.1.150:32261
Start a new client connection and submit the job:
source /opt/hadoopclient/bigdata_env
flink run /opt/hadoopclient/Flink/flink/examples/streaming/WordCount.jar
...
Job has been submitted with JobID 587d5498fff18d8b2501fdf7ebb9c4fb
Program execution finished
Job with JobID 587d5498fff18d8b2501fdf7ebb9c4fb has finished.
Job Runtime: 19917 ms
Run the following command to submit a single job on Yarn:
cd /opt/hadoopclient/Flink/flink/conf/
flink run -m yarn-cluster -yt ssl/ /opt/hadoopclient/Flink/flink/examples/streaming/WordCount.jar
...
Cluster started: Yarn cluster with application id application_1624937999496_0016
Job has been submitted with JobID e9c59fb48f44feae7b62dd90336d6d7f
Program execution finished
Job with JobID e9c59fb48f44feae7b62dd90336d6d7f has finished.
Job Runtime: 18155 ms
If the flink.keystore and flink.truststore file paths are absolute paths:
Run the following commands to start a session and submit a job in the session:
cd /opt/hadoopclient/Flink/flink/conf/
yarn-session.sh -nm "session-name"
flink run /opt/hadoopclient/Flink/flink/examples/streaming/WordCount.jar
Run the following command to submit a single job on Yarn:
flink run -m yarn-cluster /opt/hadoopclient/Flink/flink/examples/streaming/WordCount.jar
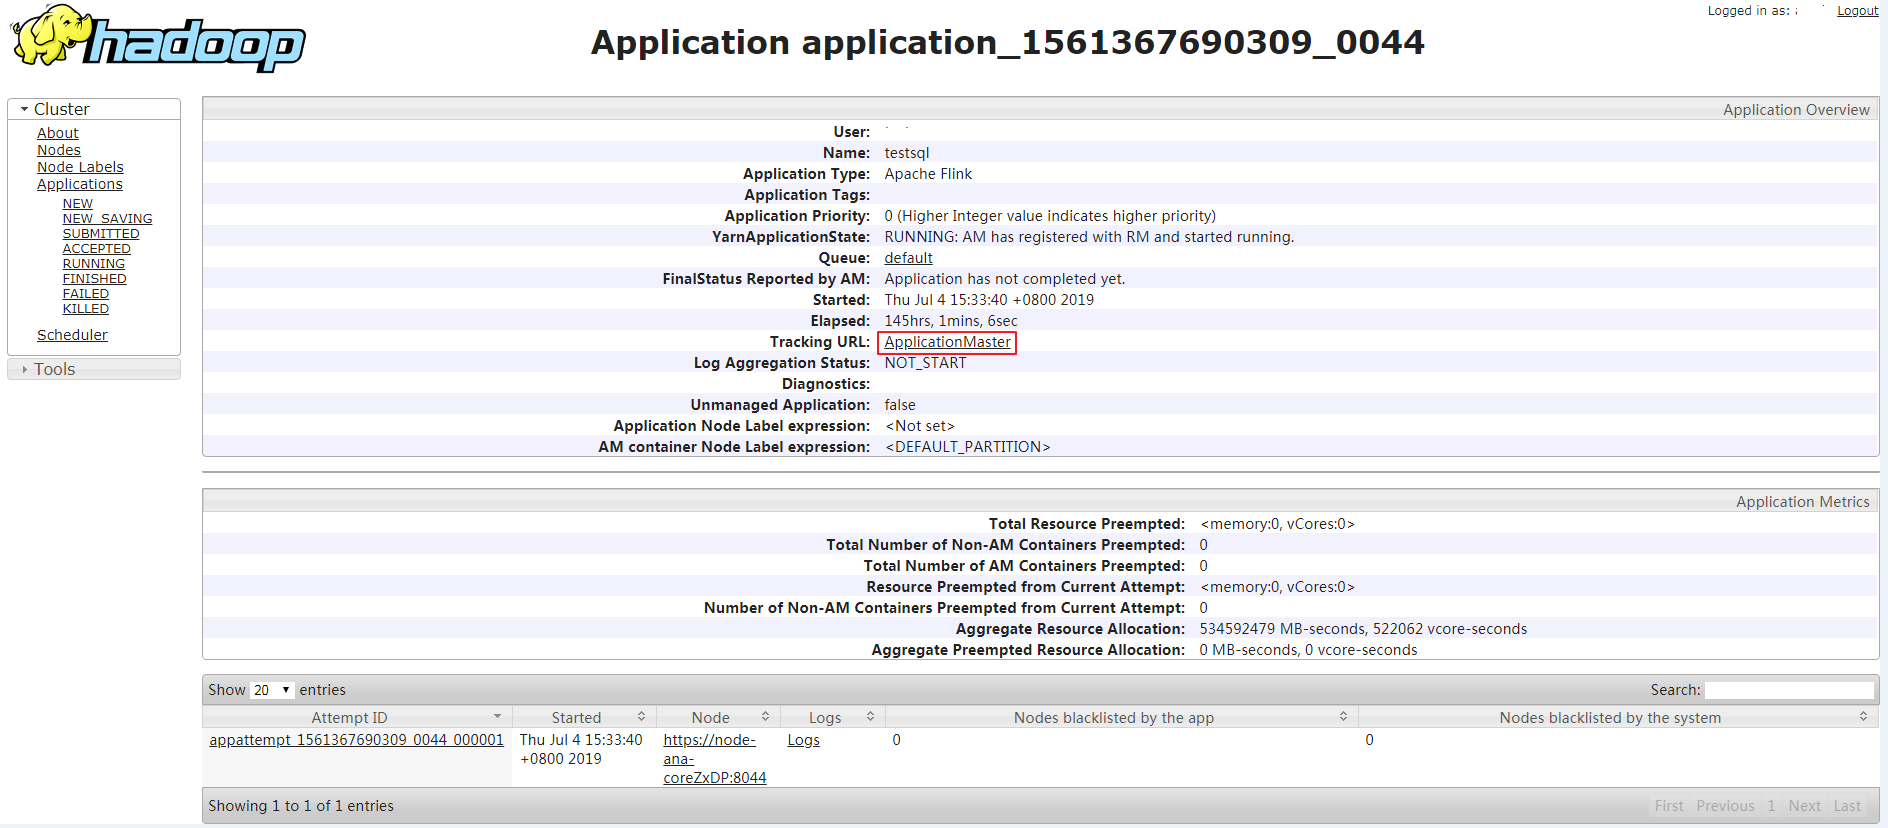
Log in to FusionInsight Manager as a running user, go to the native page of the Yarn service, find the application of the corresponding job, and click the application name to go to the job details page.
If the job is not completed, click Tracking URL to go to the native Flink page and view the job running information.
If the job submitted in a session has been completed, you can click Tracking URL to log in to the native Flink service page to view job information.

Figure 1 Application