Step 1: Create an IdP Entity
To establish a trust relationship between an enterprise IdP and the cloud platform, set the user redirect URLs and create OAuth 2.0 credentials in the enterprise IdP. On the IAM console, create an IdP entity and configure authorization information.
Prerequisites
The enterprise administrator has created an account in the cloud platform, and has created user groups and assigned them permissions in IAM. For details, see Creating a User Group and Assigning Permissions. The user groups created in IAM will be mapped to federated users so that the federated users can obtain the permissions of the user groups to use cloud resources.
The enterprise administrator has read the help documentation of the enterprise IdP or has understood how to use the enterprise IdP. Configurations of different enterprise IdPs differ greatly, so they are not described in this document. For details about how to obtain an enterprise IdP's OAuth 2.0 credentials, see the IdP help documentation.
Creating OAuth 2.0 Credentials in the Enterprise IdP
Set redirect URLs https:///authui/oidc/redirect and https:///authui/oidc/post in the enterprise IdP so that users can be redirected to the OpenID Connect IdP in the cloud platform.
Obtain OAuth 2.0 credentials of the enterprise IdP.
Creating an IdP Entity on the Cloud Platform
Create an IdP entity and configure authorization information in IAM to establish a trust relationship between the enterprise IdP and IAM
Log in to the IAM console, choose Identity Providers from the navigation pane, and click Create Identity Provider in the upper right corner.
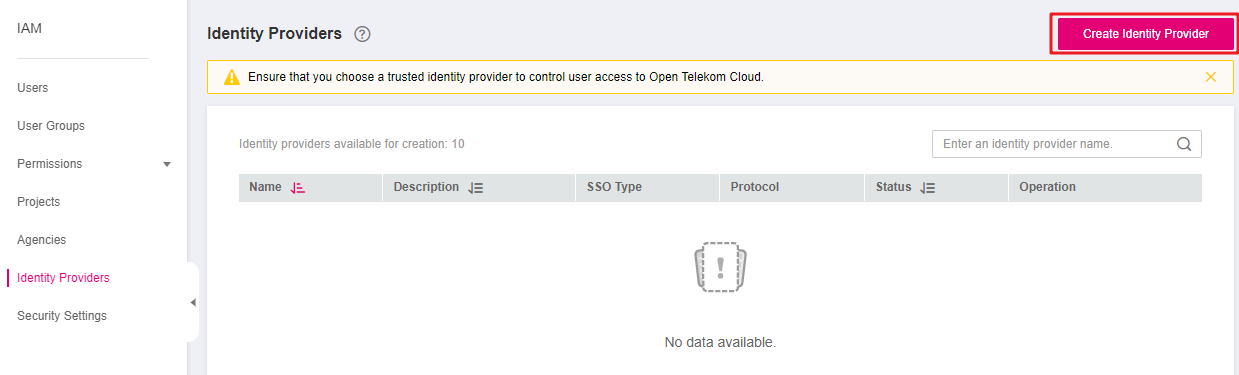
Figure 1 Creating an IdP entity
Enter an IdP name, select OpenID Connect and Enabled, and click OK.
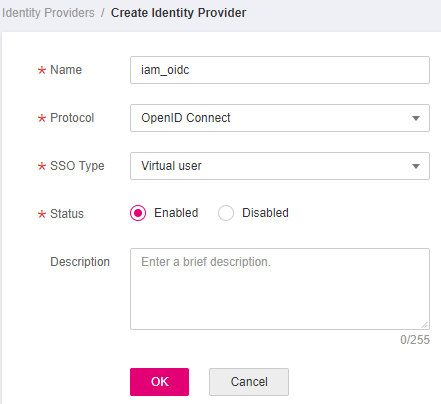
Figure 2 Setting IdP parameters
Note
The IdP name must be unique under your account. You are advised to use the domain name.
Configuring Authorization Information in the Cloud Platform
Click Modify in the Operation column of the row containing the IdP you want to modify.
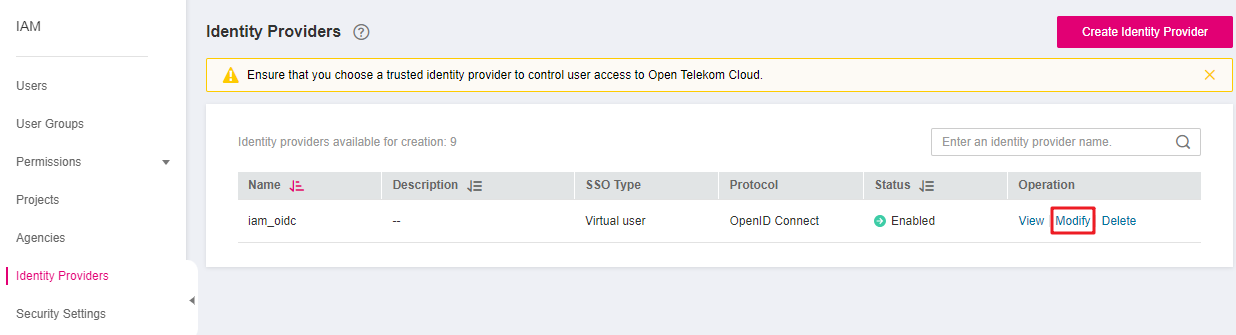
Figure 3 Modifying an IdP
Select an access type.

Figure 4 Access type
Table 1 Access type description¶ Access Type
Description
Programmatic access and management console access
Programmatic access: Federated users can use development tools (including APIs, CLI, and SDKs) that support key authentication to access the cloud platform.
Management console access: Federated users can log in to the cloud platform by using their own usernames and passwords.
Select this access type if you want users to access the cloud platform through SSO.
Programmatic access
Federated users can only use development tools (including APIs, CLI, and SDKs) that support key authentication to access the cloud platform.
Specify the configuration information.
Table 2 Configuration information¶ Parameter
Description
Identity Provider URL
URL of the OpenID Connect IdP.
Set it to the value of issuer in the Openid-configuration.
Note
Openid-configuration indicates a URL defined in OpenID Connect, containing configurations of an enterprise IdP. The URL format is https://{base URL}/.well-known/openid-configuration, where base URL is defined by the enterprise IdP. For example, the Openid-configuration of Google is https://accounts.google.com/.well-known/openid-configuration.
Client ID
ID of a client registered with the OpenID Connect IdP. The client ID is an OAuth 2.0 credential created in the enterprise IdP.
Authorization Endpoint
Authorization endpoint of the OpenID Connect IdP. Set it to the value of authorization_endpoint in Openid-configuration.
This parameter is required only if you set Access Type to Programmatic access and management console access.
Scopes
Scopes of authorization requests. openid is selected by default.
This parameter is required only if you set Access Type to Programmatic access and management console access.
Enumerated values:
openid
email
profile
Response Type
Response type of authorization requests. The default value is id_token.
This parameter is required only if you set Access Type to Programmatic access and management console access.
Response Mode
Response mode of authorization requests. The options include form_post and fragment. form_post is recommended.
This parameter is required only if you set Access Type to Programmatic access and management console access.
Signing Key
Public key used to sign the ID token of the OpenID Connect IdP. For account security purposes, change the signing key periodically.
Click OK.
Verifying the Federated Login
Click the login link displayed on the IdP details page and check if the login page of the enterprise IdP server is displayed.
On the Identity Providers page, click Modify in the Operation column of the identity provider.
Copy the login link displayed on the Modify Identity Provider page and visit the link using a browser.
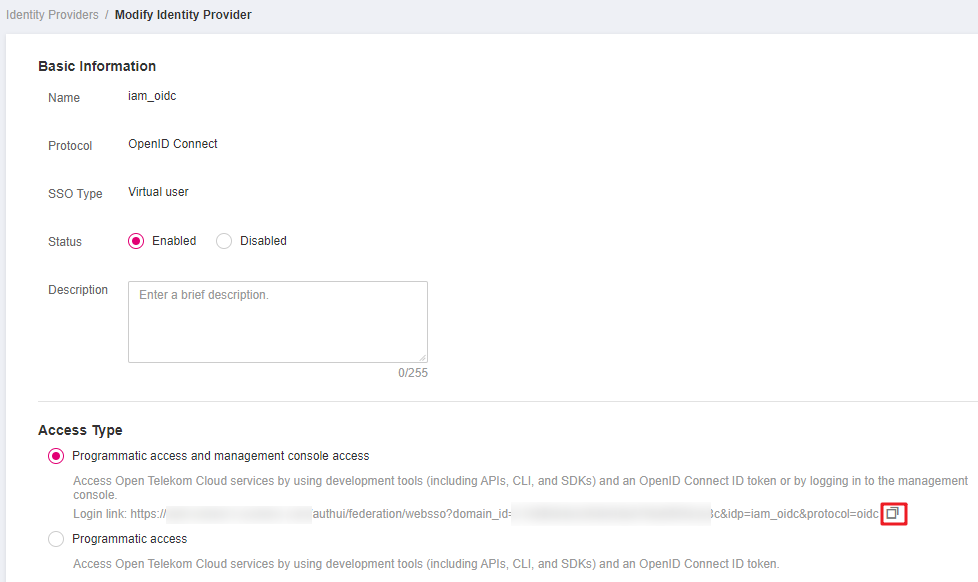
Figure 5 Copying the login link
If the enterprise IdP login page is not displayed, check the configurations of the IdP and the enterprise IdP server.
Enter the username and password of a user that was created in the enterprise management system.
If the login is successful, add the login link to the enterprise management system.
If the login fails, check the username and password.
Note
Federated users can only access the cloud platform by default. To assign permissions to federated users, configure identity conversion rules for the IdP. For details, see Step 2: Configure Identity Conversion Rules.
Follow-Up Procedure
Configure identity conversion rules to map enterprise IdP users to IAM user groups and assign permissions to the users. For details, see Step 2: Configure Identity Conversion Rules.
Configure the enterprise management system to allow users to access the cloud platform through SSO. For details, see (Optional) Step 3: Configure Login Link in the Enterprise Management System.