Adding a Protected Directory
WTP monitors website directories in real time, backs up files, and restores tampered files using the backup, protecting websites from Trojans, illegal links, and tampering.
Prerequisites
You have enabled the WTP edition.
Constraints and Limitations
Only the servers that are protected by the HSS WTP edition support the operations described in this section.
The constraints on protected directories are as follows:
For Linux,
A server can have up to 50 protected directories.
The complete path of a protected directory cannot exceed 256 characters.
The folder levels of a protected directory cannot exceed 100.
The total folders in protected directories cannot exceed 900,000.
For Windows,
A server can have up to 50 protected directories.
The complete path of a protected directory cannot exceed 256 characters.
The constraints on local backup paths are as follows:
Local backup is supported only in Linux.
The local backup path must be valid, or web tamper protection will not take effect.
The local backup path cannot overlap with the added protected directory.
The available capacity of the disk where the local backup path is located is greater than the size of all protected directories.
Adding a Protected Directory
Log in to the management console.
Click
 in the upper left corner of the page, select a region, and choose Security > HSS. The HSS page is displayed.
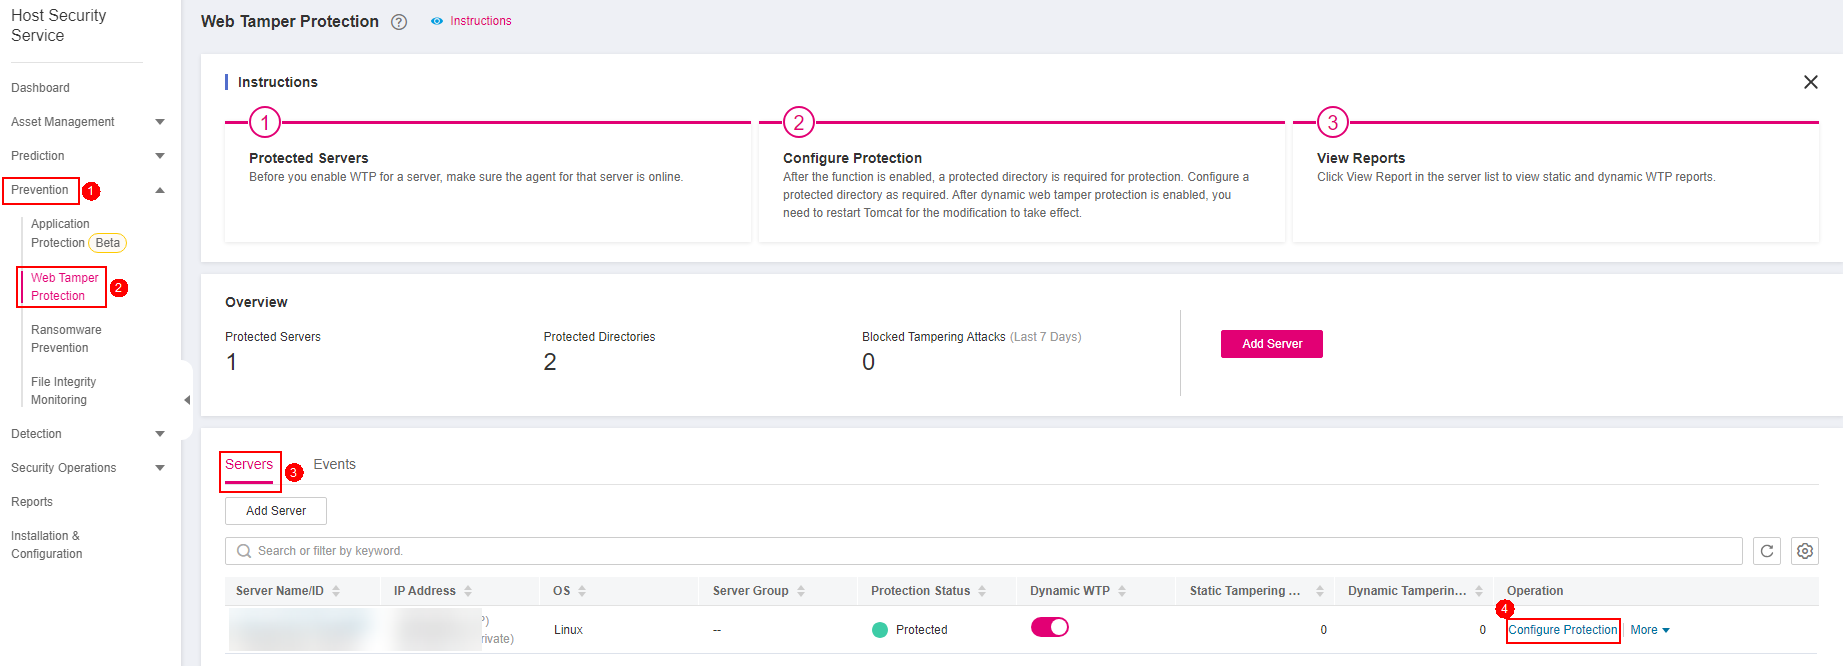
Choose Prevention > Web Tamper Protection, click Configure Protection.
Note
If your servers are managed by enterprise projects, you can select an enterprise project to view or operate the asset and scan information.

Figure 1 Entering the page for protected directory settings
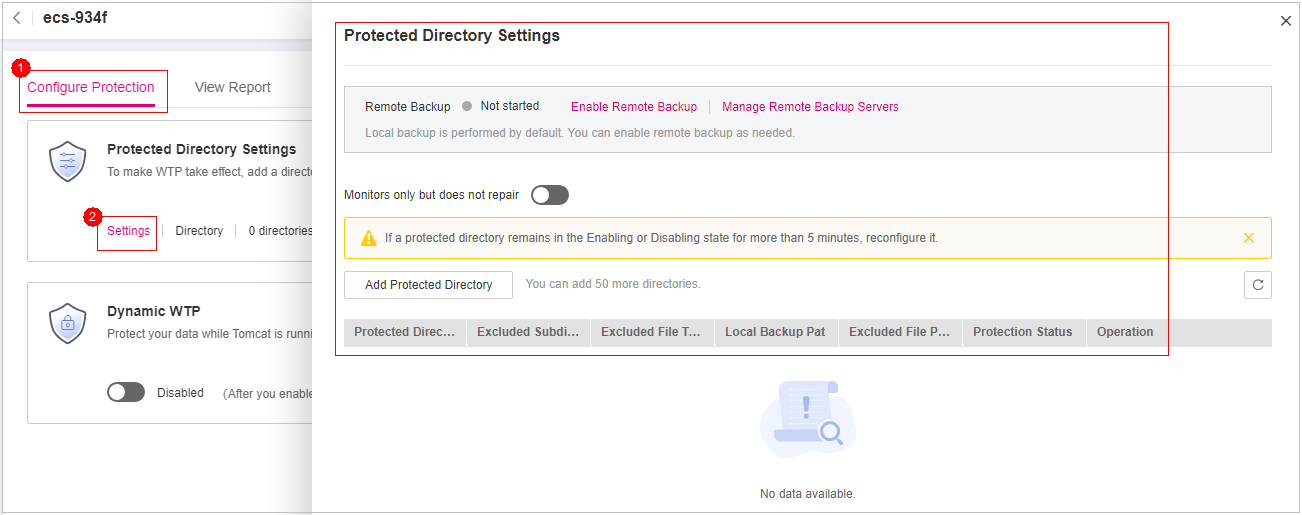
Click Settings under Protected Directory Settings.

Figure 2 Protected directory settings
You can add a maximum of 50 protected directories.
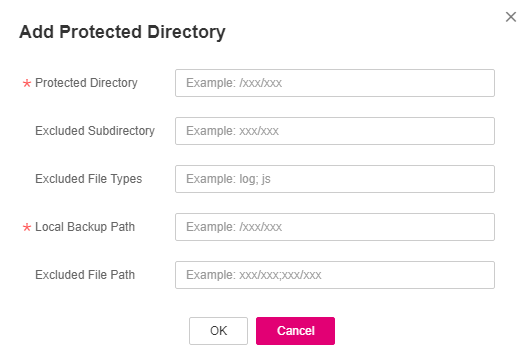
Click Add. In the Add Protected Directory dialog box, set required parameters. For details, see Table 1.

Figure 3 Adding a protected directory
Table 1 Parameters for a protected directory¶ Parameter
Description
Restriction
Protected Directory
Files and folders in this directory are read-only.
Do not set it to any OS directories.
Excluded Subdirectory
Subdirectories that do not need to be protected in the protected directory, such as temporary file directories.
Separate subdirectories with semicolons (;). A maximum of 10 subdirectories can be added.
The subdirectory is a relative directory in the protected directory.
Excluded File Types
Types of files that do not need to be protected in the protected directory, such as log files.
Separate file types with semicolons (;).
To record the running status of the server in real time, exclude the log files in the protected directory. You can grant high read and write permissions for log files to prevent attackers from viewing or tampering with the log files.
-Local Backup Path
Only Linux is supported.
After WTP is enabled, files in the protected directory are automatically backed up to the local backup path.
Generally, the backup completes within 10 minutes. The actual duration depends on the size of files in the protected directory. Protection takes effect immediately when the backup completes.
Excluded subdirectories and types of files are not backed up.
If WTP detects that a file in the protection directory is tampered with, it immediately uses the backup file on the local host to restore the file.
The local backup path cannot overlap with the added protected directory.
Excluded File Path
Paths that do not need to be protected in the protected directory.
Separate multiple paths with semicolons (;). A maximum of 50 paths can be added. The maximum length of a path is 256 characters.
A single path cannot start with a space or end with a slash (/).
The excluded file path is the relative file path of the protected directory.
Click OK.
If you need to modify files in the protected directory, stop protection for the protected directory first. After the files are modified, resume protection for the directory in a timely manner.
Enable remote backup.
By default, HSS backs up the files from the protected directories (excluding specified subdirectories and file types) to the local backup directory you specified when adding protected directories. To protect the local backup files from tampering, you must enable the remote backup function.
For details about how to add a remote backup server, see Configuring Remote Backup.
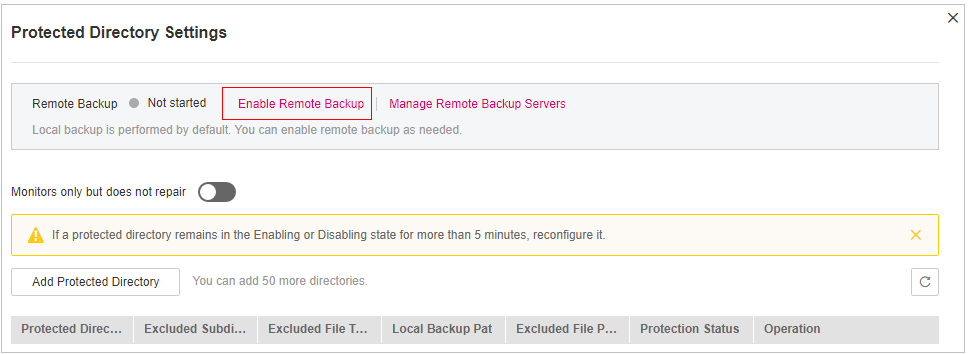
On the Protected Directory Settings page, click Enable Remote Backup.

Figure 4 Enabling remote backup
Select a backup server from the drop-down list box.
Click OK.