Performing Baseline Inspection
The baseline check supports automatic and manual baseline checks.
Automatic baseline check: checks server configurations and common weak passwords.
Manual baseline check: To view the real-time baseline risks of a specified server or detect the password complexity policy, you can manually perform a baseline check.
Automated Baseline Checks
automatically performs a check for all server configurations and common weak passwords at 01:00 every day.
Premium edition, web tamper protection edition, and container edition allow you to customize the automatic detection period for configurations. For details, see Configuration Check.
Premium edition, web tamper protection edition, and container edition allow you to customize the automatic detection period for weak passwords. For details, see Weak Password Scan.
Manually Performing a Baseline Check
Log in to the management console.
Click
 in the upper left corner of the page, select a region, and choose Security > Host Security Service. The HSS page is displayed.
In the navigation pane on the left, choose Prediction > Baseline Checks.
Note
If your servers are managed by enterprise projects, you can select an enterprise project to view or operate the asset and scan information.

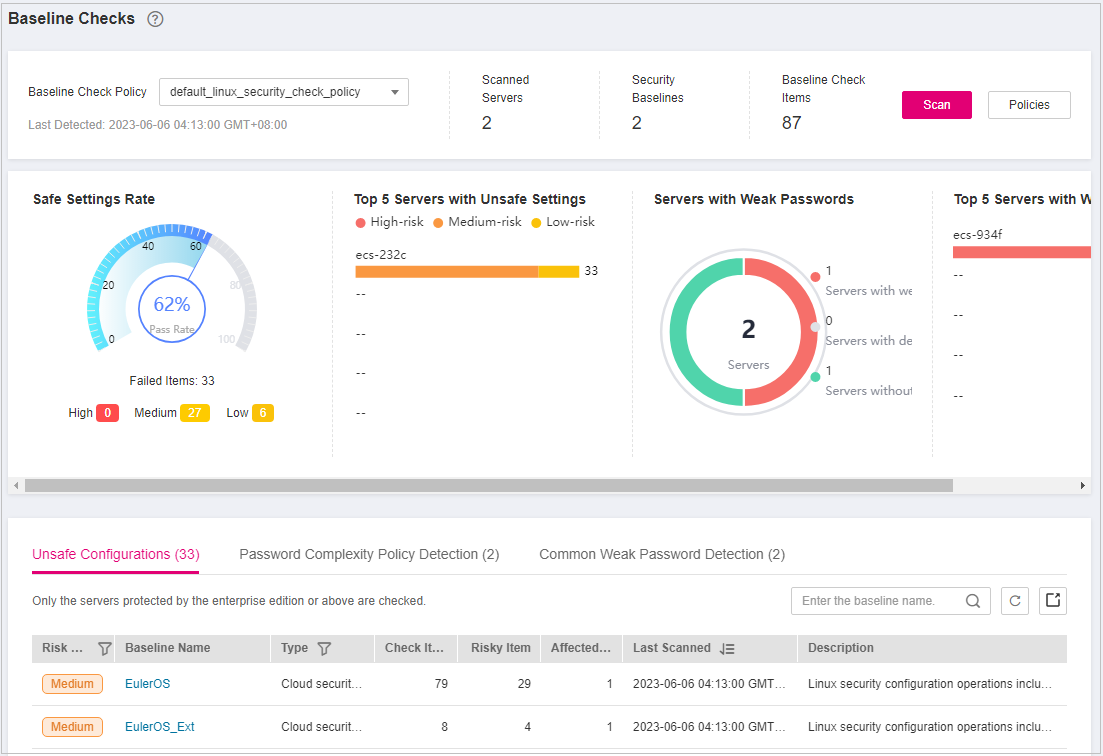
Figure 1 Baseline check overview
(Optional) Create a manual baseline check policy.
Before manually checking the baseline policy, you need to create a manual baseline check policy for the target server. If you have created a policy for the target server, skip this step.
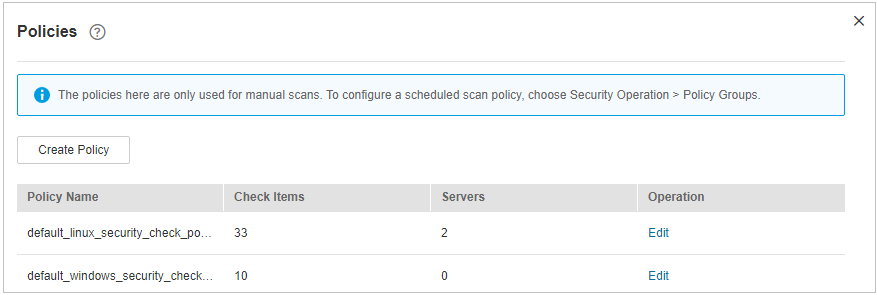
Click Policies in the upper right corner of the page.

Figure 2 Baseline policies
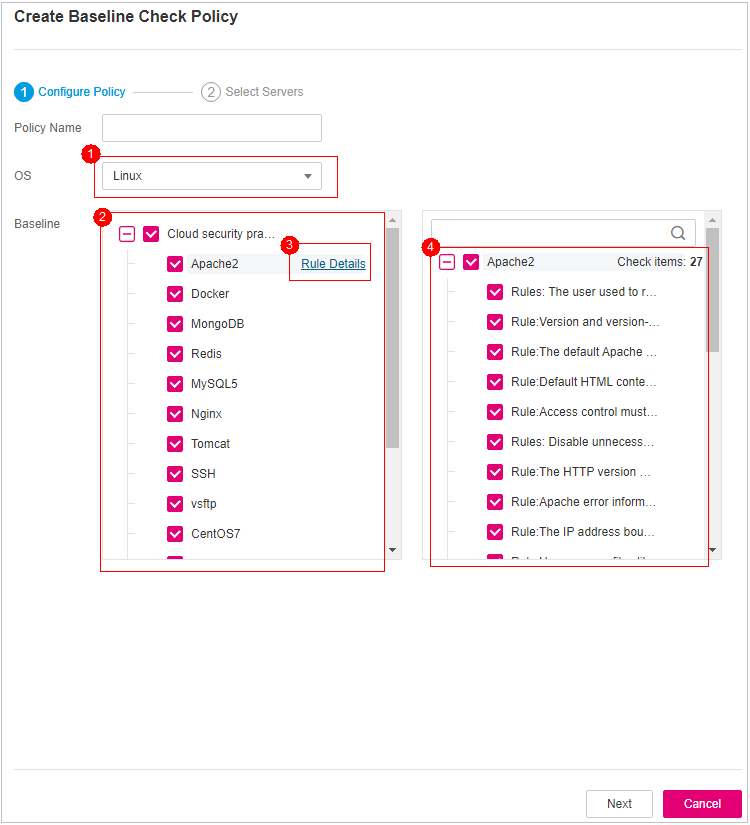
Click Create Policy and configure the policy information by referring to Table 1.
To check baseline details, click Rule Details on the right of a baseline name.
Note
If you select Linux for OS, you can select any checks included in Baseline and edit rules. This function is not supported for Windows servers.

Figure 3 Creating a policy
Table 1 Baseline policy parameters¶ Parameter
Description
Example Value
Policy
Policy name
default_linux_security_check_policy
OS
OS that will be checked.
Linux
Windows
Linux
Baseline
Baseline used for a check. Check items are as follows:
For Linux,
Cloud security practice: Apache2, Docker, MongoDB, Redis, MySQL5, Nginx, Tomcat, SSH, vsftp, CentOS7, EulerOS, EulerOS_ext, Kubernetes-Node, Kubernetes-Master, HCE 1.1, HCE 2.0
DJCP MLPS compliance: Apache 2, MongoDB, MySQL 5, Nginx, Tomcat, CentOS 6, CentOS 7, CentOS 8, Debian 9, Debian 10, Debian 11, Red Hat 6, Red Hat 7, Red Hat 8, Ubuntu 12, Ubuntu 14, Ubuntu 16, Ubuntu 18, Alma, HCE 1.1
For Windows,
The cloud security practice baseline can check MongoDB, Apache2, MySQL, Nginx, Redis, Tomcat, Windows_2008, Windows_2012, Windows_2016, Windows_2019, and SqlServer.
Cloud security practices: Select all.
DJCP MLPS: Select all.
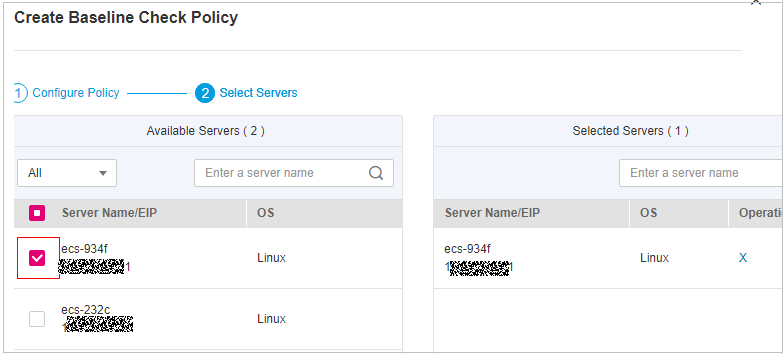
Confirm the information, click Next, and select the server to be associated with the application based on the server name, server ID, EIP, or private IP address.

Figure 4 Selecting servers
Confirm the information and click OK. The baseline policy will be displayed in the policy list.
In the upper left corner of the Baseline Inspection page, select the target baseline inspection policy.

Figure 5 Selecting the target baseline policy
Click Scan in the upper right corner of the page.
If the time displayed in the Last scanned area under the Baseline Check Policy is the actual check time, the check is complete.
Note
After a manual check is performed, the button will display Scanning and be disabled. If the check time exceeds 30 minutes, the button will be automatically enabled again. If the time displayed in the Last scanned area becomes the current check time, it indicates the check has completed.
After the check is complete, you can view the check results and handling suggestions by referring to Viewing and Processing Baseline Check Results.