- User Guide
- Asset Management
- Server Management
- Enabling Protection
- Enterprise/Premium Edition
Enterprise/Premium Edition
The professional, enterprise, and premium editions provides different levels of protection for your servers. You can apply for and enable them as needed.
Check Frequency
HSS performs a full scan in the early morning every day.
After you enable server protection, you can view scan results after the automatic scan in the next early morning, or perform a manual scan immediately.
Prerequisite
The agent has been installed on the servers to be protected, the agent status is Online, and the protection status is Unprotected.
Constraints
Linux
On servers running the EulerOS with ARM, HSS does not block the IP addresses suspected of SSH brute-force attacks, but only generates alarms.
Windows
Authorize the Windows firewall when you enable protection for a Windows server. Do not disable the Windows firewall during the HSS in-service period. If the Windows firewall is disabled, HSS cannot block brute-force attack IP addresses.
If the Windows firewall is manually enabled, HSS may also fail to block brute-force attack IP addresses.
Procedure
Log in to the management console.
Click
 in the upper left corner of the page, select a region, and choose Security > HSS. The HSS page is displayed.
In the navigation pane, choose Asset Management > Servers & Quota. Click the Servers tab.
Enable protection for one or multiple servers.

Figure 1 Enabling protection
Enabling protection for a server
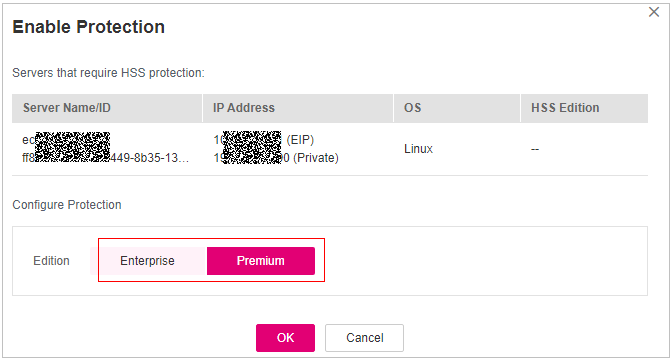
Click Enable in the Operation column of a server. In the dialog box that is displayed, confirm the server information.

Figure 2 Confirming the protection information about a server
Table 1 Protection parameters¶ Parameter
Description
Example Value
Edition
Select the enterprise or premium edition.
Enterprise edition: It provides support for the DJCP MLPS certification. Main features include asset fingerprint management, vulnerability management, malicious program detection, web shell detection, and abnormal process behavior detection.
Premium edition: It helps you with the DJCP MLPS certification and provides advanced features, including application protection, ransomware prevention, high-risk command detection, privilege escalation detection, and abnormal shell detection.
Enterprise
Enabling protection in batches
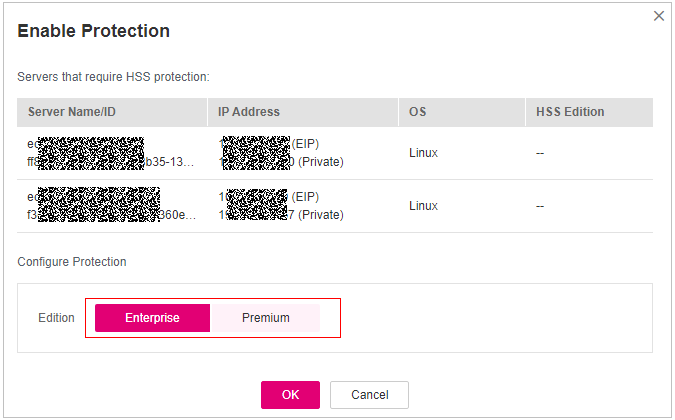
Select multiple servers and click Enable above the server list. In the dialog box that is displayed, confirm the server information. Table 1 lists the parameters.

Figure 3 Confirm information about multiple servers
Confirm the information and click OK. If the protection status of the target servers is Protected, the protection has been enabled.