Deploying a Policy
You can quickly configure and start server scans by using policy groups. Simply create a group, add policies to it, and apply this group to servers. The agents deployed on your servers will scan everything specified in the policies.
Precautions
When you enable the enterprise edition, the policy group of this edition (including weak password and website shell detection policies) takes effect for all your servers by default.
When you enable the premium edition alone or the premium edition included with the WTP edition, the policy group of this edition takes effect by default.
To create your own policy group, you can copy the policy group of premium edition and add or remove policies in the copy.
Creating a Policy Group
Log in to the management console.
Click
 in the upper left corner of the page, select a region, and choose Security > HSS. The HSS page is displayed.
In the navigation tree on the left, choose Security Operations > Policies
Copy a policy group.
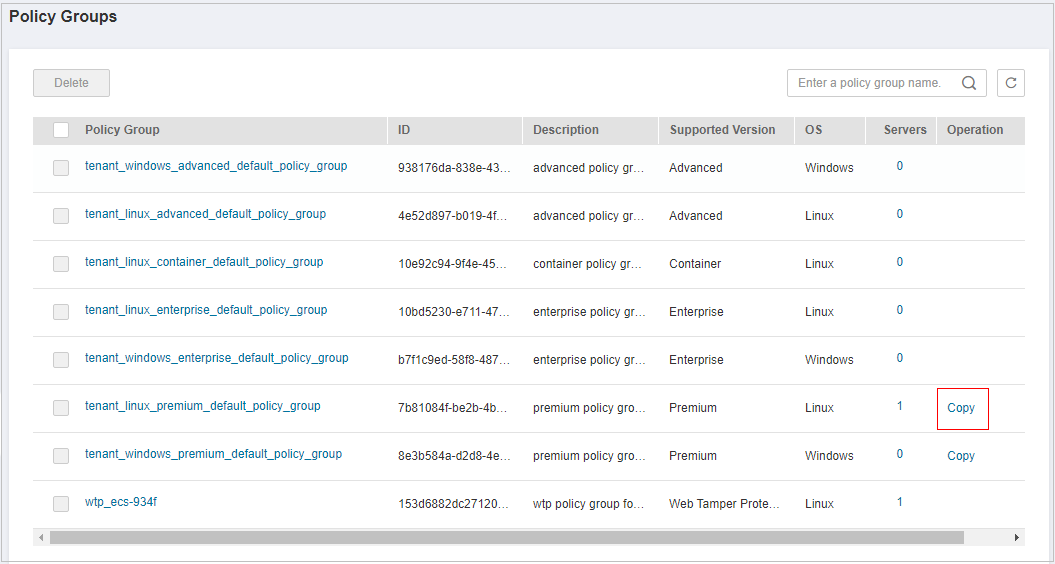
Select the tenant_linux_premium_default_policy_group policy group. Locate the row that this policy group resides, click Copy in the Operation column.

Figure 1 Copying a Linux policy group
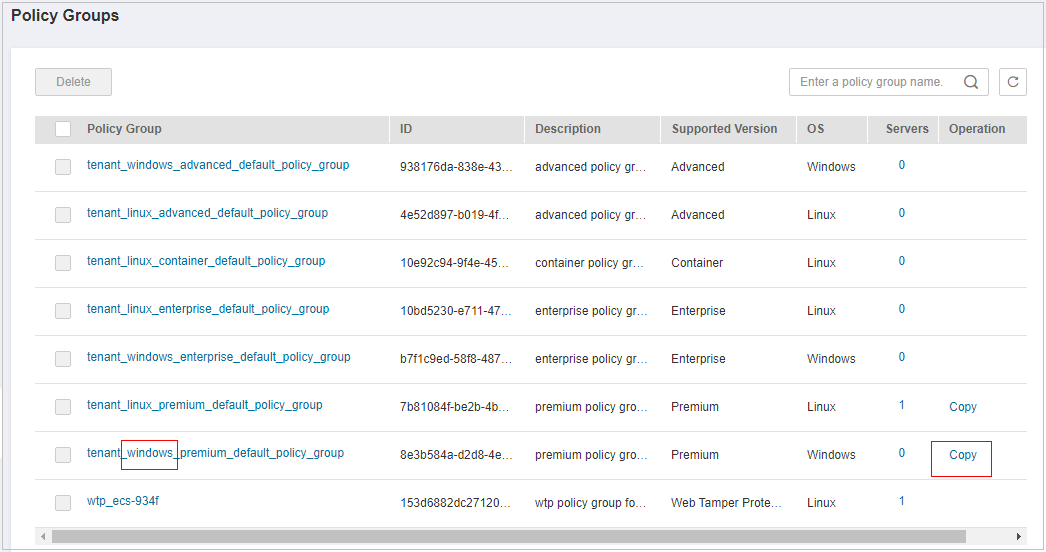
Select the tenant_windows_premium_default_policy_group policy group. Click Copy in the Operation column.

Figure 2 Copying a Windows policy group
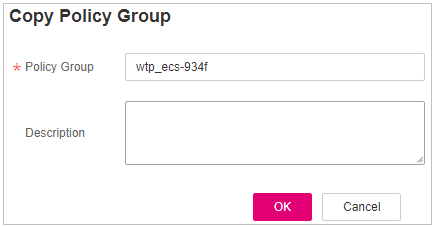
In the dialog box displayed, enter a policy group name and description, and click OK.
Note
The name of a policy group must be unique, or the group will fail to be created.
The policy group name and its description can contain only letters, digits, underscores (_), hyphens (-), and spaces, and cannot start or end with a space.

Figure 3 Creating a policy group
Click OK.
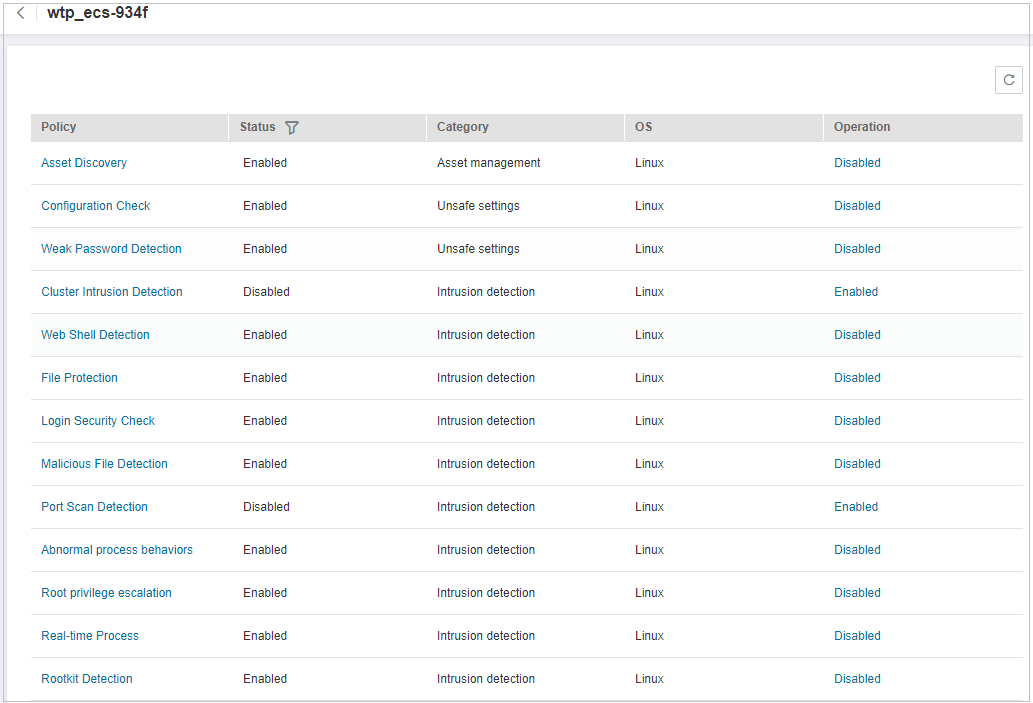
Click the name of the policy group you just created. The policies in the group will be displayed.

Figure 4 Policy group details
Click a policy name and modify its settings as required. For details, see Configuring Policies.
Enable or disable the policy by clicking the corresponding button in the Operation column. You can click
 to refresh the page.
Applying a Policy Group
Log in to the management console and go to the HSS page.
In the navigation pane, choose Asset Management > Servers & Quota and click Servers.
Select one or more servers for which you want to deploy a policy, and .

Figure 5 Applying a policy
In the dialog box that is displayed, select a policy group and click OK.
Note
Old policies applied to a server will become invalid if you apply new policies to the server.
Policies are applied to the servers within 1 minute.
Policies applied to offline servers will not take effect until the servers are online.
In a deployed policy group, you can enable, disable, or modify policies.
A policy group that has been deployed cannot be deleted.