Creating an HTTP Function
Overview
HTTP functions are designed to optimize web services and support multiple programming languages. You can send HTTP requests to URLs to trigger function execution.
Common Function Request Headers
The following table lists the default request header fields of an HTTP function.
Field | Description |
|---|---|
X-CFF-Request-Id | ID of the current request |
X-CFF-Memory | Allocated memory |
X-CFF-Timeout | Function timeout duration |
X-CFF-Func-Version | Function version |
X-CFF-Func-Name | Function name |
X-CFF-Project-Id | Project ID |
X-CFF-Package | App to which the function belongs |
X-CFF-Region | Current region |
Constraints
HTTP functions do not distinguish between programming languages. The handler must be set in the bootstrap file. You can directly write the startup command, and allow access over port 8000. The bound IP address is 127.0.0.1.
The HTTP response body cannot exceed 6 MB.
A valid HTTP function response must contain body(String), statusCode(int), headers(Map), and isBase64Encoded(boolean). By default, the response is encoded using Base64. The default value of isBase64Encoded is true. The same applies to other frameworks.
The bootstrap file is the startup file of the HTTP function. The HTTP function can only read bootstrap as the startup file name. If the file name is not bootstrap, the service cannot be started. For more information, see the bootstrap file example.
If you run the JAR package, you are advised to add the JVM parameter -Dfile.encoding=utf-8 to bootstrap. Otherwise, garbled Chinese characters may be displayed.
Only APIG triggers can be created for HTTP functions.
HTTP functions cannot be executed for a long time, invoked asynchronously, or retried.
When a function initiates an HTTP request, the request IP address is dynamic for private network access and fixed for public network access. For more information, contact technical support.
Creating and Configuring an HTTP Function
The following uses an example to describe how to create and configure an HTTP function.
Step 1: Creating a Code Package
Prepare a Node.js script. A code example is as follows:
const http = require('http'); // Import Node.js core module

var server = http.createServer(function (req, res) {   //create web server
    res.writeHead(200, { 'Content-Type': 'text/html' });
    res.write('<html><body><h2>This is http function.</h2></body></html>');
    res.end();
});

server.listen(8000, '127.0.0.1'); //6 - listen for any incoming requests

console.log('Node.js web server at port 8000 is running..')
You have prepared a bootstrap file as the startup file of the HTTP function.
The content of the bootstrap file is as follows:
/opt/function/runtime/nodejs12.13/rtsp/nodejs/bin/node $RUNTIME_CODE_ROOT/index.js
Compress the preceding two files into a ZIP package.
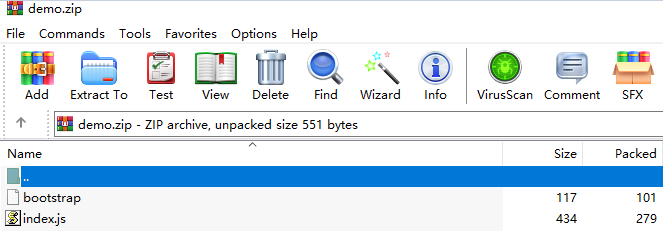
Figure 1 Compressing files into a ZIP package
For HTTP functions in Python, add the -u parameter in the bootstrap file to ensure that logs can be flushed to the disk. For example:
/opt/function/runtime/python3.6/rtsp/python/bin/python3 -u $RUNTIME_CODE_ROOT/index.py
To use another runtime, change the runtime path by referring to Table 2. The code package path does not need to be changed.
Table 2 Paths for different runtimes¶ Runtime
Path
Java 8
/opt/function/runtime/java8/rtsp/jre/bin/java
Java 11
/opt/function/runtime/java11/rtsp/jre/bin/java
Java 17
/opt/function/runtime/java17/rtsp/jre/bin/java
Java 21
/opt/function/runtime/java21/rtsp/jre/bin/java
Node.js 6
/opt/function/runtime/nodejs6.10/rtsp/nodejs/bin/node
Node.js 8
/opt/function/runtime/nodejs8.10/rtsp/nodejs/bin/node
Node.js 10
/opt/function/runtime/nodejs10.16/rtsp/nodejs/bin/node
Node.js 12
/opt/function/runtime/nodejs12.13/rtsp/nodejs/bin/node
Node.js 14
/opt/function/runtime/nodejs14.18/rtsp/nodejs/bin/node
Node.js 16
/opt/function/runtime/nodejs16.17/rtsp/nodejs/bin/node
Node.js 18
/opt/function/runtime/nodejs18.15/rtsp/nodejs/bin/node
Node.js 20
/opt/function/runtime/nodejs20.15/rtsp/nodejs/bin/node
Python 2.7
/opt/function/runtime/python2.7/rtsp/python/bin/python
Python 3.6
/opt/function/runtime/python3.6/rtsp/python/bin/python3
Python 3.9
/opt/function/runtime/python3.9/rtsp/python/bin/python3
Python 3.10
/opt/function/runtime/python3.10/rtsp/python/bin/python3
Python 3.12
/opt/function/runtime/python3.12/rtsp/python/bin/python3
PHP 7.3
/opt/function/runtime/php7.3/rtsp/php/bin/php
PHP 8.3
/opt/function/runtime/php8.3/rtsp/php/bin/php
C# (.NET Core 2.1)
/opt/function/runtime/dotnet2.1/rtsp/dotnet/dotnet
C# (.NET Core 3.1)
/opt/function/runtime/dotnet3.1/rtsp/dotnet/dotnet
C# (.NET Core 6.0)
/opt/function/runtime/dotnet6.0/rtsp/dotnet/dotnet
Step 2: Deploying the Code Package
On the Code page of the HTTP function, click Upload > Local ZIP, and upload the prepared ZIP file.
Create a trigger.
Choose Configuration > Triggers and click Create Trigger.
Configure the trigger information..
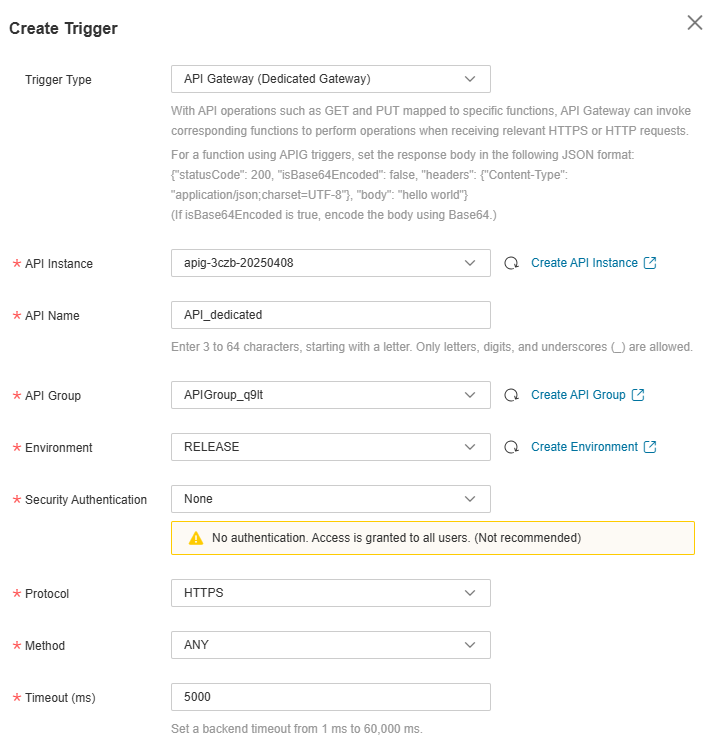
Figure 2 Creating a trigger
In this example, Security Authentication is set to None. You need to select an authentication mode based on site requirements.
Note
App: AppKey and AppSecret authentication. This mode is of high security and is recommended.
IAM: IAM authentication. This mode grants access permissions to IAM users only and is of medium security.
None: No authentication. This mode grants access permissions to all users.
Click OK.
Publish the API.
On the Triggers tab page, click an API name to go to the API overview page.
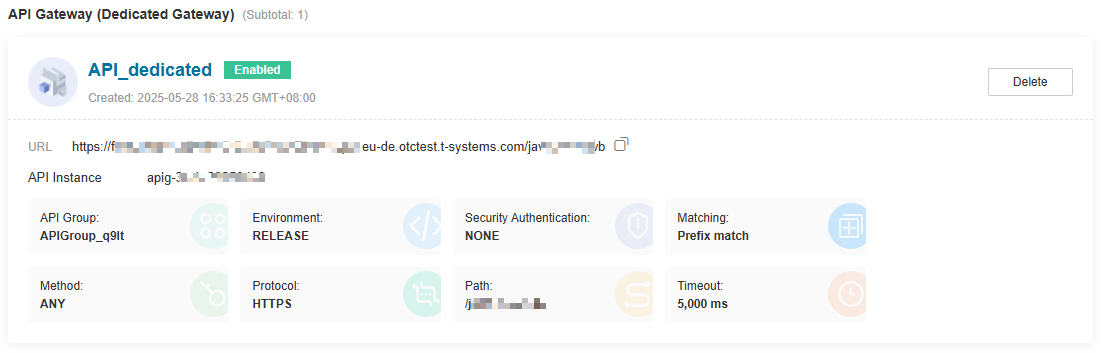
Figure 3 API trigger
Click Edit in the upper right corner. The API basic information page is displayed.

Figure 4 Modifying an API
Change the value of Path to /user/get and click Finish.
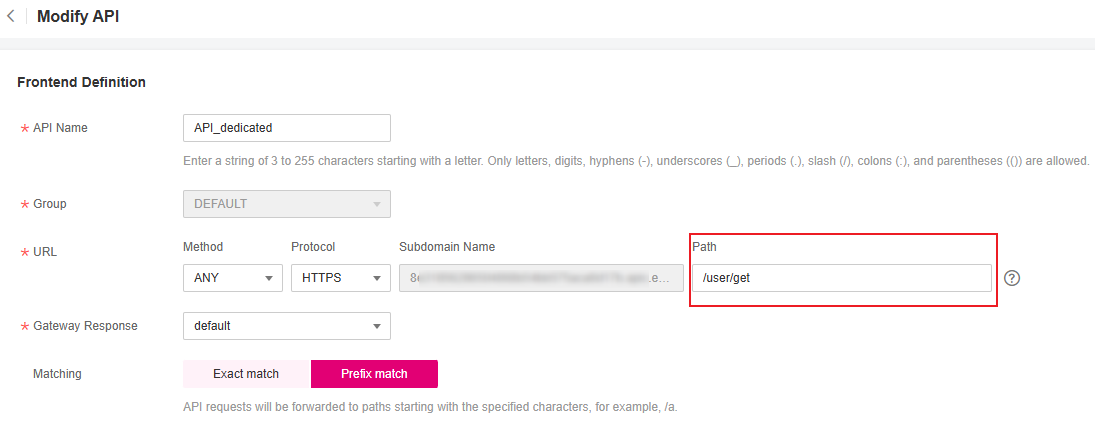
Figure 5 Defining an API request
On the API details page, click Publish in the upper right corner. On the displayed page, click OK.
Step 3: Triggering Function Execution
Go to the FunctionGraph console, choose Functions > Function List in the navigation pane, and click the created HTTP function to go to its details page.
Choose Configuration > Triggers, copy the URL as shown in , and access it using a browser.
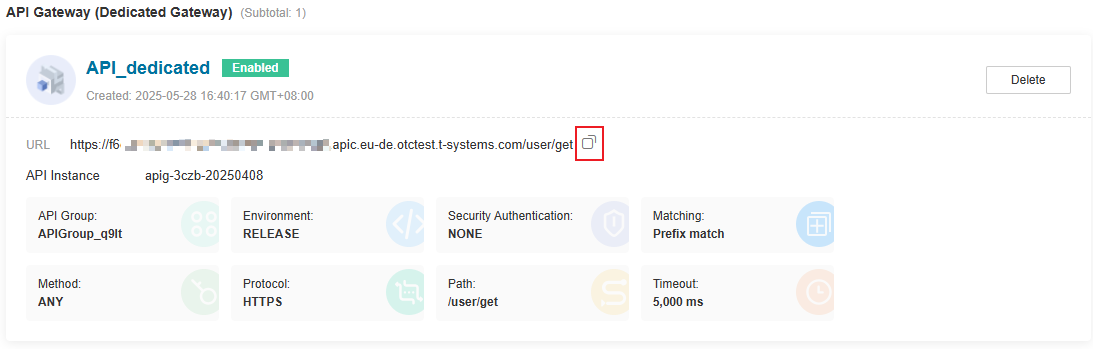
Figure 6 Copying the URL
View the request result.

Figure 7 Viewing the request result