Modifying an Enterprise Router
Scenarios
This section describes how to modify settings of an enterprise router. You can:
Modify the name of an enterprise router.
Enable or disable Default Route Table Association.
Enable or disable Default Route Table Propagation.
Procedure
Log in to the management console.
Click
 in the upper left corner and select the desired region and project.
Click Service List and choose Networking > Enterprise Router.
The Enterprise Router page is displayed.
Search for the target enterprise router by name.

Figure 1 Searching for an enterprise router
In the upper right corner of the target enterprise router, choose More > Modify Settings.
The Modify Settings page is displayed.
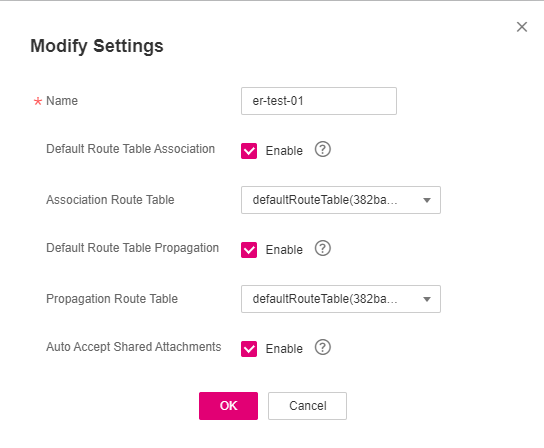
Figure 2 Modify Settings
Modify the enterprise router based on Table 1.
Table 1 Parameter description¶ Parameter
Setting
Example Value
Name
Mandatory
If you want to change the name of the enterprise router, enter a new name. The name:
Must contain 1 to 64 characters.
Can contain letters, digits, underscores (_), hyphens (-), and periods (.).
er-test-01
Default Route Table Association
Optional
Enabling Default Route Table Association can simplify network configurations. After this function is enabled:
Select a route table for Default Association Route Table.
If you create an attachment to this enterprise router, the attachment will be automatically associated with the default association route table.
Enable
Association Route Table
Optional
If you enable Default Route Table Association, select a route table for Association Route Table.
You can select a custom route table.
If you do not select a route table, a route table named defaultRouteTable will be automatically created as the default association route table.
If there is already a route table named defaultRouteTable, no route table will be created.
er-rtb-b931
Default Route Table Propagation
Optional
Enabling Default Route Table Propagation can simplify network configurations. After this function is enabled:
Select a route table for Association Route Table.
If you create an attachment to this enterprise router, the attachment will be automatically propagated to the default propagation route table.
Enable
Propagation Route Table
Optional
If you enable Default Route Table Propagation, select a route table for Propagation Route Table.
You can select a custom route table.
If you do not select a route table, a route table named defaultRouteTable will be automatically created as the default propagation route table.
If there is already a route table named defaultRouteTable, no route table will be created.
er-rtb-b931
Auto Accept Shared Attachments
Optional
As the owner, you can share your enterprise router with other users. These other users can create attachments for your enterprise router.
If you do not select this option, you must manually accept attachments to this enterprise router from the accounts that this enterprise router is shared with.
If you select this option, the attachments from the accounts that this enterprise router is shared with will be automatically accepted.
For details, see Sharing Overview.
Enable
Click OK.
The enterprise router list is displayed.
Check the enterprise router settings.
The settings take effect immediately.