Detaching a Data Disk
Scenarios
Data disks can be detached online or offline, which means that the server containing the to-be-detached data disk can either be in the Running or Stopped state.
ECS
Detach a disk online. For details, see Storage > Detaching an EVS Disk from a Running ECS in the Elastic Cloud Server User Guide.
BMS
SCSI disks can be attached to BMSs and used as data disks. You can detach a data disk either from a running or stopped BMS.
For a data disk attached to a server, the disk function is displayed as Data disk, and the disk status is displayed as In-use in the disk list. After the data disk has been detached from the server, the disk function remains unchanged, the disk status changes to Available for a non-shared data disk, and the disk status changes to Available for a shared data disk after it is detached from all its servers.
Prerequisites
Before detaching an EVS disk from a running Windows ECS, ensure that no program is reading data from or writing data to the disk. Otherwise, data will be lost.
Before detaching an EVS disk from a running Linux ECS, you must log in to the ECS and run the umount command to cancel the association between the disk and the file system. In addition, ensure that no program is reading data from or writing data to the disk. Otherwise, detaching the disk will fail.
Detaching a Non-shared Disk
Log in to the management console.
Click
 in the upper left corner and select the desired region and project.
Under Storage, click Elastic Volume Service.
The disk list page is displayed.
Determine whether to view the server information before detaching the disk.
If you need to view the server information, perform the following procedure:
In the disk list, click the name of the to-be-detached disk.
The disk details page is displayed.
Click the Attachments tab to view the server where the target disk has been attached.
Click
 to select the server and click Detach Disk.
The Detach Disk dialog box is displayed, as shown in Figure 1.
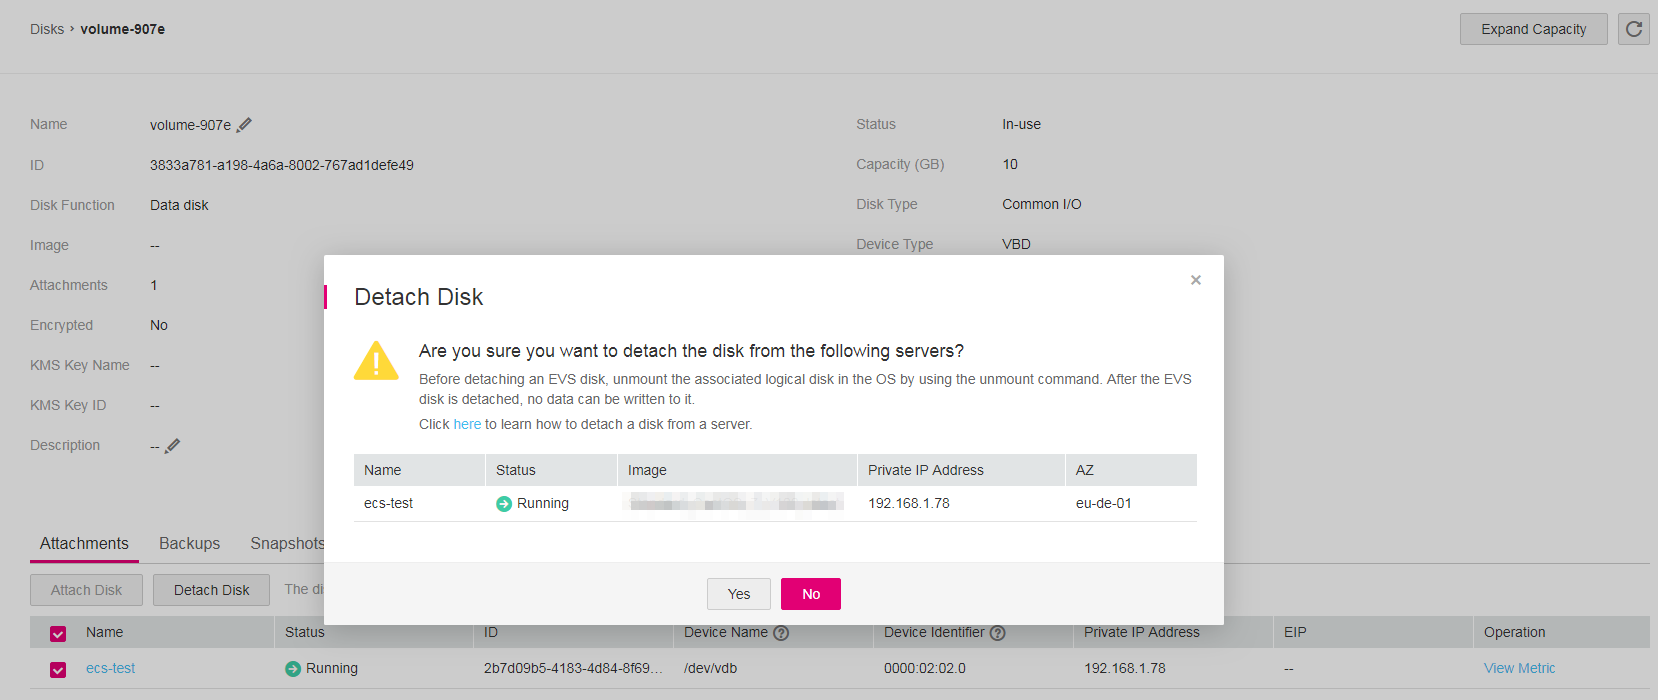
Figure 1 Detach Disk
Click Yes to detach the disk.
If you do not need to view the server information, perform the following procedure:
The disk list is displayed. The disk status is Detaching, indicating that the disk is being detached from the server.
When the status changes to Available, the disk is successfully detached.
Detaching a Shared Disk
Log in to the management console.
Click
in the upper left corner and select the desired region and project.Under Storage, click Elastic Volume Service.
The disk list page is displayed.
Determine whether to view the server information before detaching the disk.
If you need to view the server information, perform the following procedure:
In the disk list, click the name of the to-be-detached disk.
The disk details page is displayed.
Click the Attachments tab to view the servers where the target disk has been attached.
Click
to select the server and click Detach Disk.Shared EVS disks support batch detachment so that you can select multiple servers at a time.
The Detach Disk dialog box is displayed, as shown in Figure 3.
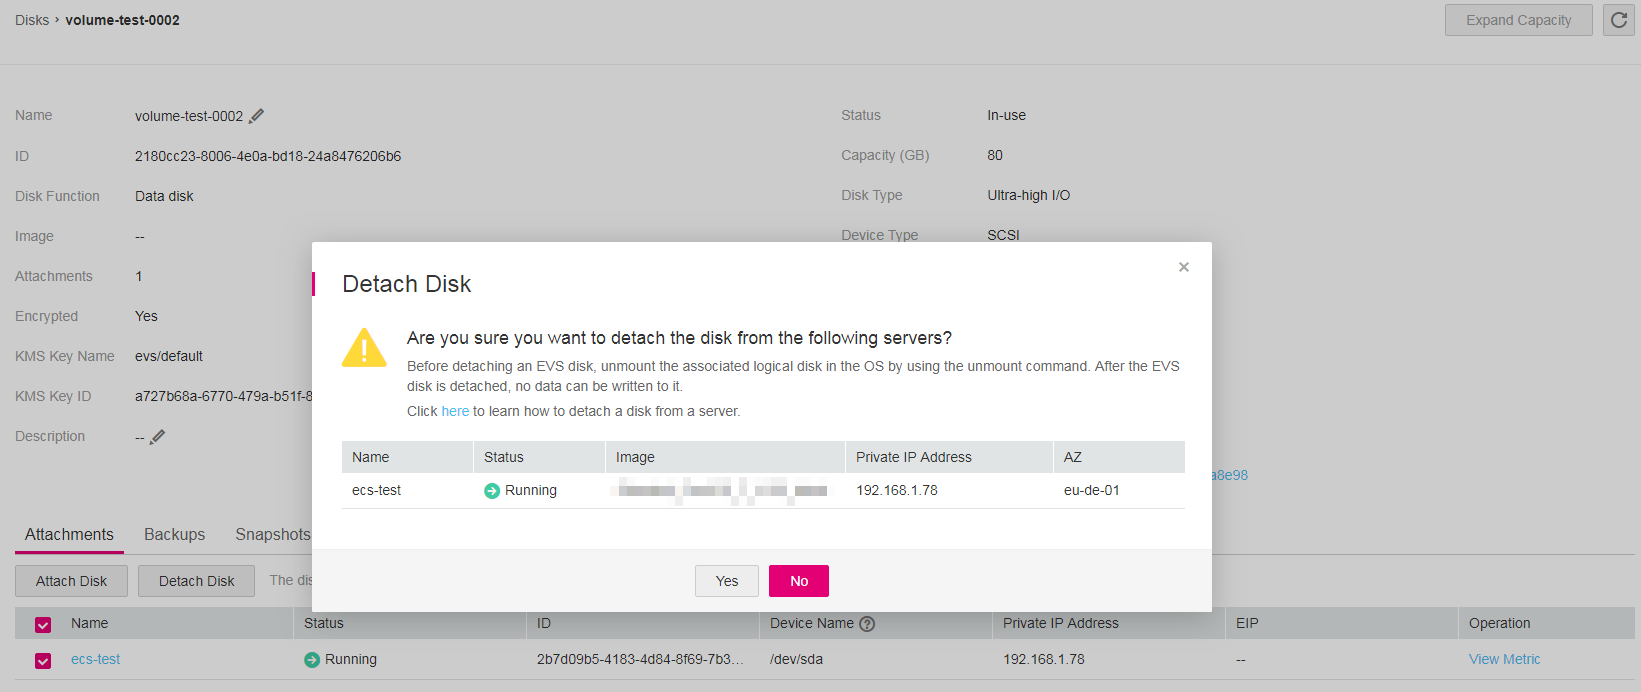
Figure 3 Detaching a shared disk
Click Yes to detach the disk.
If you do not need to view the server information, perform the following procedure:
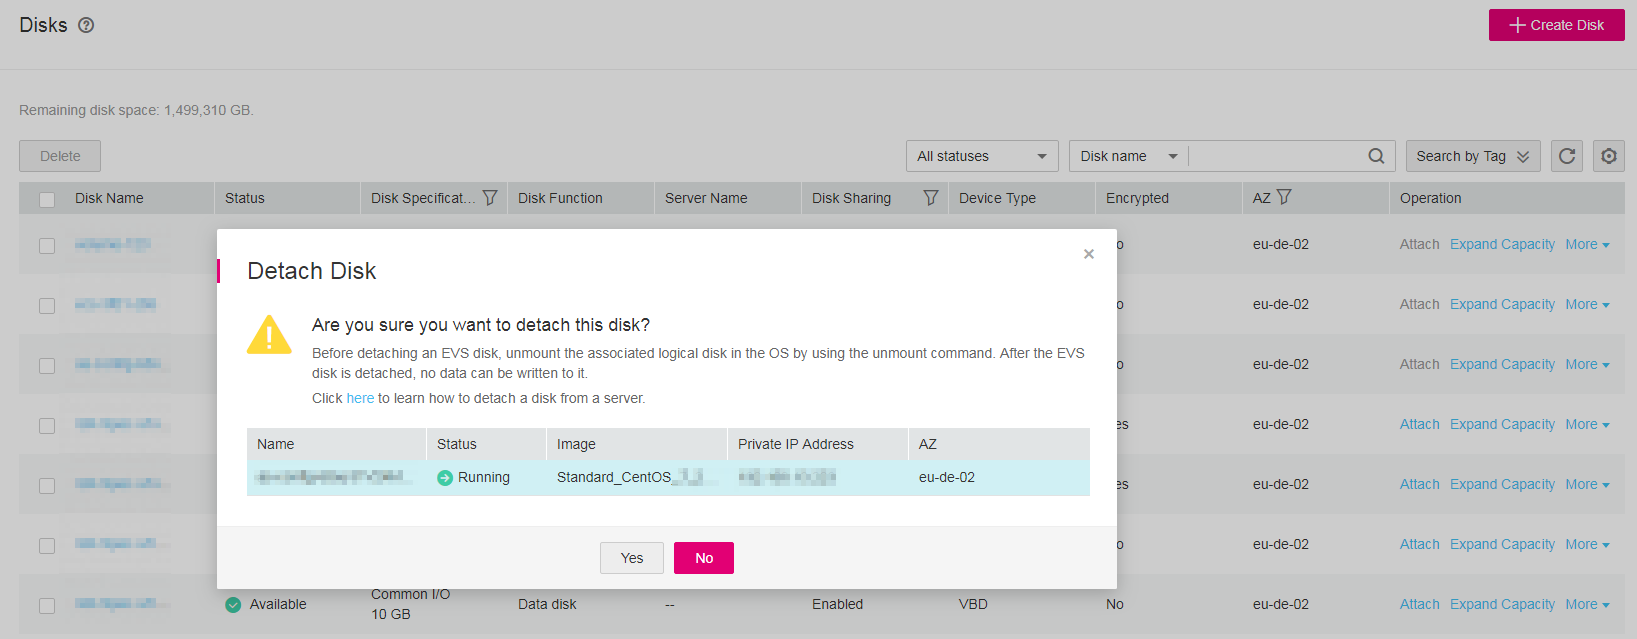
In the disk list, locate the row that contains the target disk and choose More > Detach in the Operation column.
The Detach Disk dialog box is displayed, as shown in Figure 4.
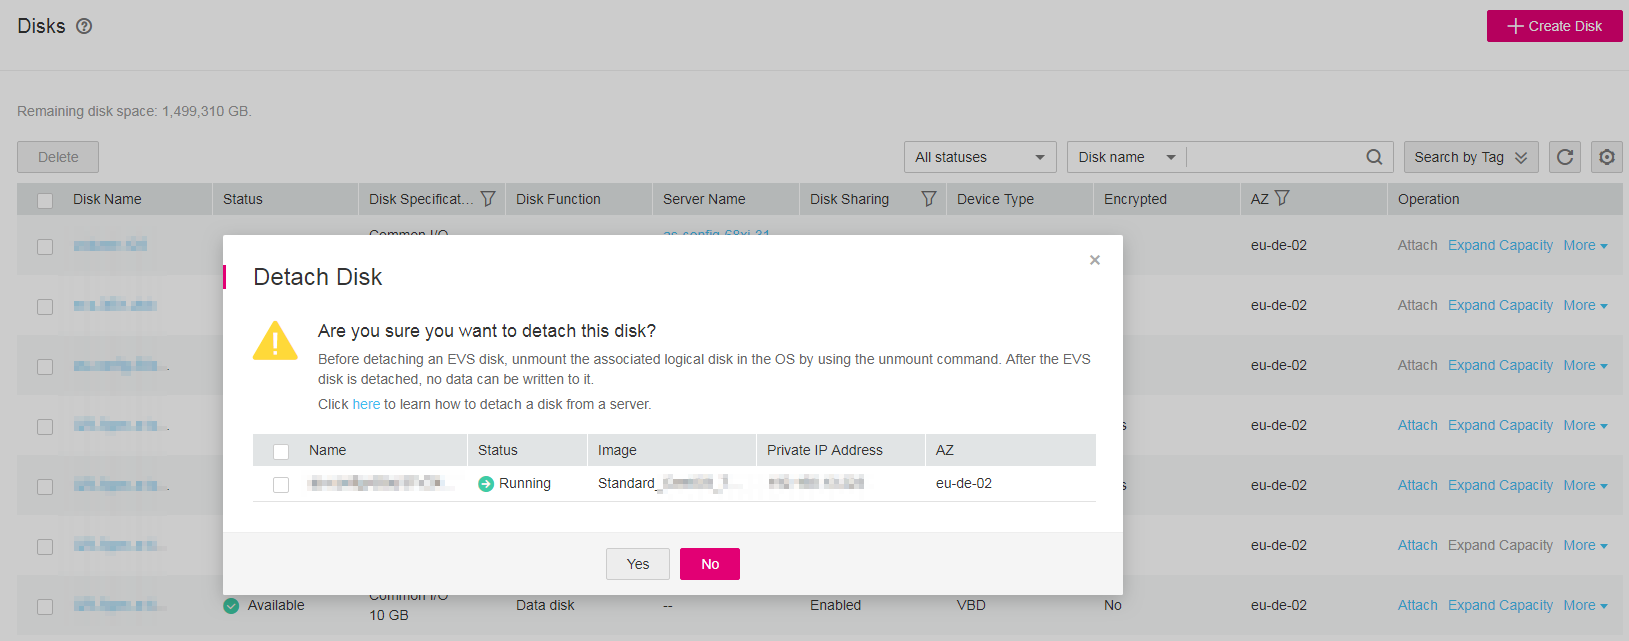
Figure 4 Detaching a shared disk dialog box
Click
to select the server.Shared EVS disks support batch detachment so that you can select multiple servers at a time.
Click Yes to detach the disk.
The disk list page is displayed. The disk status is Detaching, indicating that the disk is being detached from the server.
If the shared EVS disk has been attached to multiple servers and needs to be detached from only some of its servers, the disk status will go back to In-use after the disk has been detached from the target servers. The disk status changes to Available only when it has been detached from all the servers.