Adding a Network Interface
Scenarios
If your ECS requires multiple network interfaces, you can add them to your ECS.
Procedure
Log in to the management console.
Click
 in the upper left corner and select your region and project.
Under Computing, click Elastic Cloud Server.
Click the name of the target ECS.
The page providing details about the ECS is displayed.
On the NICs tab, click Add NIC.
Set the subnet and security group for the network interface to be added.
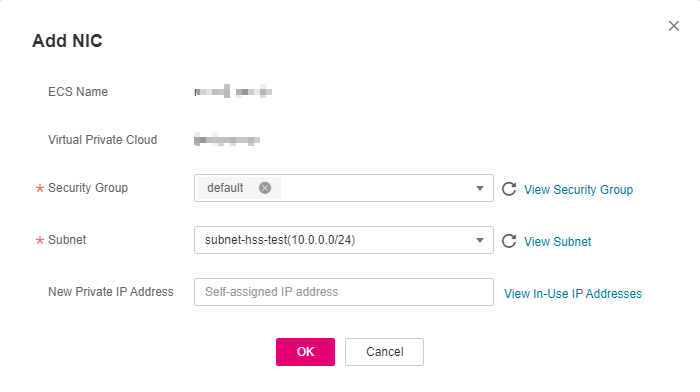
Figure 1 Configuring the subnet and security group
Security Group: You can select multiple security groups. In such a case, the access rules of all the selected security groups will apply to the ECS.
Subnet: specifies the subnet to which the network interface to be added belongs.
New Private IP Address: If you want to add a network interface with a specified IP address, enter an IP address into the New Private IP Address field. I
Click OK.
Follow-up Procedure
Some OSs cannot identify newly added network interfaces. In this case, you must manually activate the network interfaces. Ubuntu is used as an example in the following network interface activation procedure. Required operations may vary among systems. For additional information, see the documentation for your OS.
Locate the row containing the target ECS and click Remote Login in the Operation column.
Log in to the ECS.
Run the following command to view the network interface name:
ifconfig -a
In this example, the network interface name is eth2.
Run the following command to switch to the target directory:
cd /etc/network
Run the following command to open the interfaces file:
vi interfaces
Add the following information to the interfaces file:
auto eth2
iface eth2 inet dhcp
Run the following command to save and exit the interfaces file:
:wq
Run either the ifup eth2 command or the /etc/init.d/networking restart command to make the newly added network interface take effect.
X in the preceding command indicates the network interface name and SN, for example, ifup eth2.
Run the following command to check whether the network interface name obtained in step 2 is displayed in the command output:
ifconfig
For example, check whether eth2 is displayed in the command output.
If yes, the newly added network interface has been activated, and no further action is required.
If no, the newly added network interface failed to be activated. Go to step 9.
Log in to the management console. Locate the row containing the target ECS, click More in the Operation column, and select Restart.
Run the following command to check whether the network interface name obtained in step 2 is displayed in the command output:
If yes, no further action is required.
If no, contact customer service.