Configuring DNS
A DNS server is used to resolve domain names of file systems. The DNS server IP address is 100.125.4.25.
Scenarios
By default, the IP address of the DNS server used to resolve domain names of file systems is automatically configured on ECSs when creating ECSs. No manual configuration is needed except when the resolution fails due to a change in the DNS server IP address.
Windows Server 2012 is used as an example in the operation procedures for Windows.
Procedure (Linux)
Log in to the ECS as user root.
Run the vi /etc/resolv.conf command to edit the /etc/resolv.conf file. Add the DNS server IP address above the existing nameserver information. See Figure 1.
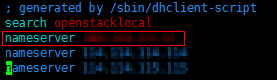
Figure 1 Configuring DNS
The format is as follows:
nameserver 100.125.4.25
Press Esc, input :wq, and press Enter to save the changes and exit the vi editor.
Run the following command to check whether the IP address is successfully added:
cat /etc/resolv.conf
Run the following command to check whether an IP address can be resolved from the file system domain name:
nslookup File system domain name
Note
Obtain the file system domain name from the file system mount point.
(Optional) In a network environment of the DHCP server, edit the /etc/resolv.conf file to prevent the file from being automatically modified upon an ECS startup, and prevent the DNS server IP address added in 2 from being reset.
Run the following command to lock the file:
chattr +i /etc/resolv.conf
Note
Run the chattr -i /etc/resolv.conf command to unlock the file if needed.
Run the following command to check whether the editing is successful:
lsattr /etc/resolv.conf
If the information shown in Figure 2 is displayed, the file is locked.

Figure 2 A locked file
Procedure (Windows)
Go to the ECS console and log in to the ECS running Windows Server 2012.
Click This PC in the lower left corner.
On the page that is displayed, right-click Network and choose Properties from the drop-down list. The Network and Sharing Center page is displayed, as shown in Figure 3. Click Local Area Connection.
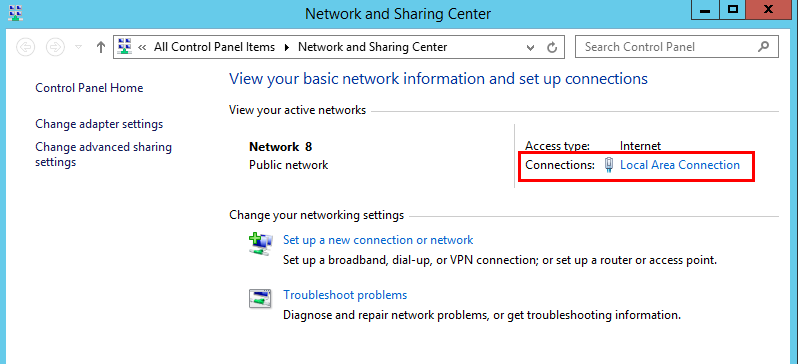
Figure 3 Page for network and sharing center
In the Activity area, select Properties. See Figure 4.
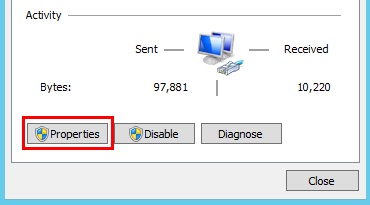
Figure 4 Local area connection
In the Local Area Connection Properties dialog box that is displayed, select Internet Protocol Version 4 (TCP/IPv4) and click Properties. See Figure 5.
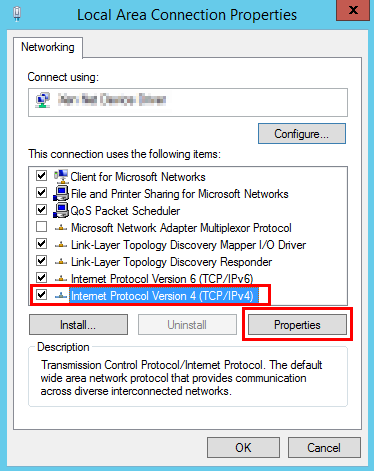
Figure 5 Local area connection properties
In the dialog box that is displayed, select Use the following DNS server addresses: and configure DNS, as shown in Figure 6. The DNS server IP address is 100.125.4.25. After completing the configuration, click OK.
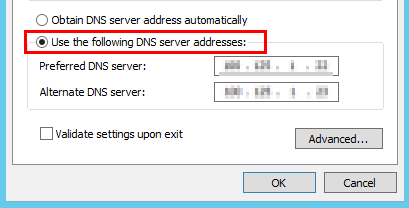
Figure 6 Configuring DNS on Windows