How Can I Transfer Files from a Local Mac to a Windows ECS?
Scenarios
This section describes how to use Microsoft Remote Desktop for Mac to transfer files from a local Mac to a Windows ECS.
Prerequisites
The remote access tool supported by Mac has been installed on the local Mac. This section uses Microsoft Remote Desktop for Mac as an example. Download Microsoft Remote Desktop for Mac.
The target ECS has had an EIP bound.
When you log in to the ECS for the first time, ensure that RDP has been enabled on it. To do so, use VNC to log in to the ECS, enable RDP, and access the ECS using MSTSC.
Note
By default, RDP has been enabled on the ECSs created using a public image.
Procedure
Start Microsoft Remote Desktop.
Click Add Desktop.
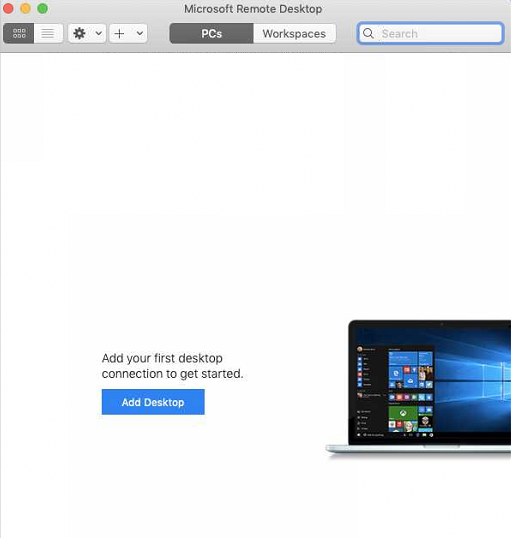
Figure 1 Add Desktop
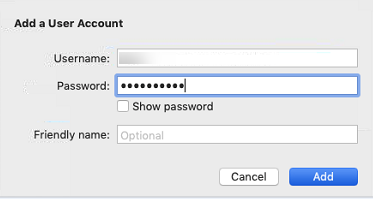
Set login parameters.
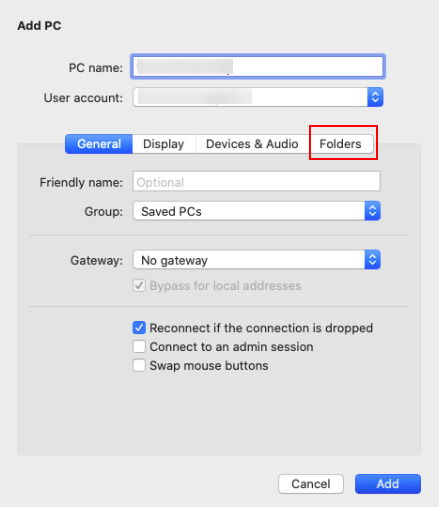
Select the folder to be uploaded.
Click Folders and switch to the folder list.
Click
 in the lower left corner, select the folder to be uploaded, and click Add.
On the Remote Desktop page, double-click the icon of the target Windows ECS.
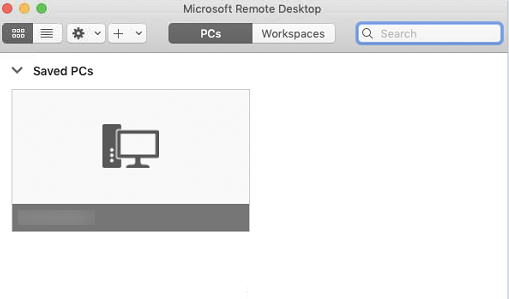
Figure 4 Double-click for login
Confirm the information and click Continue.
You have connected to the Windows ECS.
View the shared folder on the ECS.
Copy the files to be uploaded to the ECS. Alternatively, download the files from the ECS to your local Mac.