Migrating Data from MySQL to OBS
Scenario
CDM supports table-to-OBS data migration. This section describes how to migrate tables from a MySQL database to OBS. The process is as follows:
Prerequisites
You have obtained the domain name, port number, AK, and SK for accessing OBS.
You have obtained the IP address, port, database name, username, and password for connecting to the MySQL database. In addition, the user must have the read and write permissions on the MySQL database.
You have uploaded the MySQL database driver on the Job Management > Links > Driver Management page.
Creating a CDM Cluster and Binding an EIP to the Cluster
Create a CDM cluster.
The key configurations are as follows:
The flavor of the CDM cluster is selected based on the amount of data to be migrated. Generally, cdm.medium meets the requirements for most migration scenarios.
After the CDM cluster is created, on the Cluster Management page, click Bind EIP in the Operation column to bind an EIP to the cluster. The CDM cluster uses the EIP to access MySQL.
Note
If SSL encryption is configured for the access channel of a local data source, CDM cannot connect to the data source using the EIP.
Creating a MySQL Link
On the Cluster Management page, locate a cluster and click Job Management in the Operation column. On the displayed page, click the Links tab and then Create Link.
Select RDS for MySQL and click Next to set the link parameters.
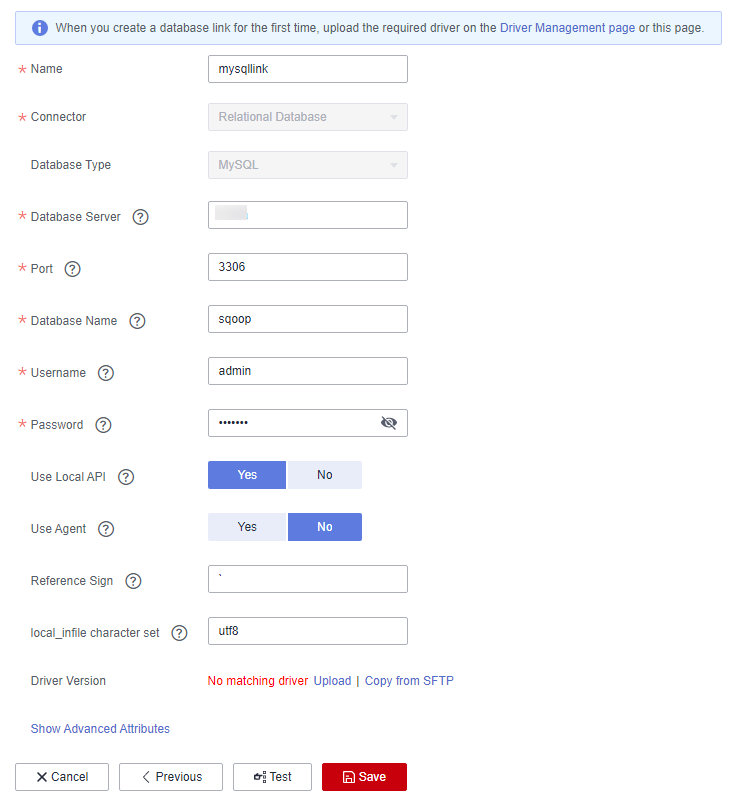
Figure 1 Creating a MySQL link
Click Show Advanced Attributes to view more optional parameters. For details, see Link to an RDS for MySQL/MySQL Database. Retain the default values of the optional parameters and configure the mandatory parameters according to Table 1.
Table 1 MySQL link parameters¶ Parameter
Description
Example Value
Name
Unique link name
mysqllink
Database Server
IP address or domain name of the MySQL database server
-Port
MySQL database port
3306
Database Name
Name of the MySQL database
sqoop
Username
User who has the read, write, and delete permissions on the MySQL database
admin
Password
Password of the user
-Use Local API
Whether to use the local API of the database for acceleration. (The system attempts to enable the local_infile system variable of the MySQL database.)
Yes
Use Agent
Whether to extract data from the data source through an agent
No
local_infile Character Set
When using local_infile to import data to MySQL, you can configure the encoding format.
utf8
Driver Version
Before connecting CDM to a relational database, you need to upload the JDK 8 .jar driver of the relational database. Download the MySQL driver 5.1.48 from https://downloads.mysql.com/archives/c-j/, obtain mysql-connector-java-5.1.48.jar, and upload it.
-Click Save. The Link Management page is displayed.
Note
If an error occurs during the saving, the security settings of the MySQL database are incorrect. In this case, you need to enable the EIP of the CDM cluster to access the MySQL database.
Creating an OBS Link
Click Job Management in the Operation column of the CDM cluster. On the displayed page, click the Links tab and then Create Link. The Select Connector page is displayed.
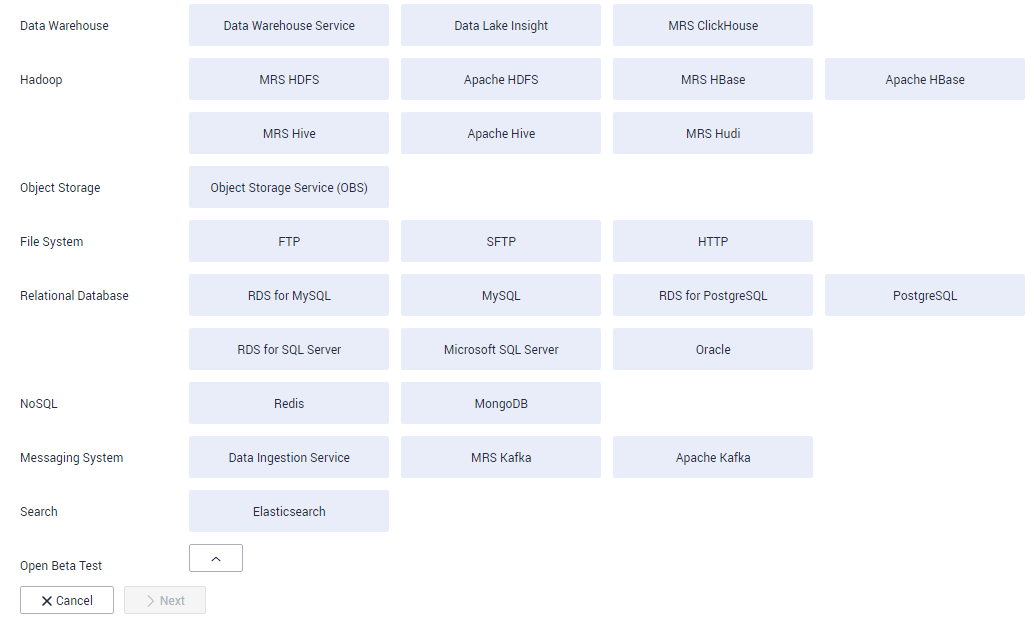
Figure 2 Selecting a connector type
Select Object Storage Service (OBS) and click Next to configure parameters for the OBS link.
Name: Enter a custom link name, for example, obslink.
OBS Server and Port: Enter the actual OBS address information.
AK and SK: Enter the AK and SK used for logging in to OBS.
To obtain an access key, perform the following steps:
Log in to the management console, move the cursor to the username in the upper right corner, and select My Credentials from the drop-down list.
On the My Credentials page, choose Access Keys, and click Create Access Key. See Figure 3.
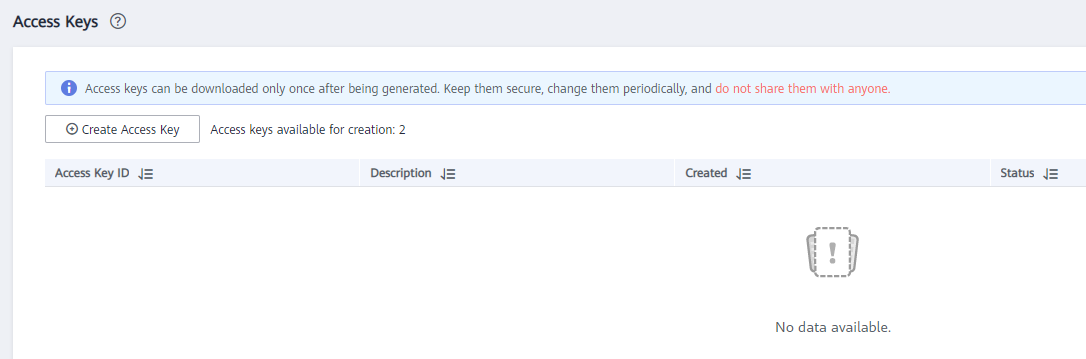
Figure 3 Clicking Create Access Key
Click OK and save the access key file as prompted. The access key file will be saved to your browser's configured download location. Open the credentials.csv file to view Access Key Id and Secret Access Key.
Note
Only two access keys can be added for each user.
To ensure access key security, the access key is automatically downloaded only when it is generated for the first time and cannot be obtained from the management console later. Keep them properly.
Click Save. The Link Management page is displayed.
Creating a Migration Job
Choose Table/File Migration > Create Job to create a job for exporting data from the MySQL database to OBS.
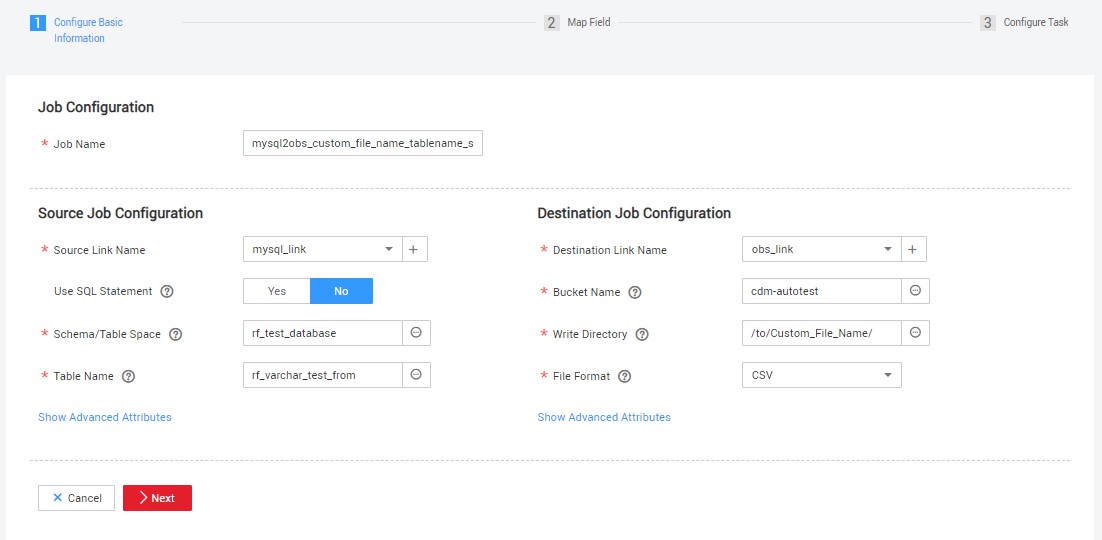
Figure 4 Creating a job for migrating data from MySQL to OBS
Job Name: Enter a unique name.
Source Job Configuration
Source Link Name: Select the mysqllink created in Creating a MySQL Link.
Use SQL Statement: Select No.
Schema/Tablespace: name of the schema or tablespace from which data is to be extracted
Table Name: name of the table from which data is to be extracted
Retain the default values of other optional parameters.
Destination Job Configuration
Destination Link Name: Select the obslink created in Creating an OBS Link.
Bucket Name: Select the bucket from which the data will be migrated.
Write Directory: Enter the directory to which data is to be written on the OBS server.
File Format: Select CSV.
Retain the default values of the optional parameters in Show Advanced Attributes.
Click Next. The Map Field page is displayed. CDM automatically matches the source and destination fields, as shown in Figure 5.
If the field mapping is incorrect, you can drag the fields to adjust the mapping.
The expressions in CDM support field conversion of common character strings, dates, and values.
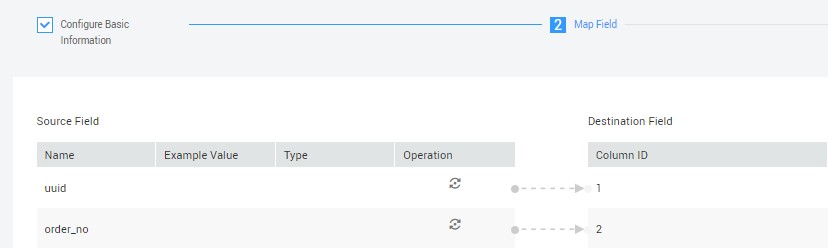
Figure 5 Table-to-file field mapping
Click Next and set task parameters. Generally, retain the default values of all parameters.
In this step, you can configure the following optional functions:
Retry Upon Failure: If the job fails to be executed, you can determine whether to automatically retry. Retain the default value Never.
Group: Select the group to which the job belongs. The default group is DEFAULT. On the Job Management page, jobs can be displayed, started, or exported by group.
Schedule Execution: Enable it if you need to configure scheduled jobs. Retain the default value No.
Concurrent Extractors: Enter the number of extractors to be concurrently executed. CDM supports concurrent extraction of MySQL data. If indexes are configured for the source table, you can increase the number of concurrent extractors to accelerate the migration.
Write Dirty Data: Specify this parameter if data that fails to be processed or filtered out during job execution needs to be written to OBS for future viewing. Before writing dirty data, create an OBS link. For file-to-table data migration, you are advised to write dirty data.
Delete Job After Completion: Retain the default value Do not delete. You can also set this parameter to Delete to prevent an accumulation of too many migration jobs.
Click Save and Run. The Job Management page is displayed, on which you can view the job execution progress and result.
After the job is successfully executed, in the Operation column of the job, click Historical Record to view the job's historical execution records and read/write statistics.
On the Historical Record page, click Log to view the job logs.