Configuring the Resource Recorder
Scenarios
You must enable the resource recorder for Config to track changes to your resource configurations.
You can modify or disable the resource recorder at any time.
This section includes the following content:
Enabling the Resource Recorder
If you have enabled the resource recorder and specified an OBS bucket and an SMN topic when you configure the resource recorder, Config will notify you if there is a change (creation, modification, deletion, relationship change) to the resources within the monitoring scope and periodically store your notifications and resource snapshots.
Log in to the management console.
Click
 in the upper left corner. Under Management & Deployment, click Config.
In the navigation pane on the left, choose Resource Recorder.
Toggle on the resource recorder. In the dialog box, click Yes.
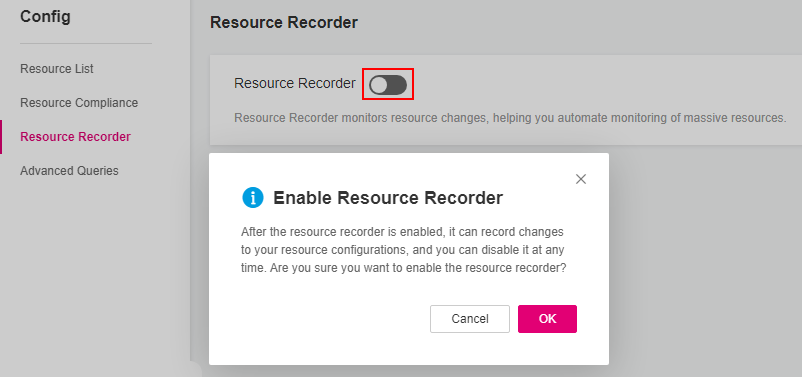
Figure 1 Enabling the resource recorder
Select the monitoring scope.
By default, all resources supported by Config will be recorded by the resource recorder. You can specify a resource scope for the resource recorder.
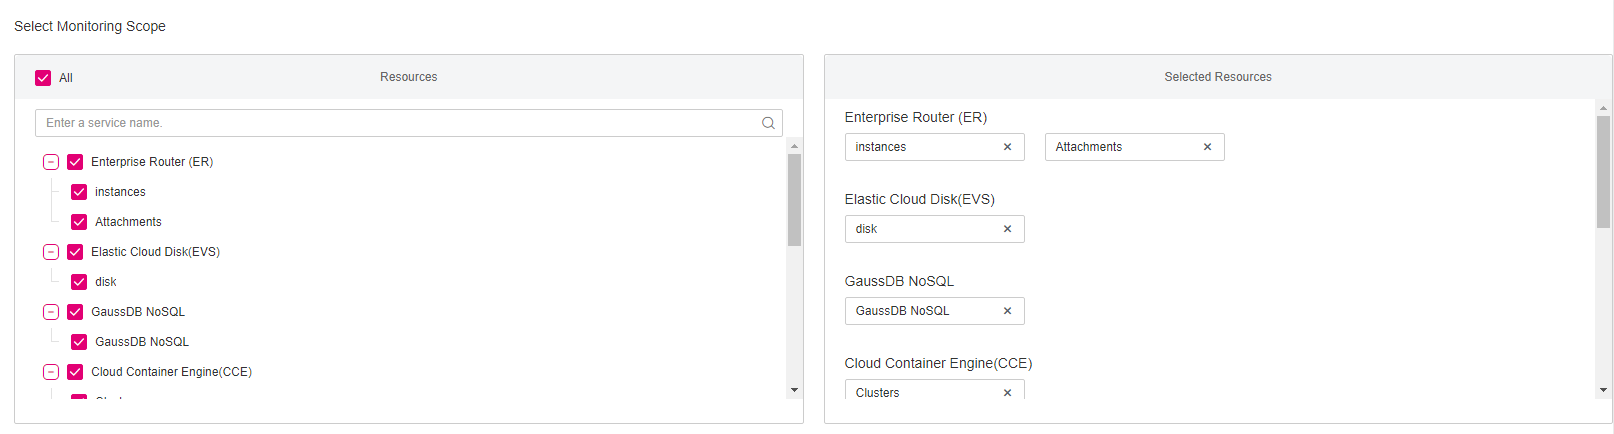
Figure 2 Specifying the monitoring scope
Specify an OBS bucket.
Specify an OBS bucket to store notifications of resource changes and resource snapshots.
To enable the resource recorder, you must configure either an SMN topic or an OBS bucket.
Select an OBS bucket from the current account:
Select Your bucket and then select a bucket from the drop-down list to store resource change notifications and resource snapshots. If you need to store the notifications and snapshots to a specific folder in the OBS bucket, enter the folder name after you select a bucket. If there are no OBS buckets in the current account, create one first. For details, see Creating a Bucket.
Select an OBS bucket from another account:
Select Other users' bucket and then configure Region ID and Bucket Name. If you need to store the notifications and snapshots to a specific folder in the OBS bucket, enter the folder name after you select a bucket. If you select a bucket from another account, you need required permissions granted by the account. For details, see Cross-Account Authorization.
Note
After you specify an OBS bucket from the current or another account, Config will write an empty file named ConfigWritabilityCheckFile to the OBS bucket to verify whether resources can be written to the OBS bucket. If an error is reported, you can address the error based on Why Is an Error Reported When Data Is Dumped to the OBS Bucket After the Resource Recorder Is Enabled?.
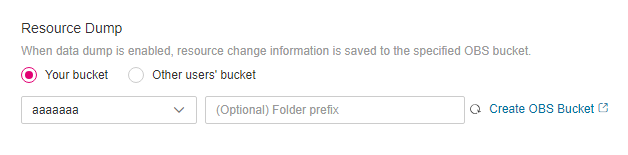
Figure 3 Configuring an OBS bucket
Specify a data retention period.
Select Seven years (2,557 days) or select A custom period and enter a retention period from 30 days to 2,557 days.
Note
The data retention period only applies to resource configuration data and snapshots reserved by Config. It will not affect your data storage with SMN or OBS.
Config will delete data that has been reserved for a longer time than the specified retention period.
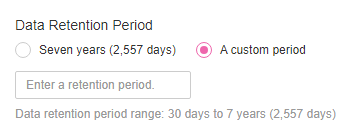
Figure 4 Configuring a data retention period
(Optional) Configure an SMN topic.
Toggle on Topic, then select a region and an SMN topic for receiving notifications of resource changes.
Select a topic from the current account:
Select Your topic, then select a region and an SMN topic. If there are no SMN topics available, create one first. For details, see Creating a Topic.
Select a topic from another account:
Select Topic under other account, then enter a topic URN. For more details about topic URN, see Concepts. If you select a topic from another account, you need required permissions granted by the account. For details, see Cross-Account Authorization.
Note
To send notifications with an SMN topic, you not only need to create the topic, but also add subscriptions and request subscription confirmations.

Figure 5 Configuring an SMN topic
Grant permissions.
Quick granting: This option will automatically create an agency named rms_tracker_agency to grant the required permissions for the resource recorder to work properly. The agency contains permissions for writing data into an OBS bucket. The agency created by quick granting doesn't contain KMS permissions, so the resource recorder is unable to store resource change notifications and snapshots to an OBS bucket that is encrypted using KMS. If you need to use an encrypted bucket, you can add required KMS Administrator permissions to the agency or use custom authorization. For details, see Storing Resource Change Notifications and Resource Snapshots to an Encrypted OBS Bucket.
For details about how to add permissions in an agency, see Deleting or Modifying Agencies.
Custom granting: You can create an agency using IAM to customize authorization for Config. The agency must include either the permissions for sending notifications using an SMN topic or the permissions for writing data into an OBS bucket. To store resource changes and snapshots to an OBS bucket that is encrypted using KMS, you need the required KMS Administrator permissions. For details, see Storing Resource Change Notifications and Resource Snapshots to an Encrypted OBS Bucket. For details about how to create an agency, see Cloud Service Agency.

Figure 6 Grant Permissions
Click Save.
In the displayed dialog box, click Yes.
Modifying the Resource Recorder
You can modify the resource recorder at any time.
In the navigation pane on the left, choose Resource Recorder.
Click Modify Resource Recorder.
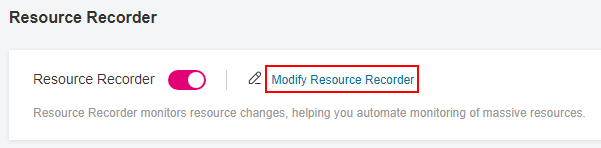
Figure 7 Modify Resource Recorder
Modify configurations.
Click Save.
In the displayed dialog box, click Yes.
Disabling the Resource Recorder
You can disable the resource recorder at any time.
In the navigation pane on the left, choose Resource Recorder.
Toggle off the resource recorder.
In the displayed dialog box, click OK.
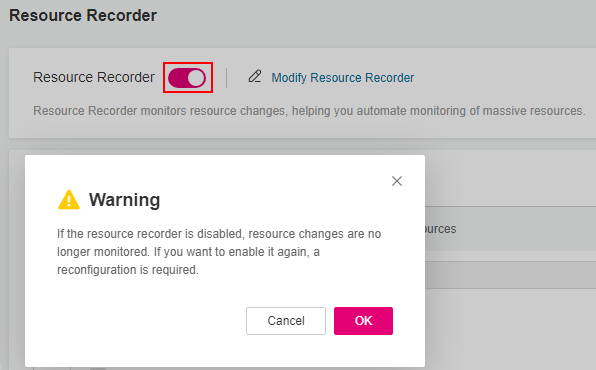
Figure 8 Disabling the resource recorder
Storing Resource Change Notifications and Resource Snapshots to an Encrypted OBS Bucket
Using an OBS bucket that is encrypted with a default key of SSE-KMS
If you need to store resource change notifications and snapshots to an OBS bucket encrypted using a default key of SSE-KMS, you need to add the KMS Administrator permission to the agency assigned to the resource recorder.
Using an OBS bucket that is encrypted with a custom key of SSE-KMS
If you need to store resource change notifications and snapshots to an OBS bucket that is encrypted using a custom key of SSE-KMS, you need to add the KMS Administrator permission to the agency assigned to the resource recorder.
If you need to store resource change notifications and snapshots to an OBS bucket that is from another account, and that is encrypted using a custom key of SSE-KMS, you need to add the KMS Administrator permission to the agency assigned to the resource recorder, and set the cross-account permission for the key at the same time. The procedure is as follows:
Log in to the management console and go to the Key Management Service console.
In the Custom Keys tab, click the alias of a target key to go to its details page and create a grant on it.
Grant the account the permissions for using the key based on Creating a Grant.
Enter the ID of the account to be authorized for Grantee.
Select Create Data Key, Describe Key, and Decrypt Data Key for Granted Operations.