Creating and Managing Indexes
Clusters of version 7.6.2 or later support index status management. ISM is a plugin that allows you to automate periodic and administrative operations based on changes on the index age, index size, or number of documents. When using the ISM plug-in, you can define policies that automatically handle index rollovers or deletions based on your needs.
Note
The following procedure uses Elasticsearch 7.6.2 as an example. The Kibana UI varies depending on the Kibana version, but their operations are similar.
Creating an Index Policy
Log in to Kibana and choose IM or Index Management on the left. The Index Management page is displayed.
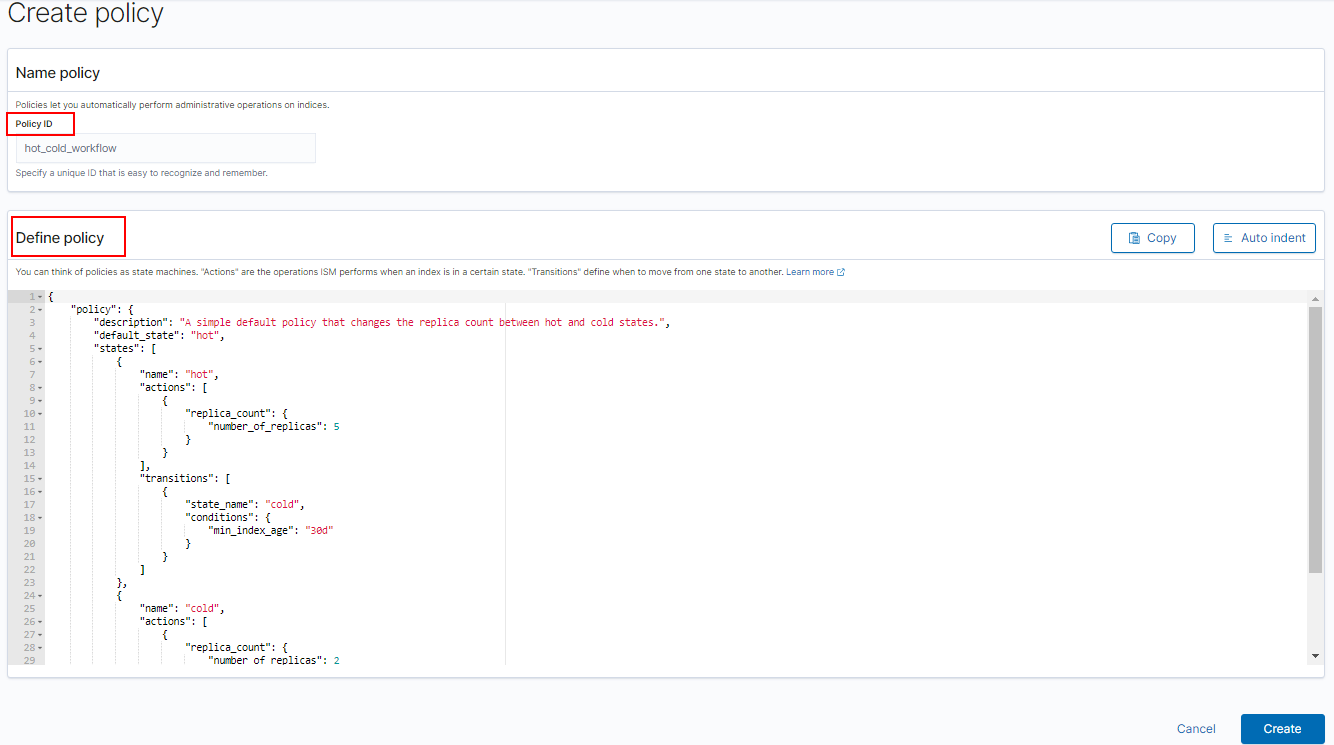
Click Create policy to create an index policy.
Enter a policy ID in the Policy ID text box and enter your policy in the Define policy text box.

Figure 1 Configuring a policy
Click Create.
Attaching a Policy to an Index
You can attach a policy to one or more indexes and add the policy ID to an index template. When you create indexes using that index template pattern, the policy will be attached to all created indexes.
Method 1: Kibana commands
On the Dev Tools page of Kibana, run the following command to associate a policy ID with an index template:
PUT _template/<template_name> { "index_patterns": ["index_name-*"], "settings": { "opendistro.index_state_management.policy_id": "policy_id" } }<template_name>: Replace it with the name of a created index template.
policy_id: Replace it with a custom policy ID.
For details about how to create an index template, see Index Template.
Method 2: Kibana console
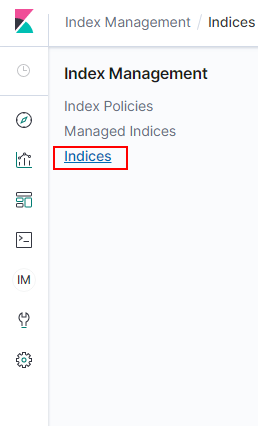
On the Index Management page of Kibana, choose Indices.

Figure 2 Choosing Indexes
In the Indices list, select the target index to which you want to attach a policy.
Click Apply policy in the upper right corner.

Figure 3 Adding a policy
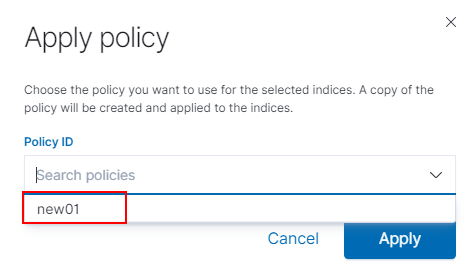
Select the policy you created from the Policy ID drop-down list.

Figure 4 Selecting a policy
Click Apply.
After you attach a policy to an index, ISM creates a job that runs every 5 minutes by default, to execute the policy, check conditions, and convert the index to different statuses.
Managing Index Policies
Click Managed Indices.
If you want to change the policy, click Change policy. For details, see Changing Policies.
To delete a policy, select your policy, and click Remove policy.
To retry a policy, select your policy, and click Retry policy.
For details, see Index State Management.