Connecting to a Dedicated Load Balancer
This section describes how to connect a CSS cluster to a dedicated load balancer.
(Optional) Preparing a Self-signed Certificate
If the target ELB listener uses the HTTP protocol, skip this step.
Prepare and upload a self-signed certificate.
Note
You are advised to use a certificate purchased in Cloud Certificate Manager (CCM) or issued by an authoritative organization.
Log in to a Linux client where the OpenSSL tool and JDK are installed.
Run the following commands to create a self-signed certificate:
mkdir ca
mkdir server
mkdir client

#Use OpenSSL to create a CA certificate.
cd ca
#Create the OpenSSL configuration file ca_cert.conf for the CA certificate.
cat >ca_cert.conf <<EOF
[ req ]
distinguished_name     = req_distinguished_name
prompt                 = no

[ req_distinguished_name ]
 O                      = ELB
EOF
#Create private key file ca.key for the CA certificate.
openssl genrsa -out ca.key 2048
#Create the CSR file ca.csr for the CA certificate.
openssl req -out ca.csr -key ca.key -new -config ./ca_cert.conf
#Create a self-signed CA certificate ca.crt.
openssl x509 -req -in ca.csr -out ca.crt -sha1 -days 5000 -signkey ca.key
#Convert the CA certificate format to p12.
openssl pkcs12 -export -clcerts -in ca.crt -inkey ca.key -out ca.p12
#Convert the CA certificate format to JKS.
keytool -importkeystore -srckeystore ca.p12 -srcstoretype PKCS12 -deststoretype JKS -destkeystore ca.jks


#Use the CA certificate to issue a server certificate.
cd ../server
#Create the OpenSSL configuration file server_cert.conf for the server certificate. Change the CN field to the domain name or IP address of the server as required.
cat >server_cert.conf <<EOF
[ req ]
distinguished_name     = req_distinguished_name
prompt                 = no

[ req_distinguished_name ]
 O                      = ELB
 CN                     = 127.0.0.1
EOF
#Create the private key file server.key for the server certificate.
openssl genrsa -out server.key 2048
#Create the CSR request file server.csr for the server certificate.
openssl req -out server.csr -key server.key -new -config ./server_cert.conf
#Use the CA certificate to issue the server certificate server.crt.
openssl x509 -req -in server.csr -out server.crt -sha1 -CAcreateserial -days 5000 -CA ../ca/ca.crt -CAkey ../ca/ca.key
#Convert the server certificate format to p12.
openssl pkcs12 -export -clcerts -in server.crt -inkey server.key -out server.p12
#Convert the service certificate format to JKS.
keytool -importkeystore -srckeystore server.p12 -srcstoretype PKCS12 -deststoretype JKS -destkeystore server.jks


#Use the CA certificate to issue a client certificate.
cd ../client
#Create the OpenSSL configuration file client_cert.conf for the client certificate. Change the CN field to the domain name or IP address of the server as required.
cat >client_cert.conf <<EOF
[ req ]
distinguished_name     = req_distinguished_name
prompt                 = no

[ req_distinguished_name ]
O                      = ELB
CN                     = 127.0.0.1
EOF
#Create private key client.key for the client certificate.
openssl genrsa -out client.key 2048
#Create the CSR file client.csr for the client certificate.
openssl req -out client.csr -key client.key -new -config ./client_cert.conf
#Use the CA certificate to issue the client certificate client.crt.
openssl x509 -req -in client.csr -out client.crt -sha1 -CAcreateserial -days 5000 -CA ../ca/ca.crt -CAkey ../ca/ca.key
#Convert the client certificate to a p12 file that can be identified by the browser.
openssl pkcs12 -export -clcerts -in client.crt -inkey client.key -out client.p12
#Convert the client certificate format to JKS.
keytool -importkeystore -srckeystore client.p12 -srcstoretype PKCS12 -deststoretype JKS -destkeystore client.jks
Upload the self-signed certificate. For details, see the section "Configuring the Server Certificate and Private Key" in Elastic Load Balance User GuideConfiguring the Server Certificate and Private Key.
Creating a Dedicated Load Balancer
Log in to the ELB management console.
Create a dedicated load balancer. For details, see Creating a Dedicated Load Balancer. Table 1 describes the parameters required for connecting a CSS cluster with a dedicated load balancer.
Table 1 Parameters for interconnecting a CSS cluster with a dedicated load balancer¶ Parameter
Description
Example
Type
Load balancer type. Select Dedicated.
Dedicated
Billing Mode
Billing mode of the dedicated load balancer.
Pay-per-use
Region
Region where the CSS cluster is located.
-IP as Backend Servers
A CSS cluster can be connected only after the cross-VPC backend is enabled.
Enabled
Network Type
Type of the network used by the load balancer to provide services for external systems.
Private IPv4 network
VPC
VPC where the load balancer works. This parameter is mandatory no matter which network type is selected.
Select the VPC of the CSS cluster
-Subnet
Subnet where the load balancer is to be created. This parameter is mandatory no matter which network type is selected.
Select the subnet of the CSS cluster
-Specifications
You are advised to select Application load balancing (HTTP/HTTPS), which provides better functions and performance.
Application load balancing (HTTP/HTTPS)
Small I
Interconnecting with a Load Balancer
Note
A cluster in security mode with HTTPS access enabled does not support HTTP protocol authentication. If you need to enable HTTP protocol authentication, disable the security mode of the cluster.
Before changing the security mode, disable load balancing. After the security mode is changed, enable load balancing.
Log in to the CSS management console.
On the Clusters page, select the cluster you want to connect to the load balancer and click the cluster name. The cluster basic information page is displayed.
In the navigation pane, choose Load Balancing. Toggle on the load balancing switch and configure basic load balancing information.
Load Balancer: Select a created load balancer. You can also click Create Load Balancer to create one.
Agency: Select an agency name. If no agency is available, click Create Agency to create one. The selected agency must have the ELB Administrator and ELB FullAccess permissions.
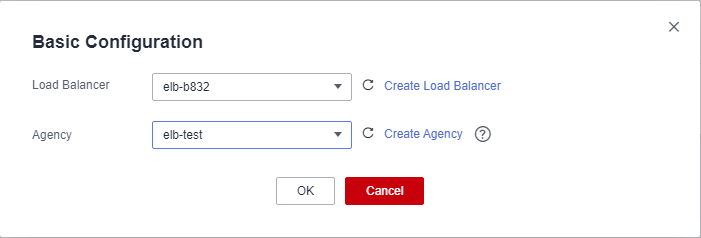
Figure 1 Enabling load balancing
Click OK. The listener configuration page is displayed.
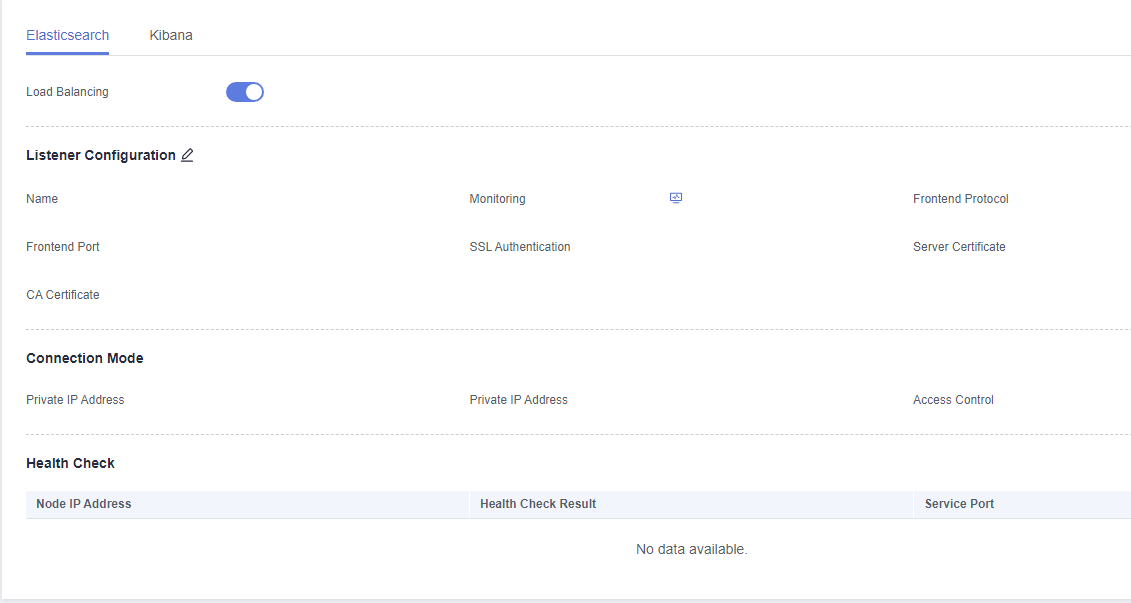
Figure 2 Creating a listener
In the Listener Configuration area, click
 to configure listener information.
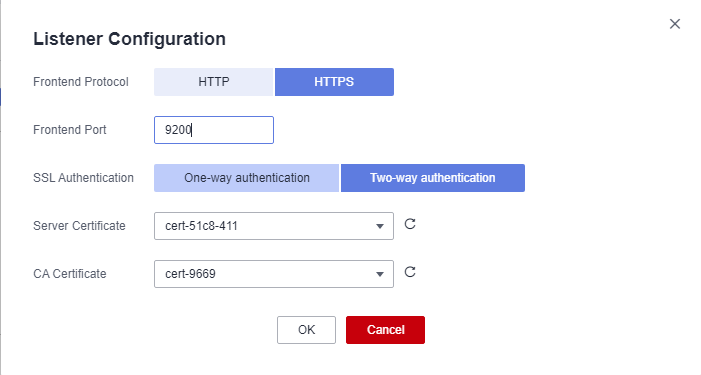
Figure 3 Configuring a listener
Table 2 Listener configuration information¶ Parameter
Description
Frontend Protocol
The protocol used by the client and listener to distribute traffic.
Select a protocol as required.
Frontend Port
The port used by the client and listener to distribute traffic.
For example, 9200. You need to specify this parameter as required.
SSL Authentication
Authentication mode for the client to access the server.
Select a parsing mode as required.
Server Certificate
The server certificate is used for SSL handshake negotiation. The certificate content and private key must be provided.
When SSL Authentication is set to Two-way authentication, this parameter is mandatory.
CA Certificate
Also called client CA public key certificate. It is used to verify the issuer of a client certificate.
When the HTTPS two-way authentication is enabled, an HTTPS connection can be established only when the client can provide the certificate issued by a specified CA.
This parameter is mandatory only when the Frontend Protocol is set to HTTPS.
(Optional) In the Connection Mode area, you can click Settings next to Access Control to configure the IP addresses or network segments that are allowed to access the system. If you do not set the IP addresses or network segments, all IP addresses are allowed to access the system by default.

Figure 4 Configuring access control
In the Health Check area, you can view the health check result of each node IP address. The following table describes the health check results.
Health Check Result | Description |
|---|---|
Normal | The IP address of the node is properly connected. |
Abnormal | The node IP address is connected and unavailable. |
Accessing a Cluster Using the Curl Command
Run the following commands to check whether the dedicated load balancer can be connected to a cluster.
Security Mode | Service Form Provided by ELB for External Systems | Curl Command for Accessing a Cluster |
|---|---|---|
Non-security | No authentication | curl http://IP:9200
|
One-way authentication | curl -k --cert ./client.crt --key ./client.key https://IP:9200
| |
Two-way authentication | curl --cacert ./ca.crt --cert ./client.crt --key ./client.key https://IP:9200
| |
Security mode + HTTP | Password authentication | curl http://IP:9200 -u user:pwd
|
One-way authentication + Password authentication | curl -k --cert ./client.crt --key ./client.key https://IP:9200 -u user:pwd
| |
Two-way authentication + Password authentication | curl --cacert ./ca.crt --cert ./client.crt --key ./client.key https://IP:9200 -u user:pwd
| |
Security mode + HTTPS | One-way authentication + Password authentication | curl -k --cert ./client.crt --key ./client.key https://IP:9200 -u user:pwd
|
Two-way authentication + Password authentication | curl --cacert ./ca.crt --cert ./client.crt --key ./client.key https://IP:9200 -u user:pwd
|
Variable | Description |
|---|---|
IP | ELB IP address |
user | Username for accessing the CSS cluster |
pwd | Password of the user |
If the Elasticsearch cluster information is returned, the connection is successful. For example, if a security cluster using the HTTPS protocol is connected to a load balancer using two-way authentication, the information shown in Figure 5 is returned.
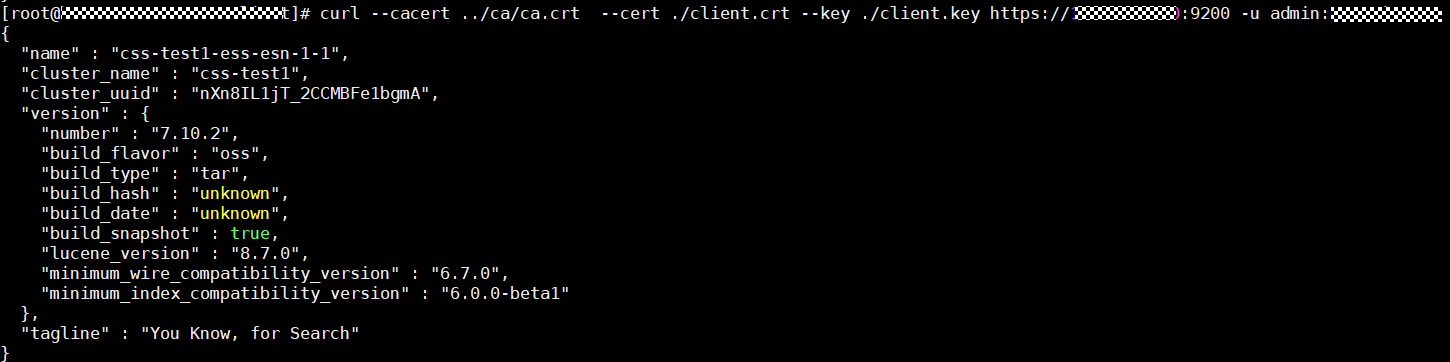
Figure 5 Accessing a cluster