Design your application with static subnets in multiple regions
The following tutorial describes how to design an application with one (global) private network spanning in two regions of Google Cloud. Each region has one subnet and one compute connecting to the subnet (e.g., Compute connects to Subnet, Compute_2 connects to Subnet_2). The compute in the first region (e.g., Compute) has access to the internet.
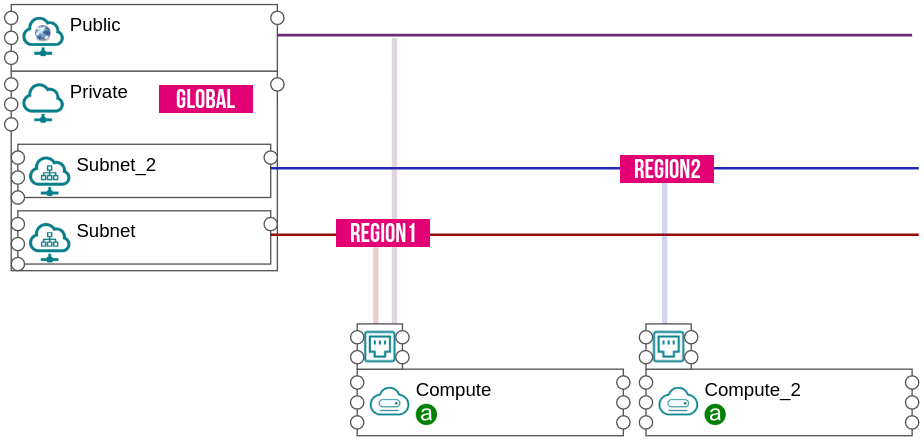
Figure 1. Multiple subnets example
Design
Step 1. Define a subnet for the network
Drop the Subnet component on the Private network.

Figure 2. Define a subnet
Step 2. Connect a compute to the subnet
Click on the network point (on the right side of the Compute) and connect it to the connection point of the Subnet.
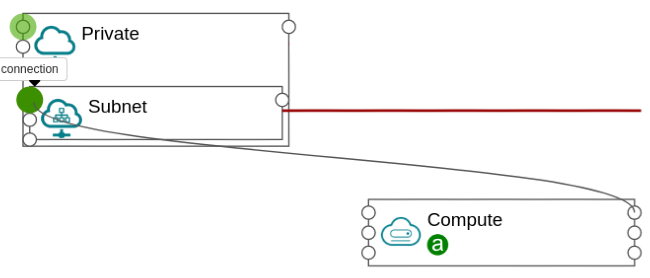
Figure 3. Connect a compute to the subnet
Step 3. Define a CIDR range for the subnet
Click on the Subnet.
Type
10.0.0.0/24in the cidr field.
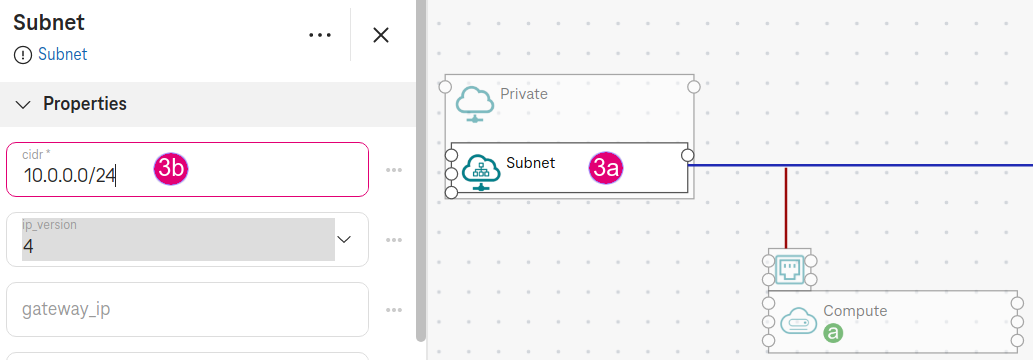
Figure 3. Define CIDR
Note
The cidr field is mandatory for defining a subnet.
Step 4. Define a fixed ip address for the compute (optional)
Click on the Port of the compute.
Type
10.0.0.3in the ip_address field. The ip_address10.0.0.3is within the range of the network above (10.0.0.0/24).
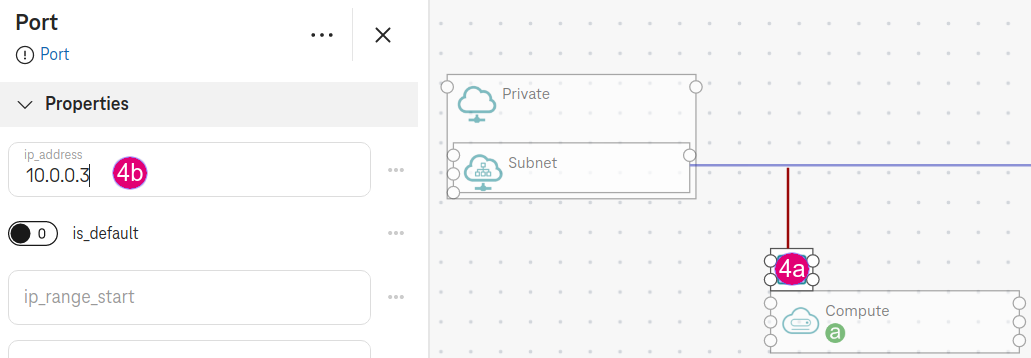
Figure 4. Define fixed ip address
Note
If no ip_address specified, an ip address will be auto-generated within the ip range of the subnet during the deployment.
Step 5. Define the second compute and subnet
Drop another Subnet component on the Private network. Now we have two subnets:
SubnetandSubnet_2.Click on the Subnet_2. Type
10.0.1.0/24in the cidr field.Drop another Compute component (e.g.,
Compute_2) and connect it to Subnet_2.

Figure 5. Define second subnet
Step 6. Connect the first compute to the public
Drop a Public network.
Connect the Port of
Computeto the link point (on the left side) of the Public network.
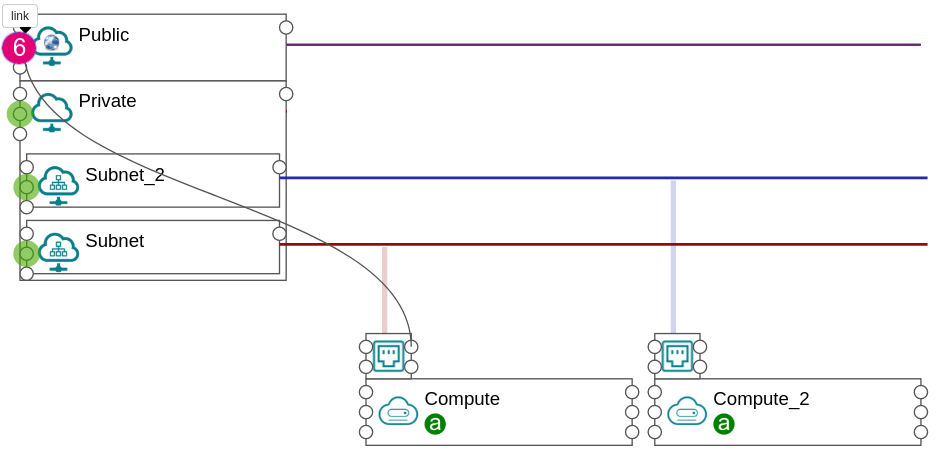
Figure 6. Connect compute to public
Deploy
Go to Deploy.
Choose the Google provider.
In the Configure cloud provider:
Choose the zone for the computes in different regions (e.g.,
europe-north1-aforComputeandeurope-west1-cforCompute_2).
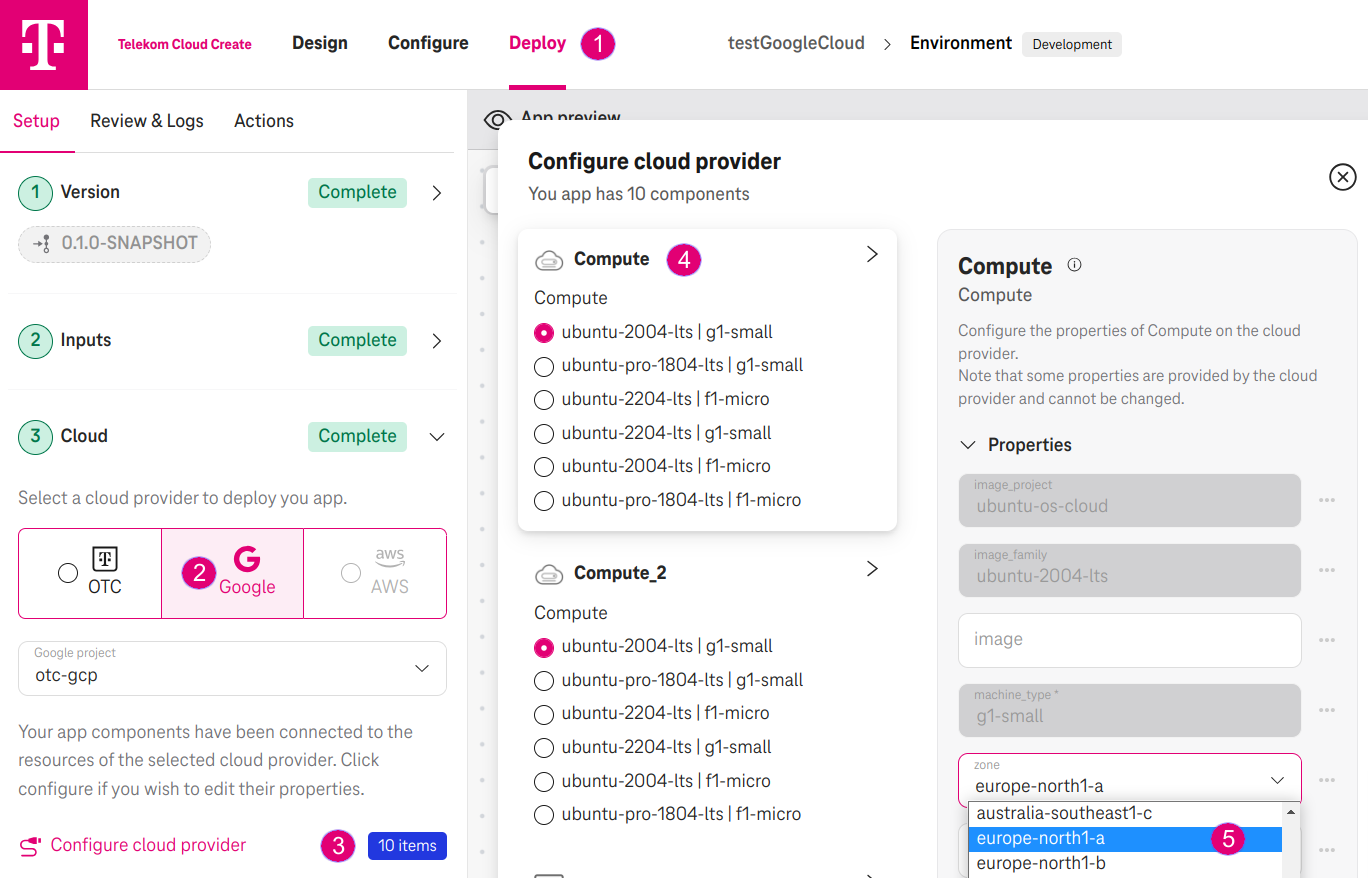
Figure 7. Choose zone europe-north1-a for Compute
In summary, we have two computes with two subnets in two different regions:
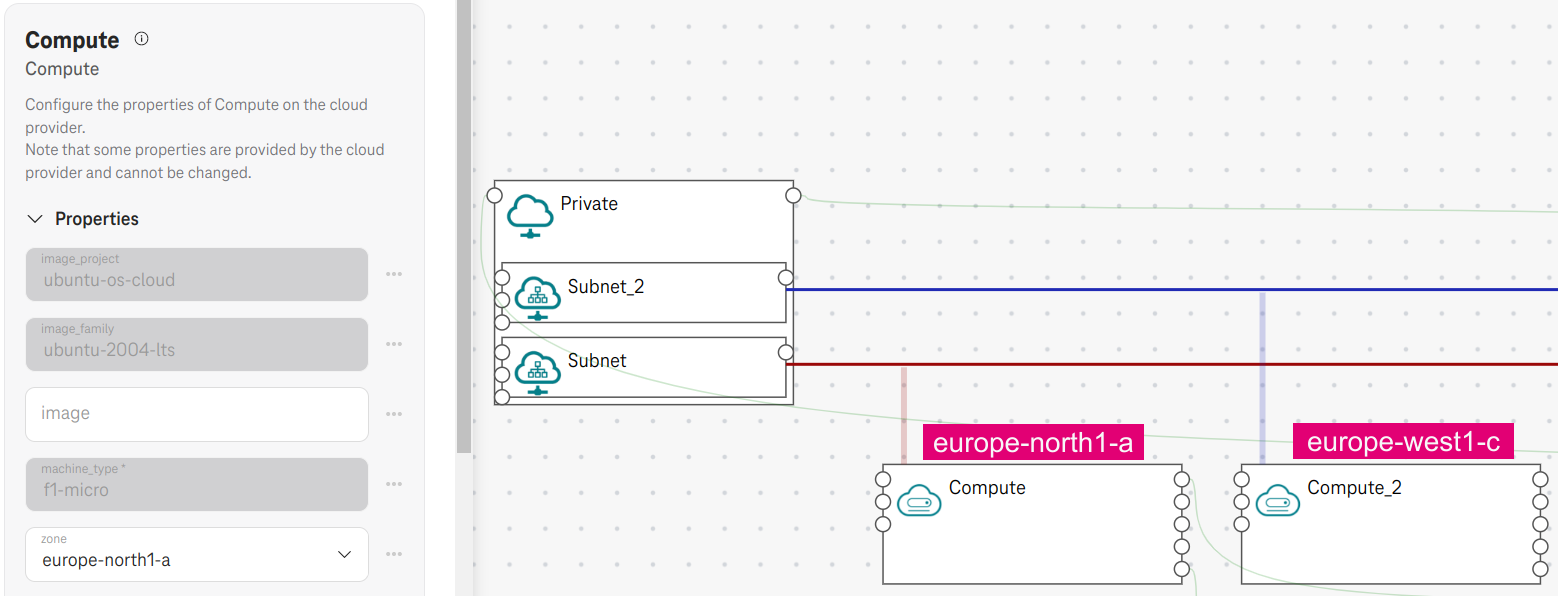
Figure 8. Two computes in two different regions europe-north1 and europe-west1
Expected result
The VPC
privatenetwork is created with two subnets (e.g.,private-subnetandprivate-subnet-2) in two cidr ranges (10.0.0.0/24and10.0.1.0/24) and in two regions (e.g.,europe-north1andeurope-west1), respectively.
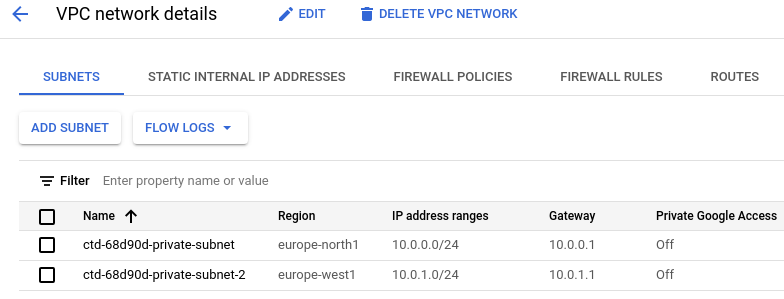
Figure 9. Two subnets are created
Two VMs will be created in the two separated subnets.
Compute-0has a fixed ip address10.0.0.3(as specified in step 4) and has an external IP.

Figure 10. Two computes are created