Creating a Disk Backup Vault
This section describes how to create a disk backup vault.
Procedure
Log in to the CBR console.
Log in to the management console.
Click
 in the upper left corner and select a region.
Click
 and choose Storage > Cloud Backup and Recovery. Select a backup type from the left navigation pane.
In the upper right corner of the page, click Create Disk Backup Vault.
Determine whether to enable backup locking.
If backup locking is enabled, backups in the vault will not be deleted maliciously or by mistake. This improves data reliability.

Important
Backup locking cannot be disabled after it is enabled.
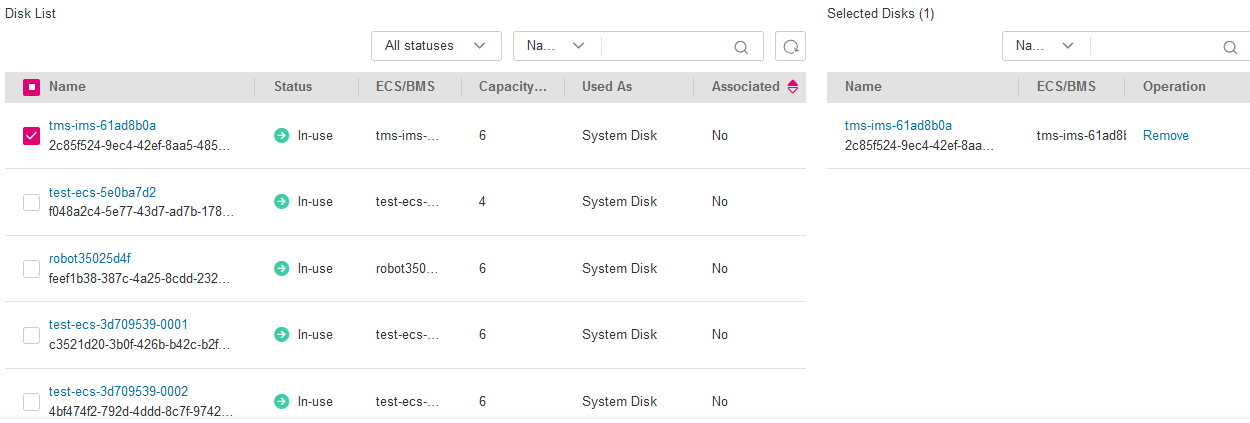
(Optional) In the disk list, select the disks you want to back up. After disks are selected, they are added to the list of selected disks. See Figure 1.
Figure 1 Selecting disks

Note
The selected disks must have not been associated with any vault and must be in the Available or In-use state.
You can also associate disks with the vault you are creating later if you skip this step.
Specify the vault capacity. This capacity is the total space that is required by the disks you want to associate with this vault. Plan the vault capacity and ensure that it is at least the same as the size of the disks you want to back up. If a backup policy is applied to the vault, plan more capacity as required. The capacity ranges from 10 GB to 10485760 GB. If automatic capacity expansion is not enabled, the vault capacity will not be automatically expanded, even if the capacity of disks is expanded during use.
You can expand the vault capacity if it becomes insufficient. See Figure 2.
Figure 2 Setting the vault capacity

Configure auto backup. See Figure 3.
If you select Configure, you must then select an existing backup policy or create a policy. After the vault is created, CBR will apply the policy to this vault, and all disks associated with this vault will be automatically backed up based on this policy.
If you select Skip, disks associated with this vault will not be automatically backed up until you apply a backup policy to the vault.
Figure 3 Configuring auto backup

(Optional) Configure automatic resource association.
If you select Configure, in the next backup period, CBR will automatically scan all unprotected resources, associate them with the vault, and then perform backups.
If you select Skip, CBR will not scan and associate unprotected resources with the vault you are creating.
You can filter unprotected resources by tag. If a tag is selected, only unprotected resources with the specified tag will be associated with the vault. Or, all unprotected resources will be associated.
If no tag is available, you can create tags on the corresponding resource page. You can search for vaults by specifying a maximum of 5 tags at a time. If you select more than one tag, the vaults with any of the specified tags will be returned.
(Optional) Add tags to the vault.
Tags are key-value pairs, which are used to identify, classify, and search for vaults. Vault tags are used to filter and manage vaults only. A vault can have a maximum of 20 tags. See Figure 4.
Figure 4 Adding a tag

Table 1 describes the parameters of a tag.
Table 1 Tag parameter description¶ Parameter
Description
Example Value
Key
Each tag has a unique key. You can customize a key or select the key of an existing tag created in TMS.
A tag key:
Can contain 1 to 36 Unicode characters.
Can contain only letters, digits, hyphens (-), and underscores (_).
Key_0001
Value
A tag value can be repetitive or left blank.
A tag value:
Can contain 0 to 43 Unicode characters.
Can contain only letters, digits, hyphens (-), and underscores (_).
Value_0001
Specify a name for the vault.
The name must contain 1 to 64 characters including digits, letters, underscores (_), or hyphens (-), for example, vault-612c. See Figure 5.

Figure 5 Setting the vault name
Note
You can also use the default name vault_xxxx.
Complete the creation as prompted.
Go back to the Cloud Disk Backups page. You can see the created vault in the vault list.
You can associate disks to the new vault or perform backup for the disks. For details, see Vault Management.