Configuring a NIC (Windows Server)
This section uses Windows Server 2012 R2 Standard as an example to describe how to configure a NIC added to or deleted from a BMS.
Note
The configuration methods of other Windows Server OSs are similar to that of Windows Server 2012 R2 Standard.
If the network is still disconnected after the NIC is added and the BMS is restarted, add the NIC again.
Add a NIC
Obtain information about the NIC to be added.
Table 1 NIC information¶ Parameter
Description
Example Value
VLAN and MAC address
Specifies the VLAN information and MAC address of the NIC. To obtain them, perform the following operations:
In the BMS list, click the name of the target BMS.
Click the NICs tab, locate the row that contains the NIC to be added, and click
 to expand details.
Obtain the values of VLAN and MAC Address.
2812
fa:16:3e:15:38:07
Gateway
Specifies the gateway address of the NIC. To obtain them, perform the following operations:
192.168.1.1
Log in to a Windows BMS.
On the Windows PowerShell CLI of the BMS, run the following command to check whether the NIC information contains Team1 (port group name of the VPC):
Get-NetAdapter
If yes, go to step 4.
If no, contact the customer service.
Information similar to the following is displayed.

Note
eth0 and eth1 are the network devices that carry the VPC.
Run the following commands to add the NIC:
Add-NetLbfoTeamNIC -Team "Team1" -VlanID vlan_id -Name "Team1-vlan-vlan_id" -Confirm:$false
Set-NetAdapter -Name "Team1-vlan-vlan_id" -MacAddress "mac_addr" -Confirm:$false
In the preceding command, Team1 is the port group name of the VPC, vlan_id is the VLAN information obtained in step 1 (such as 2812), and mac_addr is the MAC address obtained in step 1 (such as fa:16:3e:15:38:07).

Run the following command to check the status of the NIC device:
Get-NetAdapter
Information similar to the following is displayed.

Ping the gateway from the new network device to check whether the network connectivity is normal.
The IPv4 address of the added network device Team1-vlan-2812 is that shown in the red box in the following figure.

Use the gateway address obtained from step 1.
Information similar to the following is displayed.

Delete a NIC
Obtain the VLAN and MAC address of the NIC to be deleted.
Log in to a Windows BMS.
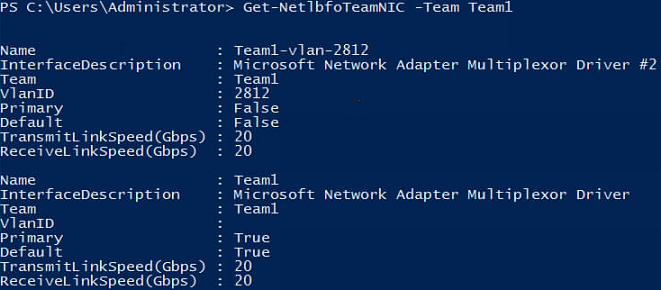
On the Windows PowerShell CLI of the BMS, run the following command to check information about the NIC to be added:
Get-NetLbfoTeamNIC -Team Team1

Run the following command to delete the NIC:
Remove-NetLbfoTeamNIC -Team "Team1" -VlanID vlan_id
In the command, vlan_id indicates the VLAN information obtained in step 1.

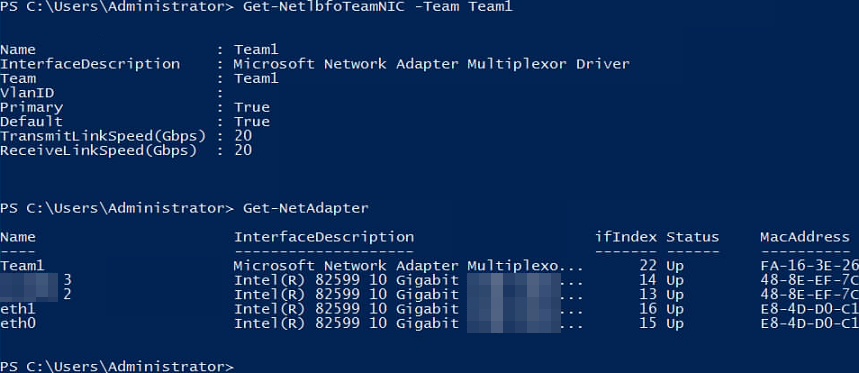
Run the following commands to query the NIC information and verify that the NIC is deleted:
Get-NetLbfoTeamNIC -Team Team1
Get-NetAdapter
