How Do I Configure the DNS Server?
When installing Agent on a BMS, ensure that the DNS server of the BMS runs properly. This section describes how to configure the DNS server and how to verify the DNS server status.
Linux
Log in to the BMS as user root.
Run the following command to edit the resolv.conf file:
vi /etc/resolv.conf
Press i to enter editing mode and enter nameserver DNS server IP address before existing nameserver configurations.
The format is as follows:
nameserver 100.125.4.25
Press Esc and enter :wq to save the change and exit.
Run the following commands to restart the network:
rcnetwork restart
service network restart
/etc/init.d/network restart
Windows
The following steps use Windows Server 2012 R2 as an example to describe how to configure the DNS server for Windows:
Log in to the BMS as user Administrator.
Click
 in the lower left corner to start Control Panel.
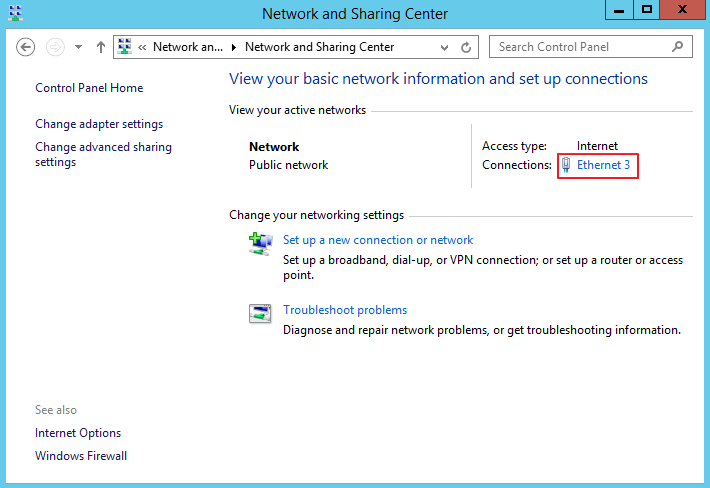
Choose Network and Internet > Network and Sharing Center. Then, click the NIC for which you are to configure the DNS server, such as Ethernet 3.

Figure 1 Network and Sharing Center
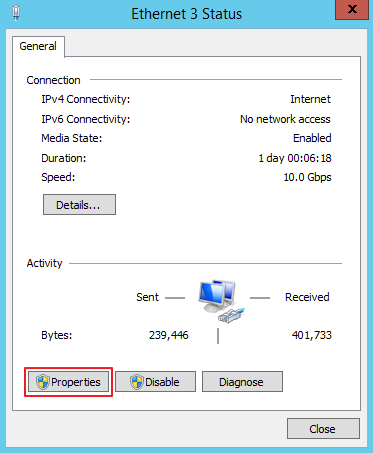
Click Properties. Figure 2 shows the Ethernet 3 Status.

Figure 2 Ethernet 3 Status
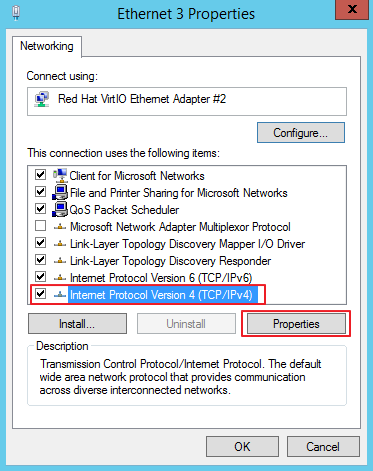
In the displayed Ethernet 3 Status dialog box, select Internet Protocol Version 4 (TCP/IPv4) and click Properties.

Figure 3 Ethernet 3 Properties
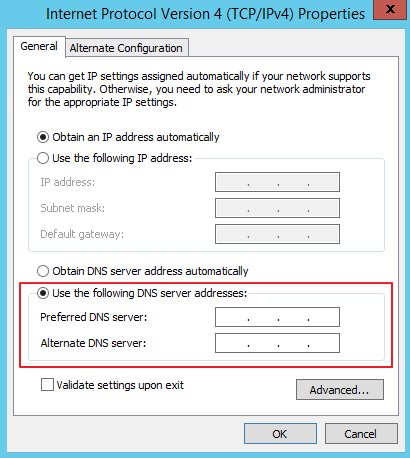
In the displayed Internet Protocol Version 4 (TCP/IPv4) Properties dialog box, select Use the following DNS server addresses: and configure the required parameters shown in Figure 4.
The DNS server IP address is 100.125.4.25. After completing the configuration, click OK.

Figure 4 Configuring the DNS server
After completing the configuration, click
 , select Windows PowerShell, and enter the ipconfig /all command. The configured IP address is displayed in DNS Servers.