Initializing a Windows Data Disk (Windows Server 2016)
Scenarios
This section uses Windows Server 2016 Standard 64bit to describe how to initialize a data disk attached to a BMS running Windows.
The maximum disk capacity supported by MBR is 2 TB, and that supported by GPT is 18 EB. Therefore, use the GPT partition style if your disk capacity is greater than 2 TB. For details about disk partition styles, see Introduction to Data Disk Initialization Scenarios and Partition Styles.
The method for initializing a disk varies depending on the OSs running on the BMS. This document is for reference only. For detailed operations and differences, see the product documents of the OSs running on the corresponding BMSs.
Prerequisites
You have logged in to the BMS.
A data disk has been attached to the BMS and has not been initialized.
Procedure
On the BMS desktop, click the start icon in the lower left corner.
The Windows Server window is displayed.
Click Server Manager.
The Server Manager window is displayed.
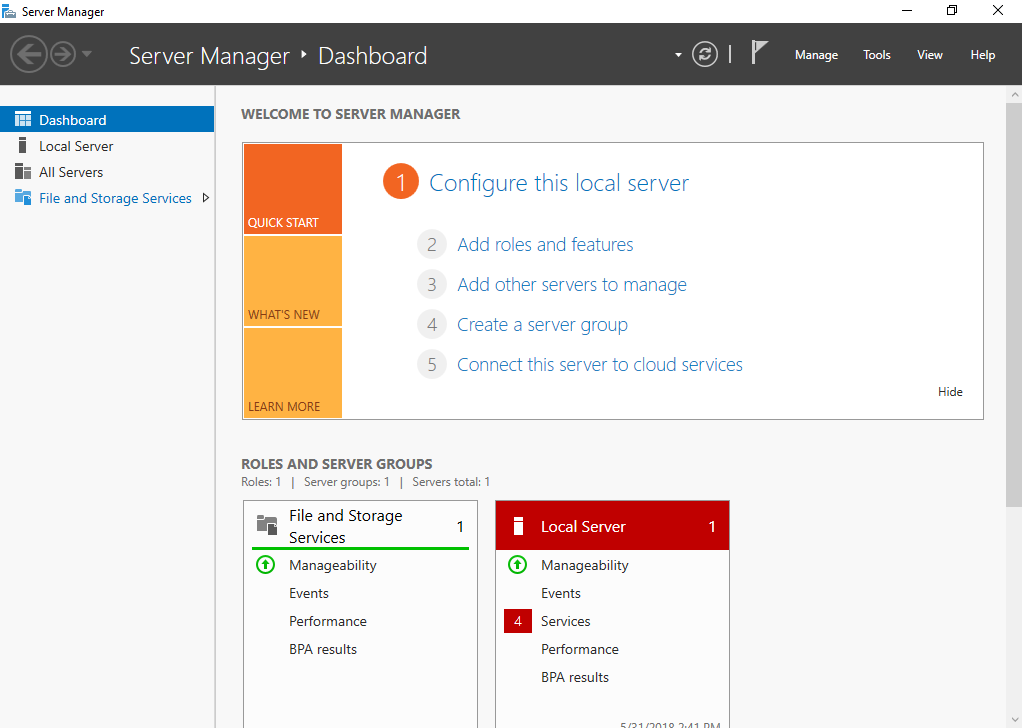
Figure 1 Server Manager
In the navigation tree on the left, choose File and Storage Services.
The Servers page is displayed.
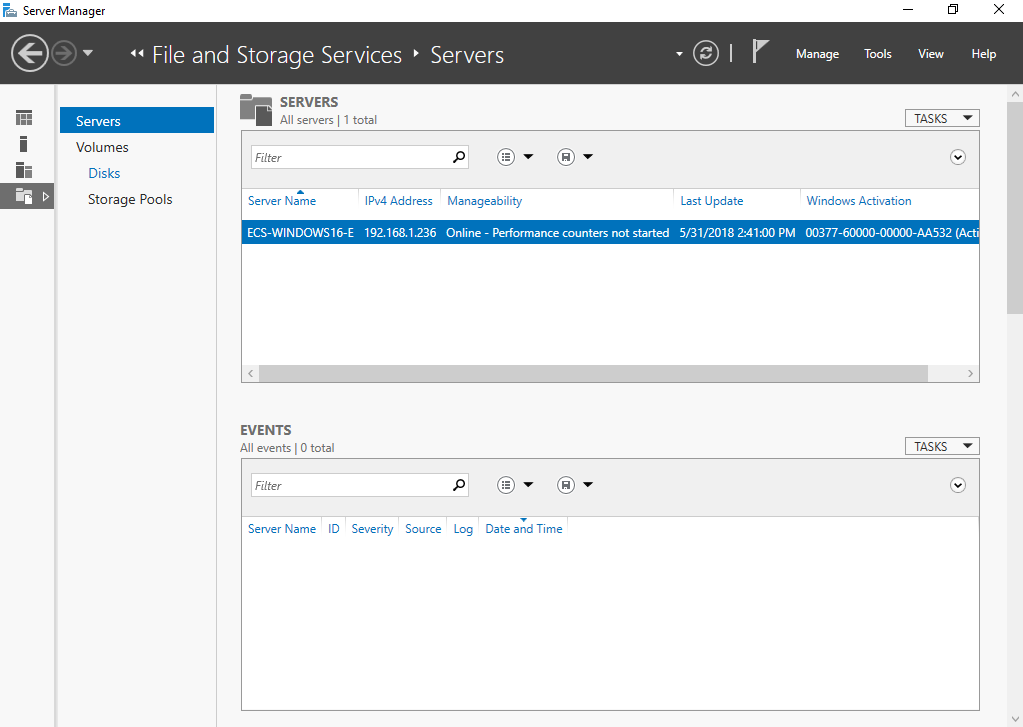
Figure 2 Servers
In the navigation pane, choose Disks.
The Disks page is displayed.
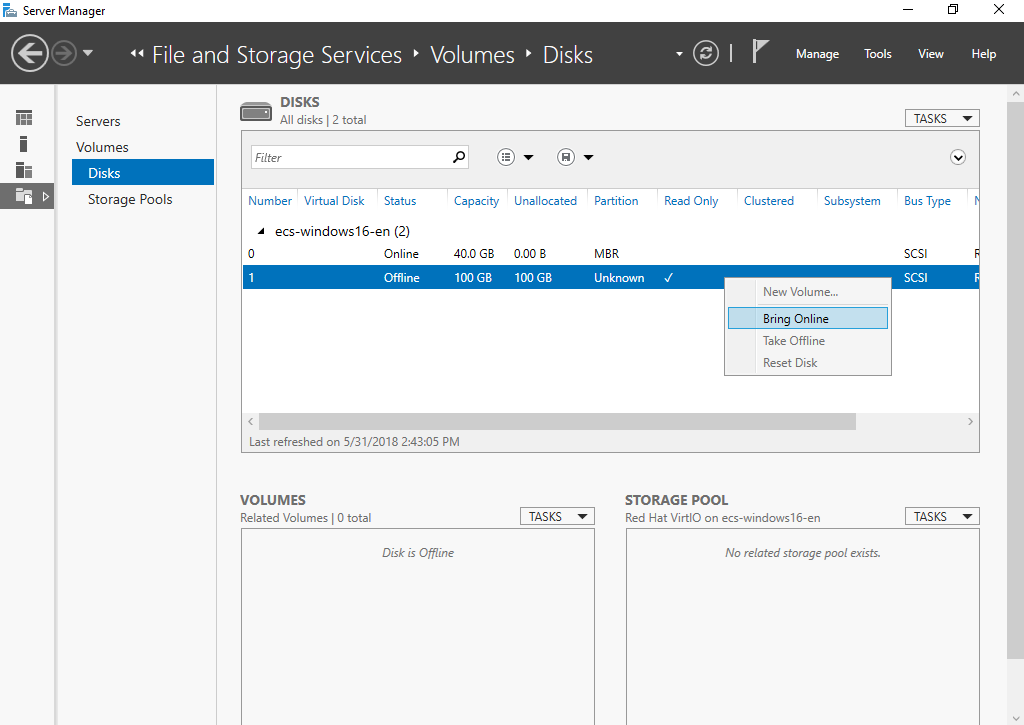
Figure 3 Disks
Disks are listed in the right pane. If the new disk is in the offline state, bring it online before initialize it.
Right-click the new disk and choose Bring Online from the shortcut menu.
The Bring Disk Online dialog box is displayed.
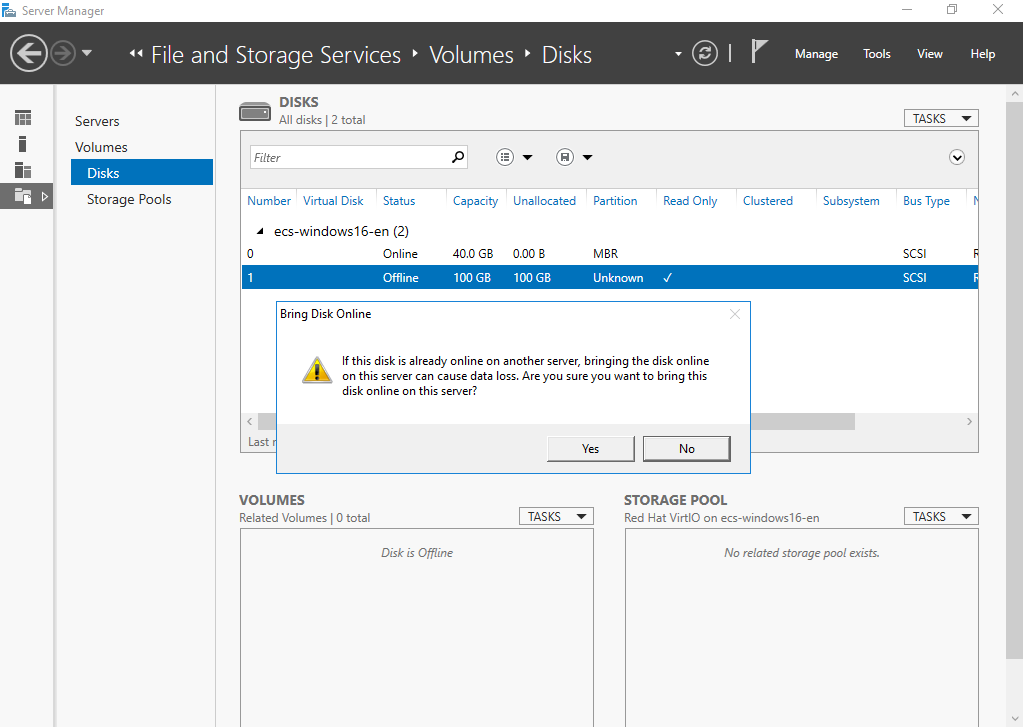
Figure 4 Bring Disk Online
Click Yes to confirm the operation.
Click
 in the upper area of the page to refresh the disk information.
When the disk status changes from Offline to Online, the disk has been brought online.
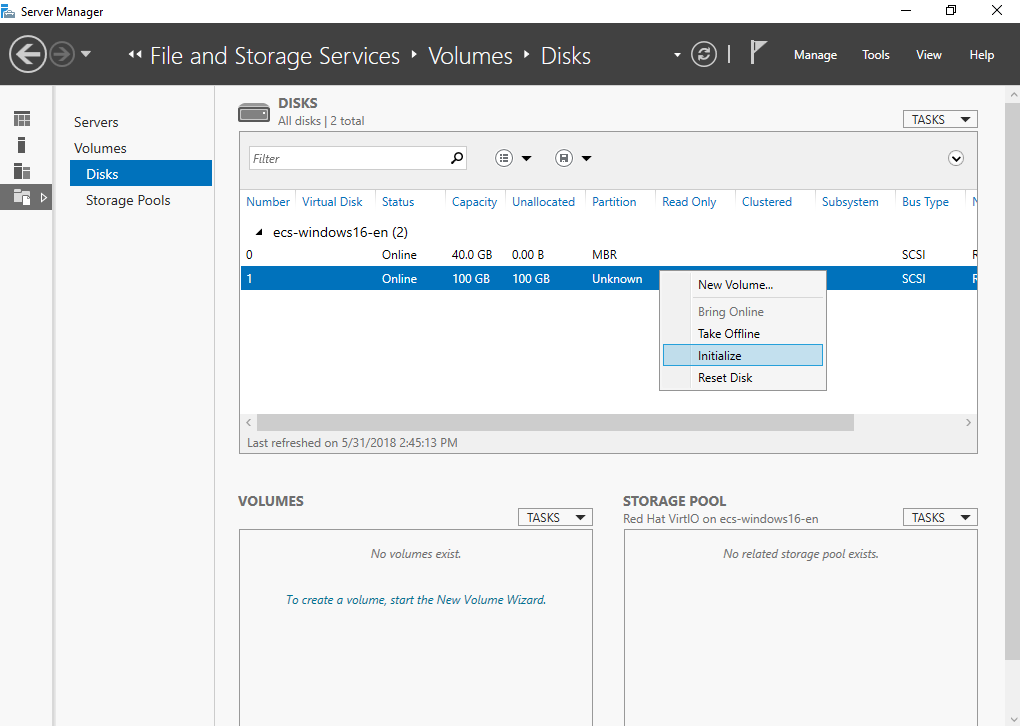
Figure 5 Bring online succeeded
After the disk has been brought online, initialize the disk.
Right-click the new disk and choose Initialize from the shortcut menu.
The Initialize Disk dialog box is displayed.
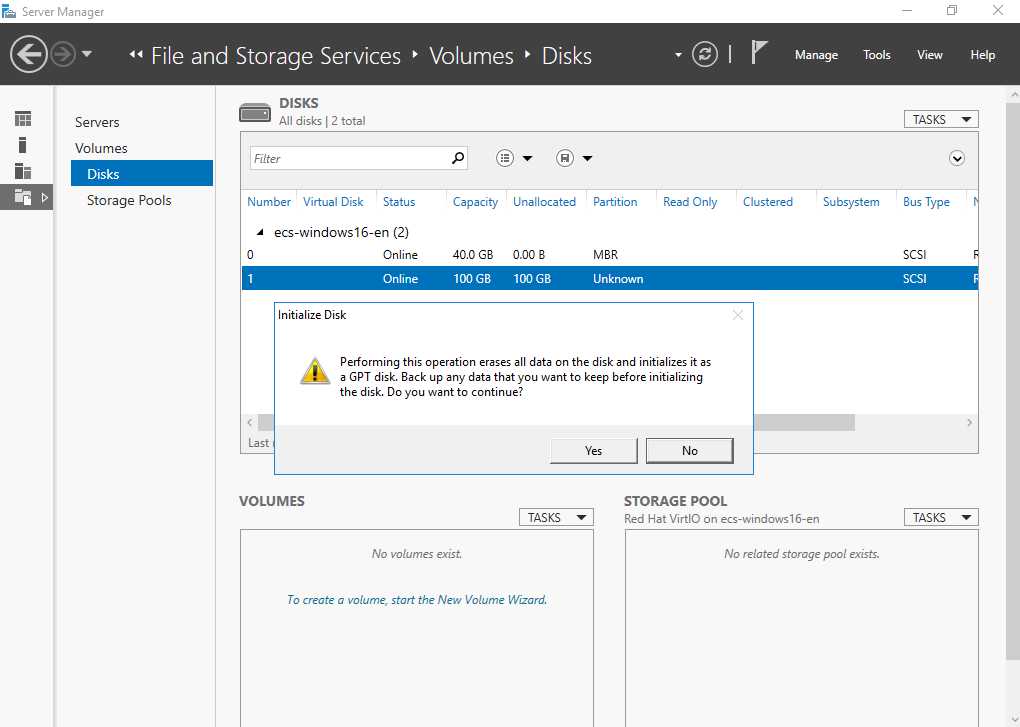
Figure 6 Initialize Disk (Windows 2016)
Click Yes to confirm the operation.
Click
 in the upper area of the page to refresh the disk information.
When the disk partition changes from Unknown to GPT, the initialization is complete.
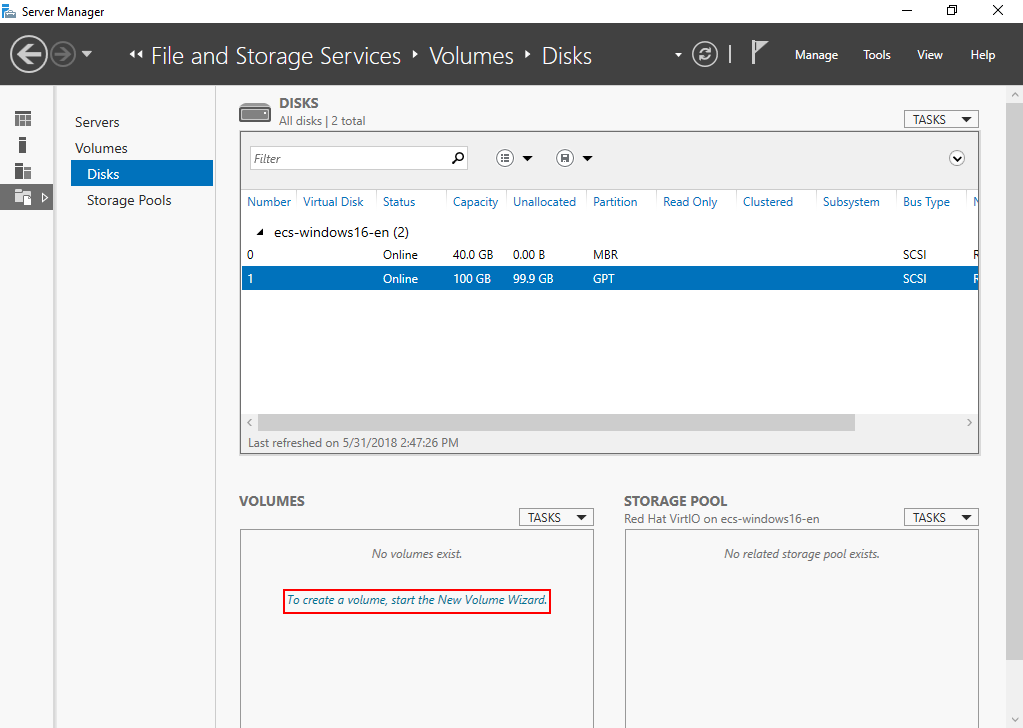
Figure 7 Completing initialization
In the lower left area of the page, click To create a volume, start the New Volume Wizard. to create a new volume.
The New Volume Wizard window is displayed.
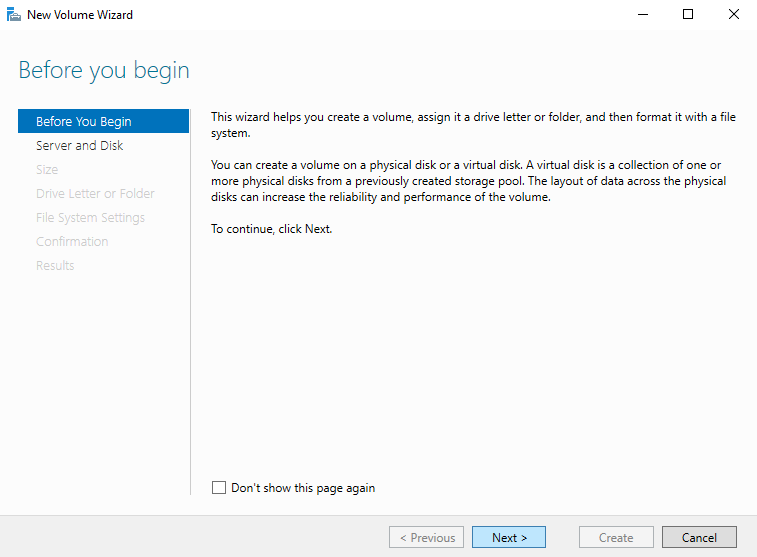
Figure 8 New Volume Wizard
Follow the prompts and click Next.
The Select the server and disk page is displayed.
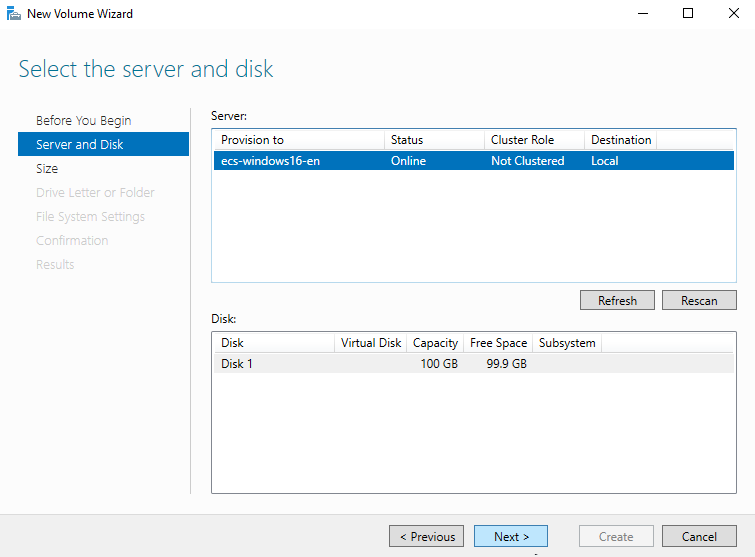
Figure 9 Select the server and disk
Select the server and disk, and then click Next. The system selects the server to which the disk is attached by default. You can specify the server based on your requirements. In this example, the default setting is used.
The Specify the size of the volume page is displayed.
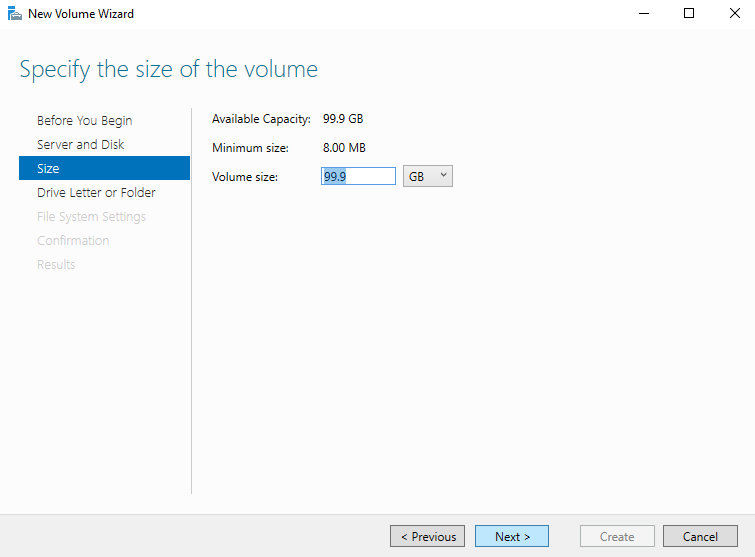
Figure 10 Specify Volume Size (Windows 2016)
Specify the volume size and click Next. The system selects the maximum volume size by default. You can specify the volume size as required. In this example, the default setting is used.
The Assign to a drive letter or folder page is displayed.
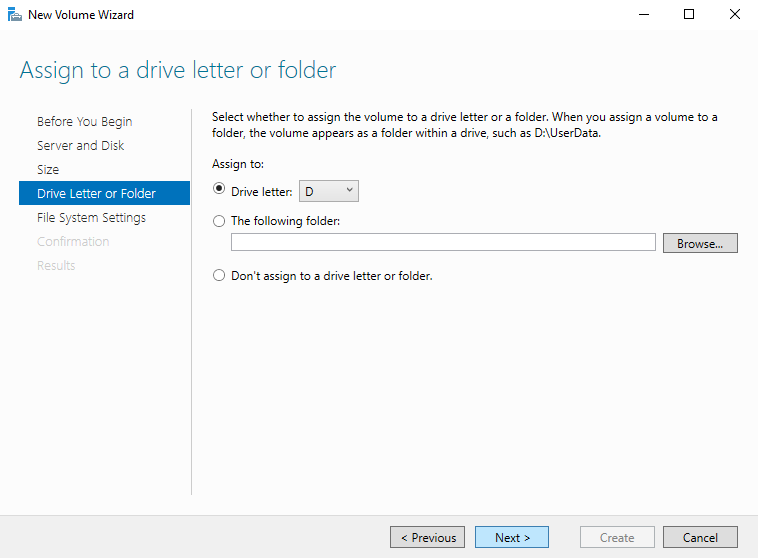
Figure 11 Assign to a drive letter or folder
Assign the volume to a drive letter or folder and click Next. The system assigns the volume to drive letter D by default. In this example, the default setting is used.
The Select file system settings page is displayed.
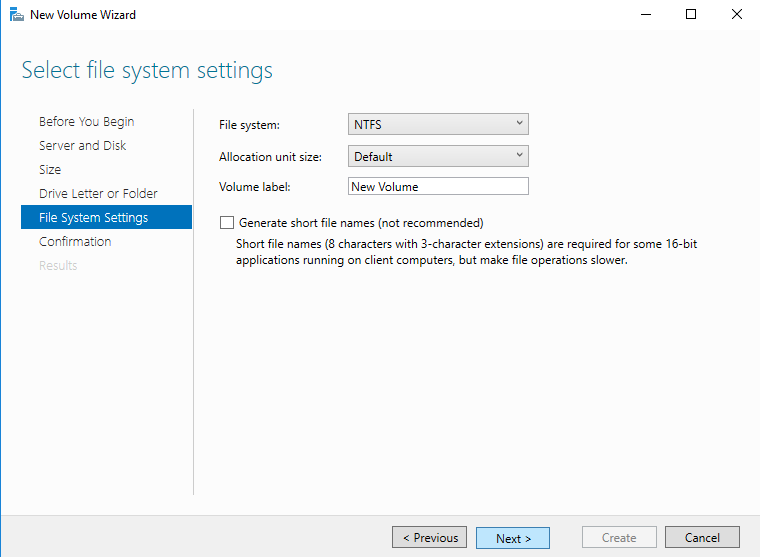
Figure 12 Select file system settings
Specify file system settings and click Next. The system selects the NTFS file system by default. You can specify the file system type based on the actual condition. In this example, the default setting is used.
Note
The partition sizes supported by file systems vary. Therefore, you are advised to choose an appropriate file system based on your service requirements.
The Confirm selections page is displayed.
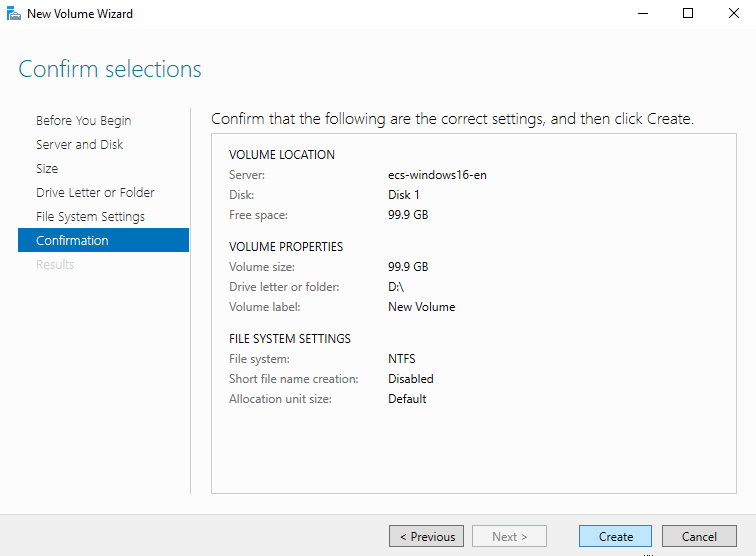
Figure 13 Confirm selections
Confirm the volume location, volume properties, and file system settings. Then, click Create to create a volume.
If the page shown in Figure 14 is displayed, the volume is successfully created.
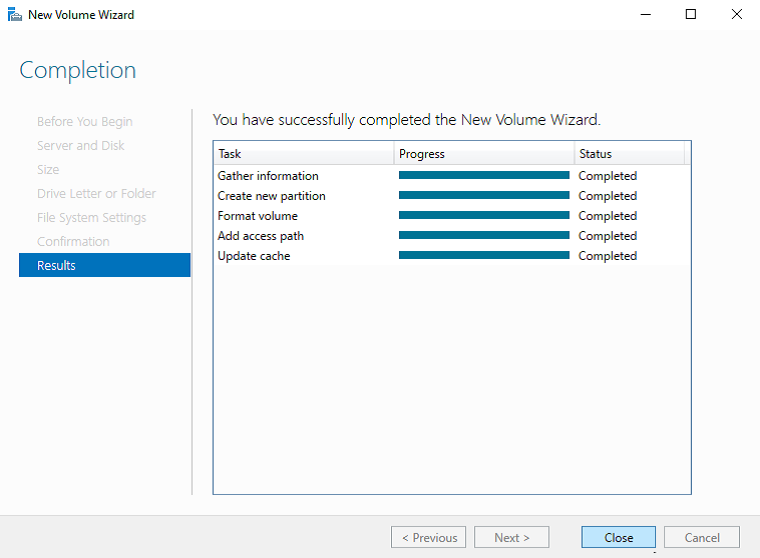
Figure 14 Completion
After the volume is created, click
 and check whether a new volume appears in File Explorer. In this example, New Volume (D:) is the new volume.
If New Volume (D:) appears, the disk is successfully initialized and no further action is required.
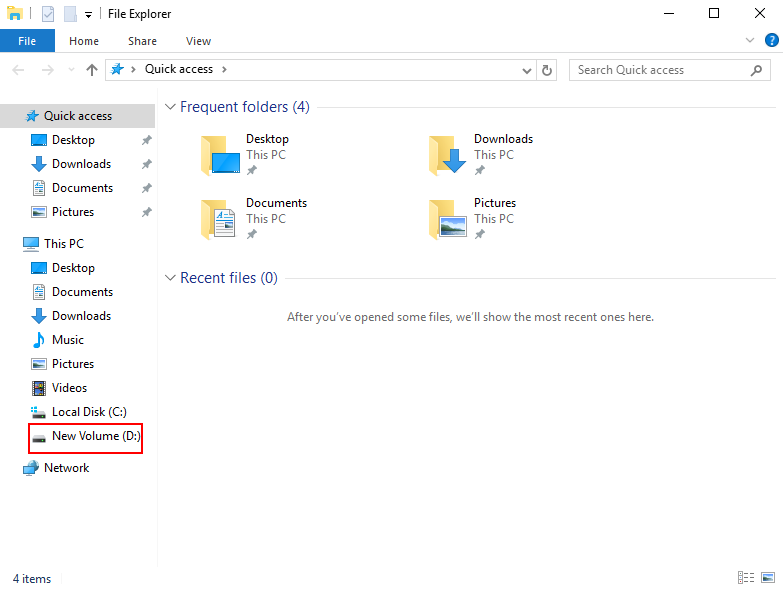
Figure 15 File Explorer
If New Volume (D:) does not appear, perform the following operations to assign the volume to another drive letter or folder:
Click
 , enter cmd, and press Enter.
The Administrator: Command Prompt window is displayed.
Run the diskmgmt command.
The Disk Management page is displayed.
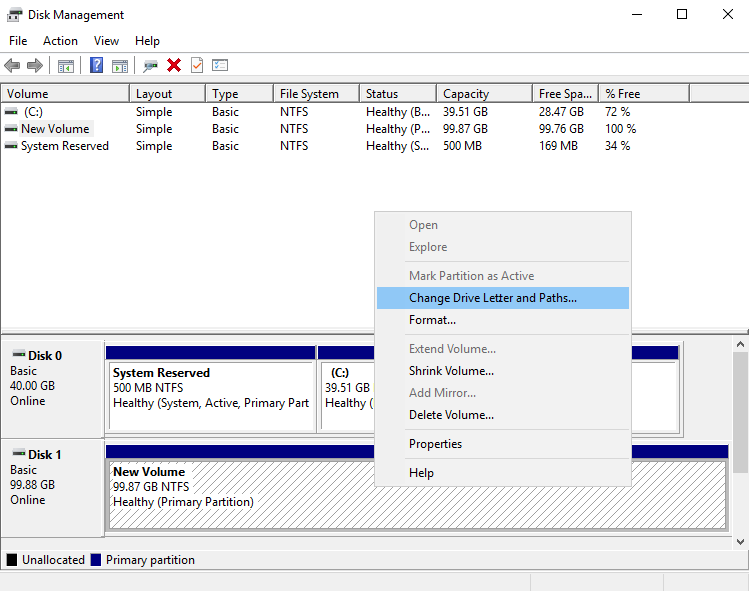
Figure 16 Disk Management (Windows 2016)
In the right pane of Disk 1, right-click and choose Change Drive Letter and Paths.
The Change Drive Letter and Paths for New Volume dialog box is displayed.
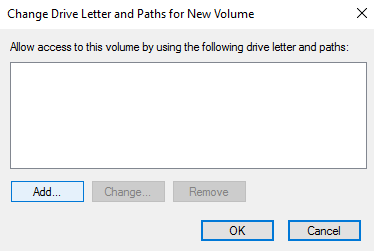
Figure 17 Change Drive Letter and Paths for New Volume
Click Add.
The Add Drive Letter or Path dialog box is displayed.
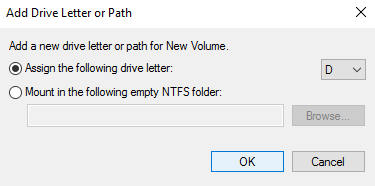
Figure 18 Add Drive Letter or Path
Select Assign the following drive letter to re-assign the volume to a drive letter. Then, click OK. Drive letter D is used in this example.
After assigning the drive letter, you can view New Volume (D:) in File Explorer.
Note
The drive letter selected here must be the same as that set in 11.