Installing the chipset Driver
Scenario
chipset is a driver living on a Windows motherboard. If this driver is not installed, other hardware drivers may be undermined in performance or even fail to work properly.
Note
chipset can only be installed in Windows Server 2012 R2 and Windows Server 2016. This document uses Windows Server 2016 as an example to describe how to install the chipset driver. The procedure is also applicable to Windows Server 2012 R2.
Procedure
Decompress the onboard_driver_win2k16.iso file in Making Preparations to obtain the SetupChipset.exe file from the folder that contains chipset (for example, Chipset-Win2K16-XXX).
Extract SetupChipset.exe to a new folder.
Click Start, enter cmd in the Type here to search box to open the command-line interface (CLI).
Go to the directory where SetupChipset.exe is stored, for example, D:\windows2016\tmp.
D:\windows2016\tmp>dir
2018/04/08    17:25    <DIR>          .
2018/04/08    17:25    <DIR>          ..
2018/03/08    15:14    <DIR>          drivers1
2018/03/08    11:28         3,525,008 SetupChipset.exe

D:\windows2016\tmp>
Run the following command to extract SetupChipset.exe to a new folder named driver:
.\SetupChipset.exe -extract driver
D:\windows2016\tmp>.\SetupChipset.exe -extract driver

D:\windows2016\tmp>dir
2018/04/08    17:32    <DIR>          .
2018/04/08    17:32    <DIR>          ..
2018/04/08    17:32    <DIR>          driver
2018/03/08    15:14    <DIR>          drivers1
2018/03/08    11:28         3,525,008 SetupChipset.exe

D:\windows2016\tmp>
Decompress the Windows 2016 ISO file to a folder.
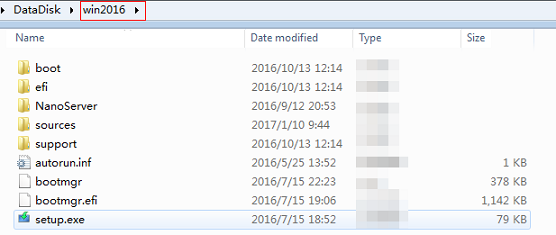
Mount the image from boot.wim to a local directory and inject the chipset driver into the images.
Open Dism++ and choose File > Mount Image.
In the Mount Image window, perform the operations in the following figure in sequence.
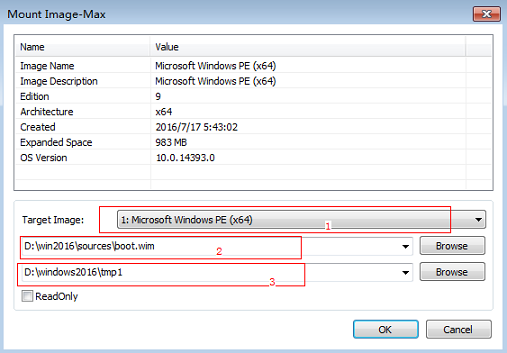
1: Select the target image.
2: Select boot.wim in the sources folder shown in 3.
3: Select an empty folder, for example, tmp1.
4: Click OK. A message is displayed indicating that the image is being mounted.
When the image status changes to Ready, click Open session.
Perform the operations shown in the following figure in sequence.
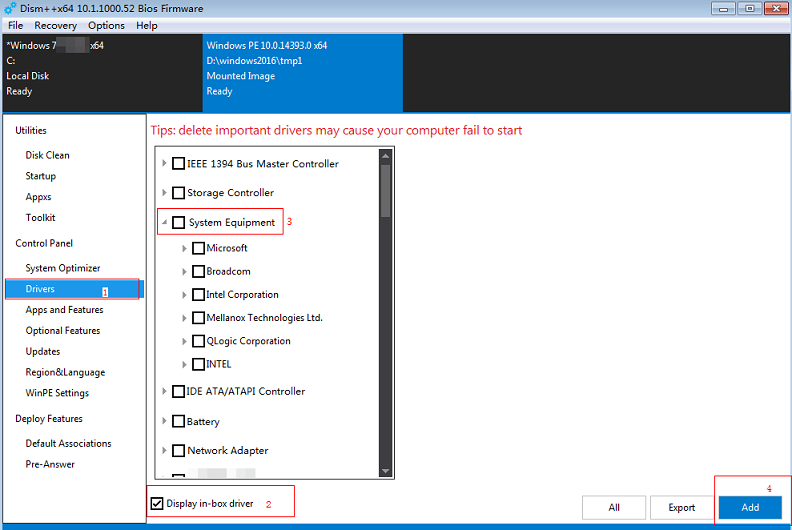
In the navigation pane, choose Drivers.
Select Display in-box driver.
3: Select System Equipment.
Click Add.
Select the drivers folder generated in 2.
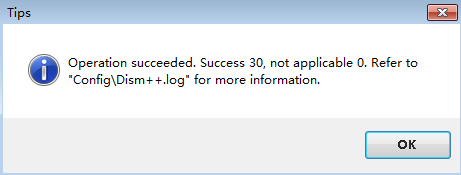
The following dialog box is displayed.
Save the added driver and unmount the image.
Choose File > Save Image. In the displayed dialog box, click Save.
Wait for the image status to change from Saving to Ready.
Choose File > Unmount Image.
Mount the image from install.wim to a local directory and inject the chipset driver into the image.
Open Dism++ and choose File > Mount Image.
In the Mount Image window, perform the operations in the following figure in sequence.
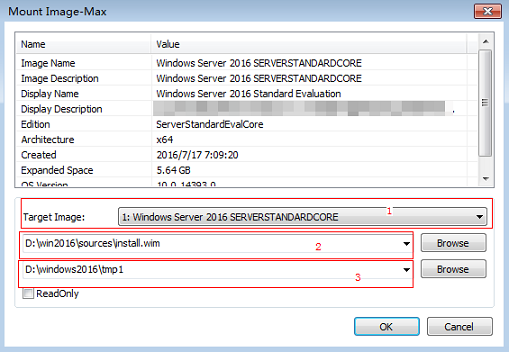
1: By default, Windows Server 2016 SERVERSTANDARDCORE is selected. You can also select other versions from the drop-down list as needed.
2: Select install.wim in the sources folder shown in 3.
3: Select an empty folder, for example, tmp1.
When the image status changes to Ready, click Open session.
Save the added driver and unmount the image by performing 5.