Data Masking
You can set policies to mask the data reported using APM.
Constraints
APM will collect and store masked data. Do not upload privacy or sensitive data to APM. If you need to upload such data, encrypt them.
Viewing a Data Masking Configuration
Log in to the management console.
Click
 on the left and choose Application > Application Performance Management.
In the navigation tree on the left, choose Configuration Management > Data Masking and select your target node. The configuration information is displayed.

Figure 1 Viewing a data masking configuration
In the search box, enter a configuration name keyword and click the search icon or press Enter.

Figure 2 Searching for a configuration
Adding a Data Masking Configuration
In the navigation tree on the left, choose Configuration Management > Data Masking and select your target node.

Figure 3 Configuring data masking
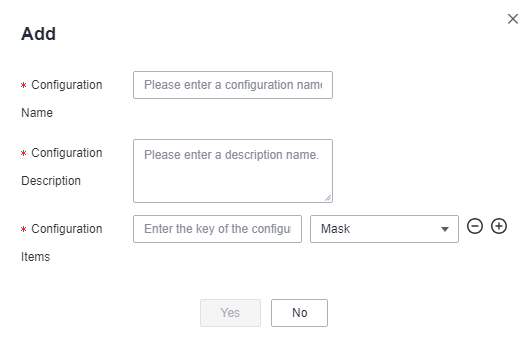
Click Add and set configuration parameters.

Figure 4 Adding a configuration
Table 1 Configuration parameters¶ Parameter
Description
Configuration Name
Used to identify a data masking configuration. This parameter cannot be empty. Enter up to 30 characters. Only letters, digits, and special characters are allowed.
Configuration Description
Used to describe the data masking configuration. This parameter cannot be empty. Enter up to 1,000 characters. Only letters, digits, and special characters are allowed.
Configuration Items
Enter up to 32 characters. Only letters, digits, underscores (_), and hyphens (-) are allowed.
The configuration item cannot be empty. By default, an empty configuration item is displayed. If you select Token, content will be replaced with a globally unique random character string. If you select Mask, content will be replaced with a fixed number of asterisks (*). By default, Mask is selected.
Click the plus sign (+) to add a configuration item, or click the minus sign (-) to delete one.
Each configuration can contain up to 20 configuration items.
The httpMethod, remoteAddr, exceptionType, content-type, charset, api_address, url, method, requestBody, responseBody, exceptionMsg, cookie, and Cookie fields have special functions in APM traces and do not support masking.
If you use one of these fields as a key, the system will display a message indicating that an invalid name exists.
Click Yes.
In the navigation pane, choose Application Monitoring > Tracing.
Specify criteria to query traces and click
 to view call parameters.
Figure 5 Viewing call parameters
On the View Call Parameter page, check the value of transactionNames. It is displayed as ********.

Figure 6 Data masking going into effect
Modifying a Data Masking Configuration
In the navigation tree on the left, choose Configuration Management > Data Masking and select your target node.
Click Modify in the Operation column to modify the configuration.

Figure 7 Modifying the data masking configuration
Click Yes.
Deleting Data Masking Configurations
In the navigation tree on the left, choose Configuration Management > Data Masking and select your target node.
Click Delete in the Operation column. In the displayed dialog box, click Yes to delete the configuration.

Figure 8 Deleting the data masking configuration
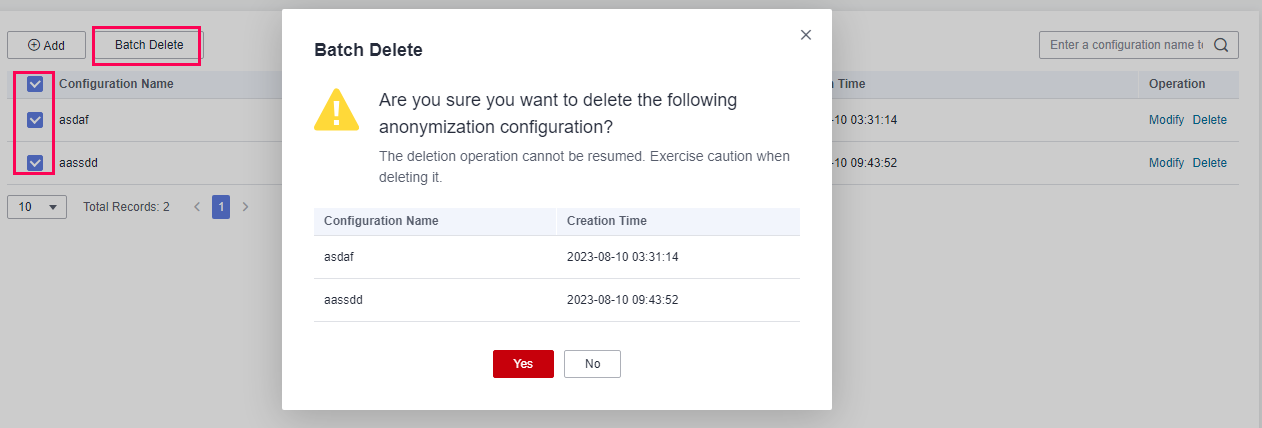
Select multiple data masking configurations and click Batch Delete above the list. In the displayed dialog box, click Yes to delete multiple data masking configurations at a time.

Figure 9 Deleting configurations in batches